background image

63 


Print This Photo Menu 


You can use the 

‘Print This Photo’ menu to print the photos that are on your digital camcorder 

directly to a Pictbridge compatible printer. 

1.  Scroll through your pictures and find the one you would like to print. 

2.  Press the 

MENU

 button to open the menus for the current mode. 

3.  Press the 

LEFT

 or 

RIGHT


button to scroll and select the ‘Print This Photo’ menu. 

4.  The following options appear: 

-  Print this Photo: 

To continue with the print process, press the 

UP

 or 

DOWN

 button to highlight 

‘Print This 

Photo’. Press the 

SET

 button to confirm. 

You will be asked to connect the camcorder to the Pictbridge printer. 

Connect the USB cable provided in the package from the camcorder to the Pictbridge 

port of the printer. 

Once connected, follow the instructions on the printer to proceed with the printing process. 

-  Cancel: 

To exit without continuing, select ‘Cancel’ and then press the 

SET

 button to return to 

Playback Mode. 


Slide Show Menu 


The Slide Show menu allows you to set the interval length of time that each picture displays 

during the Slide Show. 

1.  Press the 

MENU

 button to open the menus for the current mode.   

2.  Press the 

LEFT

 or 

RIGHT

 button to scroll and select the 

‘Slide Show’ menu.   

3.  Press the 

UP

 or 

DOWN

 button to highlight a specific option.   

4.  Press the 

SET

 button to confirm and select the highlighted menu option. 

  selected option icon appears on the selected item. 

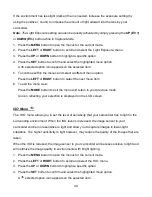
5.  To continue within the menus and select a different menu option: 

Press the 

LEFT

 or 

RIGHT

 button to select the next menu item. 

Содержание DVR 993HD

Страница 1: ...corder User Manual 2009 2013 Sakar International Inc All rights reserved Windows and the Windows logo are registered trademarks of Microsoft Corporation All other trademarks are the property of their...

Страница 2: ...er Features ViviLink LED Light Display 16 Video Capture Mode 18 Video Playback Mode 32 Photo Capture Mode 39 Photo Playback Mode 56 Connecting the Digital Camcorder to a TV or HDTV 64 Installing the S...

Страница 3: ...the number inside is a 4 or higher Your digital camcorder supports a Class 4 SD Memory Card up to 32GB In order to use your digital camcorder normally it is strongly recommended to insert the SD Memor...

Страница 4: ...igital Camcorder with Lens Cover 2 USB cable 3 TV Cable 4 Vivitar Experience Image Manager Software Installation CD 5 Lens Cover Strap 6 Lithium Battery 7 AC Charger 8 Hand Strap not shown Note SD Mem...

Страница 5: ...on the side 5 Self Timer Left Button 17 LCD Screen 6 Exposure EV Down Button 18 Lens 7 Set OK LED Light On Off Slide Show Button 19 LED Light 8 Delete Right Button 20 Lens Cover 9 Exposure EV Up Butt...

Страница 6: ...onnect the camcorder using the supplied USB cable to the computer s USB port or to the AC Charger which is then inserted into a standard wall socket 4 Allow the battery to charge for at least 3 hours...

Страница 7: ...ry power level is low When the battery power is empty the battery icon turns red and Low Battery flashes on the LCD screen several times The camcorder automatically turns off a few seconds later The e...

Страница 8: ...play If you do not see the SD icon on the display please check if the card was inserted properly Make sure the SD card is not locked check the lock switch on the side of the SD card If the SD card is...

Страница 9: ...inue with the initial camcorder setup A message will appear Continue with Camcorder Setup Select Yes to continue or No to exit the setup Note If you select Cancel and decide to leave the camcorder set...

Страница 10: ...of your choice with the accompanying software application 1 First you will be asked to choose the default ViviLink social network for Photos Press the UP or DOWN button to highlight the desired defau...

Страница 11: ...U button while in the Video Capture mode PHOTO CAPTURE MODE Use this mode to capture pictures with your camcorder After turning on your camcorder press the MODE button once to open the Photo Capture m...

Страница 12: ...to 32GB Internal Memory One test photo 3MP resolution setting LCD Display 2 7 Inch TFT Lens f 5 50mm F2 8 4 8 Zoom 10X Optical Zoom Exposure 3 0EV 3 0EV White Balance Auto Daylight Cloudy Fluorescent...

Страница 13: ...ble hard disk space 16 bit Color monitor 1024 X 768 recommended screen resolution CD ROM Drive QuickTime 6 or higher Microsoft Internet Explorer 7 or higher Windows Media Player 10 or higher DirectX 9...

Страница 14: ...LED light turns on briefly The LCD screen turns on with your camcorder in Video Capture Mode to start POWERING THE CAMCORDER OFF While the camcorder is on you can press the POWER button again at any p...

Страница 15: ...active camcorder mode make sure the camcorder is powered ON and press the MODE button When in Video Capture Mode this icon displays on the top left corner of the LCD display When in Photo Capture Mod...

Страница 16: ...d by your camcorder until you manually change the setting or restore the camcorder s default factory settings Camcorder Features ViviLink LED Light Display VIVILINK OPTION The ViviLink technology allo...

Страница 17: ...tion and press SET to save your selection 5 Press the MODE button to return to Playback Mode 6 Your selected ViviLink destination appears as an icon on the image LED LIGHT To increase the lighting in...

Страница 18: ...Zoom lever up towards the T Telephoto to Zoom In Push the Zoom lever down towards the W Wide to Zoom Out 3 Capturing the Video Press the Shutter button to START the video capture You will see a red bl...

Страница 19: ...own Light Exposure 3 0EV 3 0EV Reduces the Light Exposure SET LED Light Turns the LED Flash Light On Off MENU SAVE SELECTION Selects and saves your chosen menu option Other Shutter VIDEO CAPTURE START...

Страница 20: ...in your digital video camcorder s Video Capture Mode Note The selection icons appearing above indicate the default setting Once you change a setting the setting is saved by your camcorder until you m...

Страница 21: ...ecting your selection is displayed on the LCD screen Image Size Menu The Image Size menu allows you to choose the desired size of the images taken by your digital video camcorder Keep in mind that ima...

Страница 22: ...t menu item 6 To exit the menu view Press the MODE button to exit the menu and return to your previous mode An icon reflecting your selection is displayed on the LCD screen ViviLink for Videos Menu Th...

Страница 23: ...s for the current mode 2 Press the LEFT or RIGHT button to scroll and select the Anti Shake menu 3 Press the UP or DOWN button to highlight a specific option 4 Press the SET button to confirm and sele...

Страница 24: ...t mode 2 Press the LEFT or RIGHT button to scroll and select the Color Effect menu 3 Press the UP or DOWN button to highlight a specific option 4 Press the SET button to confirm and select the highlig...

Страница 25: ...into the lens by your camcorder If the environment has less light darker than is needed increase the exposure setting by using the positive count to increase the amount of light allowed into the lens...

Страница 26: ...lect the highlighted menu option A selected option icon appears on the selected item 5 To continue within the menus and select a different menu option Press the LEFT or RIGHT button to select the next...

Страница 27: ...ress the MODE button to exit the menu and return to your previous mode An icon reflecting your selection is displayed on the LCD screen Language Menu You can select your digital video camcorder s lang...

Страница 28: ...on to confirm and select the highlighted menu option A selected option icon appears on the selected item 5 To continue within the menus and select a different menu option Press the LEFT or RIGHT butto...

Страница 29: ...m and select the highlighted menu option A selected option icon appears on the selected item 5 To continue within the menus and select a different menu option Press the LEFT or RIGHT button to select...

Страница 30: ...IGHT button to scroll and select the TV Mode menu 3 Press the UP or DOWN button to highlight a specific option 4 Press the SET button to confirm and select the highlighted menu option A selected optio...

Страница 31: ...hout formatting Select Yes and press the SET button to begin the format The memory card will be completely formatted 6 Press the MODE button at any time to exit the menu and return to the previous scr...

Страница 32: ...you first turn on the camcorder the camcorder will be in Video Capture Mode by default Press the MODE button twice to open the Playback Mode The latest captured image appears on the LCD screen If the...

Страница 33: ...VIEW Press the Zoom lever down towards the W Zoom Out to display your captured images in Thumbnail View The images videos and photos on your camcorder will be displayed in a 3 X 3 matrix where you ca...

Страница 34: ...n Navigates in Thumbnail View SET STOPS Video Playback Enlarges selected photo from Thumbnail size to regular size MENU SAVE SELECTION Selects and saves your chosen menu option Other Shutter PLAYS and...

Страница 35: ...ed video Select Delete This Video and press the SET button You will be asked to confirm the deletion of the video If you would like to proceed with deleting the current image select Yes and press the...

Страница 36: ...the social networks of your choice with the accompanying Vivitar Experience Image Manager application 1 Select the video you to which you would like to add a ViviLink 2 Press the MENU button to open...

Страница 37: ...select the Protect Lock menu 4 Press the UP or DOWN button to highlight a specific option To Lock the Selected Image To lock the selected image use the UP or DOWN button to highlight Lock This Video...

Страница 38: ...to your previous mode Note Any image that is locked displays a lock symbol on the LCD screen when viewing that image in the Playback Mode Videos that are not locked do not display the lock symbol Reme...

Страница 39: ...LCD Display While in Photo Capture mode use the LCD display to direct the camcorder at the scene you would like to capture 2 Zoom Options Use the Zoom feature to better set the camcorder display if de...

Страница 40: ...0EV 3 0EV Increases the Light Exposure EV Down Light Exposure 3 0EV 3 0EV Reduces the Light Exposure SET LED Light Turns the LED Flash Light On Off MENU SAVE SELECTION Selects and saves your chosen me...

Страница 41: ...41 PHOTO CAPTURE MODE MENUS The following are the menus that appear in your digital video camcorder s Photo Capture Mode...

Страница 42: ...d item 5 To continue within the menus and select a different menu option Press the LEFT or RIGHT button to select the next menu item 6 To exit the menu view Press the MODE button to exit the menu and...

Страница 43: ...o highlight a specific option 4 Press the SET button to confirm and select the highlighted menu option A selected option icon appears on the selected item 5 To continue within the menus and select a d...

Страница 44: ...e using this menu Self Timer Menu The Self Timer menu allows you to set a delay between the time that the digital camcorder s Shutter button is pressed and the actual capture of the picture This is an...

Страница 45: ...croll and select the Anti Shake menu 3 Press the UP or DOWN button to highlight a specific option 4 Press the SET button to confirm and select the highlighted menu option A selected option icon appear...

Страница 46: ...button to highlight a specific option 4 Press the SET button to confirm and select the highlighted menu option A selected option icon appears on the selected item 5 To continue within the menus and se...

Страница 47: ...button to highlight a specific option 4 Press the SET button to confirm and select the highlighted menu option A selected option icon appears on the selected item 5 To continue within the menus and s...

Страница 48: ...GHT button to scroll and select the Image Sharpness menu 3 Press the UP or DOWN button to highlight a specific option 4 Press the SET button to confirm and select the highlighted menu option A selecte...

Страница 49: ...Press the MODE button to exit the menu and return to your previous mode An icon reflecting your selection is displayed on the LCD screen ISO Menu The ISO menu allows you to set the level of sensitivi...

Страница 50: ...nd adjusts the settings of the image into several zones for light metering such as complex light conditions position of subject brightness background direct light and scenes Spot Meters the area withi...

Страница 51: ...ime Menu When you capture an image with your camcorder the image will include a time stamp with the date and time that the image was taken The Date Time menu allows you to set your camcorder s date an...

Страница 52: ...utton at any time to exit the menu and return to your previous screen Silent Mode Menu You have the option of activating the camcorder s Silent Mode to disable all of the sound effects that the digita...

Страница 53: ...or RIGHT button to select the next menu item 6 To exit the menu view Press the MODE button to exit the menu and return to your previous mode Frequency Menu The options in the Frequency menu represent...

Страница 54: ...on the selected item 5 To continue within the menus and select a different menu option Press the LEFT or RIGHT button to select the next menu item 6 To exit the menu view Press the MODE button to exit...

Страница 55: ...camcorder or to reset your camcorder settings to the Factory Default Settings 1 Press the MENU button to open the menus for the current mode 2 Press the LEFT or RIGHT button to scroll and select the F...

Страница 56: ...to display the previous image Press the RIGHT button to display the next image Each captured image video and photo is displayed on the LCD screen Photos appear with a JPG icon on the top left section...

Страница 57: ...3 Press the SET button to enlarge the selected image full size 4 When full size you can magnify the selected photo by using the Zoom Lever and pushing it up Zoom In or down Zoom Out PHOTO PLAYBACK MOD...

Страница 58: ...u options for Playback Mode To navigate through the Menus use the UP DOWN LEFT RIGHT direction control buttons MODE MODE SELECTION Toggles between the Photo Capture Mode Video Capture Mode and Playbac...

Страница 59: ...you do not want to delete the current image select No and press the SET button The photo will not be deleted and you will exit the menu and return to the Playback Mode To delete all the images videos...

Страница 60: ...To exit the menu view Press the MODE button to exit the menu and return to your previous mode Note An icon appears on the image with the selected ViviLink destination site when you return to the Play...

Страница 61: ...to highlight the Crop option and the press the SET button to confirm and open the Crop option 5 The selected picture opens with the blue Crop box displayed in the middle 6 To define the area of the p...

Страница 62: ...Photo and then press the SET button The image now appears in Playback Mode without the lock icon To Lock All Images To lock all captured videos and photos use the UP or DOWN button to highlight Lock A...

Страница 63: ...in the package from the camcorder to the Pictbridge port of the printer Once connected follow the instructions on the printer to proceed with the printing process Cancel To exit without continuing se...

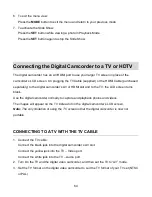
Страница 64: ...HDMI slot and to the TV the LCD screen turns blank Use the digital camcorder normally to capture and playback photos and videos The images will appear on the TV instead of on the digital camcorder s...

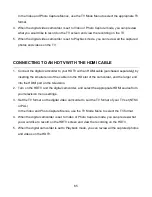
Страница 65: ...y inserting the smaller end of the cable into the HD slot of the camcorder and the larger end into the HDMI port on the television 2 Turn on the HDTV and the digital camcorder and select the appropria...

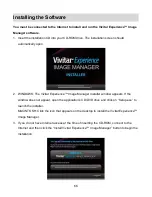
Страница 66: ...Experience Image Manager Installer window appears If the window does not appear open the application s CD DVD drive and click on Setup exe to launch the installer MACINTOSH Click the icon that appears...

Страница 67: ...WINDOWS and MACINTOSH Click the I accept the terms of this license agreement and then click Next to continue 9 WINDOWS only Let the Vivitar Experience Image Manager installer create the folder to whe...

Страница 68: ...to the computer you will have to wait a few seconds until the computer recognizes the device Getting Photos and Videos from your Camcorder to Your Computer An SD card needs to be inserted Do not disc...

Страница 69: ...wnloading to your computer A message appears when the download is complete 10 The photo and video files that you selected are now downloaded to your computer to the selected folder and albums ready fo...

Страница 70: ...the Videos My Videos folder 7 Do not disconnect the cable during transfer Doing so will cancel the transfer of any files on their way to your computer TRANSFERRING PHOTOS AND VIDEOS MACINTOSH OS 1 Us...

Страница 71: ...er Connector Note iPad Camcorder Connector not included This may be purchased separately 2 Using an iPad SD Card Reader Connect the SD Card Reader to your iPad then insert your digital camcorder s SD...

Страница 72: ...including but limited to repair by unauthorized parties tampering modification or accident What To Do When Service Is Required When returning your defective product postage pre paid for service your...

Страница 73: ...le photos and then try downloading them again With test photos if the camcorder powers off before you upload them to the computer the photos are not stored in the camcorder s memory These photos shoul...

Отзывы: