background image

32 


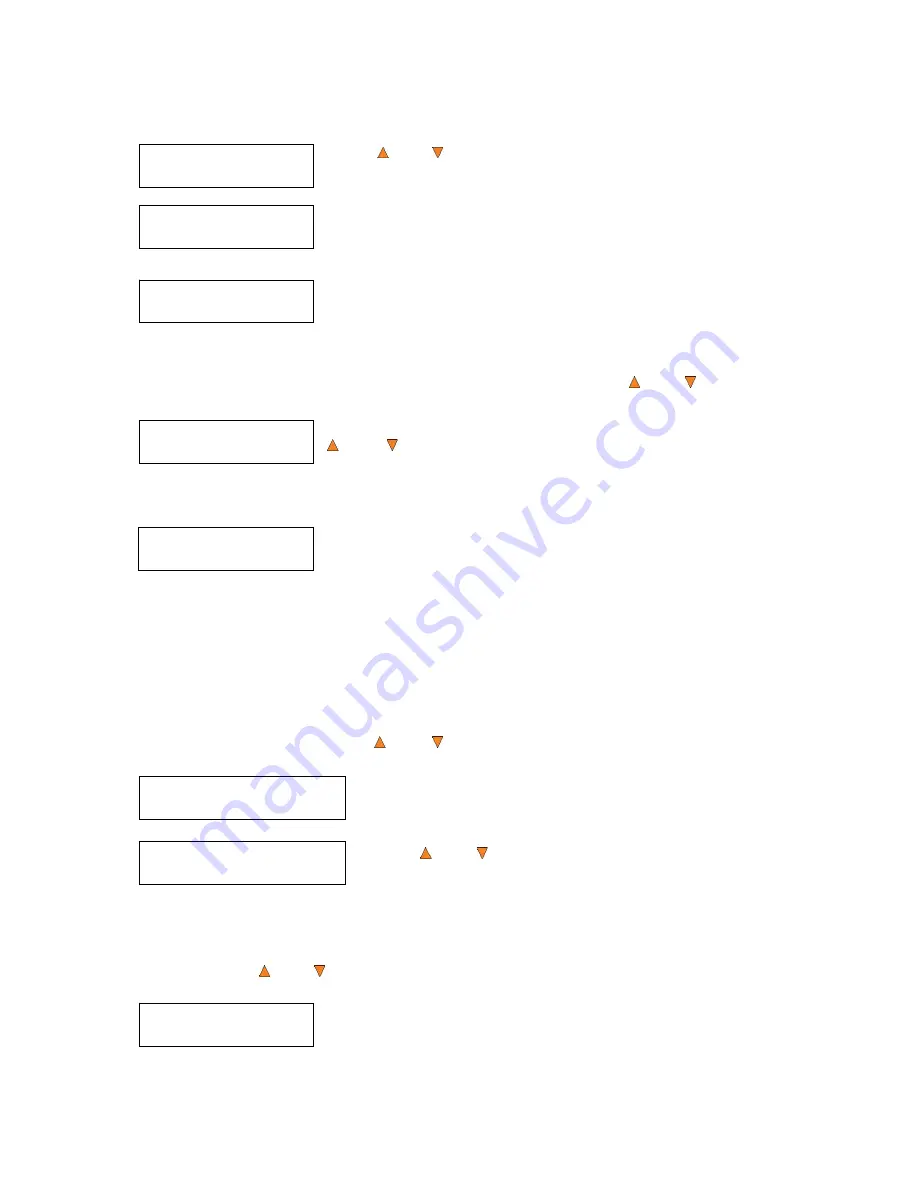
Choose Partition 
[FUN.VEF]     4012MB 

Delete Partition 
[FUN.VEF], OK? 

[FUN.VEF] 

Deleted! 

Hard Drive Setup 

 5.Partition Info 

Hard Drive Setup 

 6.Select Loading Drive 

Drive 1 Port 0 
PIONEER DVD-RW DVR-115D 

Hard Drive Setup 
 7.Format Hard Drive 

 
Use the 

Up or  Down

 button to find the partition that you want to delete. 

Press the 

ENT/Enter

 button to select the partition.  


The autoloader displays the 

Delete Partition

 confirmation message. Press 

the 

ENT/Enter

 button to continue.  


The autoloader displays the 

Deleted

 message for two seconds and then 

returns you to the 

Delete Partition

 menu.  


11.5 Partition Info  

The 

Partition Info

 option provides information about an existing partition. Use the 

Up or  Down 

button 

to navigate to the 

Partition Info

 menu.  

 
Press the 

ENT/Enter

 button to enter the 

Partition Info

 menu, and use the 

Up or  Down

 button to find the partition that you want information 

about.  


  The “(002)” field indicates that it is the second partition on the drive. 

  The “[FUN.VEF]” field shows the name of the partition.  

  The “DVD” field indicates that the master stored in this partition is a 

DVD.  

  The “4021MB” field indicates the capacity of the master’s content 

stored in this partition. 

(002) DVD 4012MB 
FUN.VEF 


11.6 Select Loading Drive  

Select Loading Drive

 gives you the control of choosing which drive the master should be loaded from when 

you perform the 

“Load Partition”

 feature under 

“Hard Drive Setup”.


Please note that this setting does NOT apply to any feature other than settings within 

“Hard Drive Setup”

 
To change the loading drive, use the 

Up or  Down

 button to navigate to the 

Select Loading Drive


menu:  

 
Press the 

ENT/Enter

 button to enter the 

Select Loading Drive

 menu.  


Press the 

Up or  Down

 button to select the desired Drive. Press 

the 

ENT/Enter

 button to select the Loading Drive.  


The selected drive will now be used to load a partition to the Hard Drive. 
 

11.7 Format Hard Drive  

This function formats the Hard Drive. It deletes all partitions and re-initiates the Hard Drive. To format the 
Hard Drive, use the 

Up or  Down

 button to navigate to the 

Format Hard Drive 

menu:  


Press the 

ENT/Enter

 button to enter the 

Format Hard Drive

 menu.  


Содержание ROBOTIC AUTOLOADER 3.6.0

Страница 1: ...User s Manual v3 6 0...

Страница 2: ...EDITING OR ANY PART THEREOF OF A COPYRIGHT DISC IS STRICTLY PROHIBITED WE DISCOURAGE THE USE OF ANY SUCH ACTION THAT GIVES RISE TO CRIMINAL INTENT AND PROSECUTION VINPOWER DIGITAL IS NOT RESPONSIBLE...

Страница 3: ...26 5 Compare 26 6 Test Copy 27 7 Copy Compare 27 8 Select Burn Speed 28 9 Master Mode 29 10 Erase 29 11 Hard Drive Setup 30 11 1 Select Partition 30 11 2 Load Partition 31 11 3 Rename Partition 31 11...

Страница 4: ...5 5 Robot Speed Mode Not available on all systems 43 15 6 Fast Boot up 44 15 7 Sticky Media Detection 44 15 8 Robot Capacity For 100 200 Disc Capacity Models ONLY 44 15 9 Update Robot Firmware 44 16 M...

Страница 5: ...Blu Ray DVD capability you can copy a double layer Blu Ray DVD disc to another double layer Blu Ray DVD recordable media but you cannot duplicate a single layer Blu Ray DVD disc to double layer Blu Ra...

Страница 6: ...reatment If you have experienced this kind of problem please do the following to remove the adhesive static between the discs Separate the blank discs before you place them into the autoloader s spind...

Страница 7: ...not slanted at an angle to ensure the picking arm can securely grab the disc with all 3 vacuum suction heads Be sure to not load too many discs onto the spindle as well as this may cause errors in pl...

Страница 8: ...e blank discs you wish to copy and or print on Spindle 2 see figure 1 2 on page 5 for proper media stacking The robotic arm will pick blank discs from Spindle 2 then place the successfully copied prin...

Страница 9: ...ctual quantity varies depending on the media thickness Prior to starting a job make sure Spindle 1 is empty Stack the blank discs you wish to copy on Spindle 2 and 3 see Figure 1 2 on page 5 for prope...

Страница 10: ...r failed NG discs Stack the blank media you wish to copy on Spindle 1 and 2 see Figure 1 2 on page 5 for proper media stacking The robotic arm will pick blank discs from Spindle 1 first then place the...

Страница 11: ...1 2 on page 5 for proper media stacking The robotic arm picks blank discs from Spindle 2 first and places the successful copied discs onto Spindle 1 Once Spindle 2 is empty it picks blank discs from...

Страница 12: ...nter Execute the function Also referred to as OK in the Menus ESC Escape Go back to the previous function Copy Copy Quick key to make a copy Pressing this key automatically performs the AUTOCOPY job T...

Страница 13: ...Print menu to print label s directly onto the label side of your LightScribe printable media Before you start a printing process please make sure you have successfully loaded your LightScirbe label fi...

Страница 14: ...oses please perform Full Erase 11 Hard Drive Setup page 30 Use the Hard Drive Setup menu to perform various hard drive related operations These options include loading renaming or deleting your images...

Страница 15: ...0 ISRC This option will allow you to enable disable copying the ISRC code of an Audio CD ISRC is the serial number of the audio track that uniquely identifies the song in that audio track This ISRC co...

Страница 16: ...built into the autoloader You can scroll between the various options using the Up or Down button 15 1 Drive Alignment The Drive Alignment menu is used to check the mechanical alignment between the dri...

Страница 17: ...from a Master Disc which should be placed on top of the first Input Spindle instead of a preloaded master image on the HDD to all of the blank discs which follow it The benefit of this operation is t...

Страница 18: ...5 Place the master disc for job B on top of the stacked blank discs for job B 6 Place 20 blank discs for job A on top of the master disc for job B 7 Place the master disc for job A on top of the stack...

Страница 19: ...see the next Specify Counter menu To specify the number of copies for your project you need to enter input a four digit number If you need to specify a number that is less than four digits fill the l...

Страница 20: ...example if you want to name the partition for your master disc as FUN Then follow this example Press the Down button repeatedly until F is displayed You can also hold the Down button down and the auto...

Страница 21: ...n to the next section If you are making copies in Multi Master Mode jump ahead to Making Copies in Multi Master Mode on page 21 1 1 Making Copies in Single Master Mode This process will copy your mast...

Страница 22: ...case the loader has taken a disc from the input spindle and is placing it into Drive 1 The loader will continue to remove discs from the input spindle and place those into drives until either all of...

Страница 23: ...ou will see a screen similar to below Drive 1 indicates the below results are for the 1st drive OK 1 indicates there is 1 successful copy made by this drive NG 0 indicates there are 0 bad copies creat...

Страница 24: ...n Single Master and Multi Master Modes on page 16 In general the order of the discs on the spindle will be from top to bottom The master disc for the first job The blank discs for the first job The ma...

Страница 25: ...s you with the Input Bin Empty message Press the ENT Enter button to continue and you will see the Access Job Log screen You can press the ENT Enter button one more time to see the job log that indica...

Страница 26: ...ix C Design and Create a Label File on page 59 To begin the printing process perform the following Turn on your autoloader and wait until it has booted up You should see the following signifying your...

Страница 27: ...dle the loader will then pick up another LightScribe printable disc and load it into the drive This is then repeated for each drive The printing process will continue until you either run out of Light...

Страница 28: ...r instructions 5 Compare Use the Compare function to perform a bit by bit comparison between the content of your master disc s in the Hard Drive and the contents of all discs it copied This ensures th...

Страница 29: ...tton to finish Input Bin Empty indicates that the system has run out of discs to compare If you have more discs to compare you can empty the Output Spindle place the discs to be compared in the Input...

Страница 30: ...Hard Drive CD Content to CD R RW Discs HDD to DVD Copy Hard Drive DVD Content to DVD R RW Discs HDD to DVD DL Copy Hard Drive Double Dual Layer DVD Content to DVD DL R RW Discs HDD to BD SL Copy Hard...

Страница 31: ...s the ENT Enter button on Erase to enter the menu and you will see the following screens There are two options Full Erase This option erases the entire disc destroying all previously written data in t...

Страница 32: ...continue If you have no more discs to erase press the ESC Escape button to terminate the operation 11 Hard Drive Setup The Hard Drive Setup menu consists of functions related to the Hard Drive operati...

Страница 33: ...create a partition name NEW 0001 Enter a new partition name as described in Editing Names on page 18 For this example we will name it HAPPY Press the ENT Enter button to overwrite the partition named...

Страница 34: ...VEF field shows the name of the partition The DVD field indicates that the master stored in this partition is a DVD The 4021MB field indicates the capacity of the master s content stored in this parti...

Страница 35: ...tion Default By select this option the partitions will be in chronological order Alpha Asc By select this option the partitions will be in alphabetic order Alpha Dec By select this option the partitio...

Страница 36: ...t which point you can press the ENT Enter button to return to the Print Setup menu 12 2 Rename Label When you load your LightScribe Label file into the hard drive the filename of the label file is use...

Страница 37: ...2 Read Error Skip Normally when the autoloader encounters a read error while reading your master disc the duplication is aborted and all the recordable media in the writers are ruined However if you...

Страница 38: ...o Video CD and CD G format to ensure reliable duplication for such formats Use the Up or Down button to select the Max Audio VCD CDG Speed menu and press the ENT Enter button to enter that menu Use th...

Страница 39: ...button to enter that menu Use the Up or Down button to select whether the Counter is on or off and press the ENT Enter button to select that option For information on entering the counters see Settin...

Страница 40: ...n button until you see the Save Changes screen and press the ENT Enter button to save the changes you made Once the changes are saved you shall see the Please Restart screen and restart the system to...

Страница 41: ...ed press ENT Enter button once and the cursor moves to OK Then press the ENT Enter button once to submit your maximum failures per job 13 14 Max Failure per Drive Use this setting to set the maximum f...

Страница 42: ...ul tools for duplication aspect of the system Each of these options is discussed in its own subsection 14 1 Disc Info Use the Disc Info utility to identify the type and other information about your bl...

Страница 43: ...trongly suggest that you do not upgrade your autoloader s firmware unless your autoloader has become unstable or you are instructed to do so by Tech Support Warning When you update the firmware on you...

Страница 44: ...he first input spindle Use the Up or Down button to select the Spindle Alignment menu and press the ENT Enter button to enter that menu The autoloader will proceed to the Please Select Spindle menu Us...

Страница 45: ...ne of the below drives Enabling the Z form Maneuver will allow the robotic arm to lower the disc off center from the front of the drives to clear any protruding obstacles like the bezels and then cent...

Страница 46: ...protect against placing media in a tray if the previous loading accidentally placed multiple discs in the tray due to sticky media By enabling this feature it may slow down the speed of the system To...

Страница 47: ...y turning on the Password on Bootup setting Refer to Password on Bootup on page 47 for additional information Note This system comes with a standard license that allows you to create up to 32 users Ho...

Страница 48: ...and Assigning Names on page 17 Press the ENT Enter to complete The autoloader will display a confirmation message and automatically return you to the Manage Accounts menu 16 3 Edit User Info The Edit...

Страница 49: ...6 5 Password on Bootup This menu allows you to enable or disable the Password on Boot up feature During this process you will be asked to select Yes or No enable or disable Press the ENT Enter button...

Страница 50: ...Specified Copying H4012MB 0 21 12 481MB or Copying H4012MB 0 12 481MB H indicates the source of the job resides in the Hard Drive 4012MB indicates the capacity of the master disc 12 481MB indicates t...

Страница 51: ...PY It simplifies the process by not requiring that the project be pre loaded on the hard drive After the copy process is done the autoloader automatically compares the copied discs from the content of...

Страница 52: ...wn Ready to Power Off Press the ENT Enter button to shut down the autoloader The autoloader will do all of its internal housekeeping and then display a confirmation message Ready to Power Off Press th...

Страница 53: ...ng process press the ESC Escape button and hold it for several seconds If it still doesn t work turn the machine off and then restart the machine after a minute Copy completed but the copies are not r...

Страница 54: ...y remain frozen at system bootup is caused by improper shut down To solve the problem contact the Tech Support department Even though this problem can be solved all the hard drive information will be...

Страница 55: ...cuum picking arm and the spindle where the disc can be placed securely onto the spindle This error indicates that an obstruction missing component or mechanical failure has prevented the vacuum pickin...

Страница 56: ...it when attempting to place a blank disc into a specified drive tray R70 Disc dropped during input procedure If error code 70 is shown it represents that a disc was picked from an input bin and the va...

Страница 57: ...e current climate is conducive to high concentration of static electricity This error is caused by the buildup of an electric static charge which shocks the robotic arm while loading a disc If this er...

Страница 58: ...Short Philips Screws to fasten the bracket into place 2 on the side and 2 on top Note there are 3 pre drilled holes on Top of the base the 2 small screws will go into the outer holes leaving the cente...

Страница 59: ...rt the LightScribe Installation Disc into the CD drive of your computer 2 Using the My Computer icon or Windows Explorer click on the CD drive 3 From the CD Drive double click the setup exe to run the...

Страница 60: ...elected You can then click Install to continue the installation process Where is the icon for this statement 7 During the installation process the following applications will be installed LightScribe...

Страница 61: ...ntact Tech Support for assistance Section 1 Design your labels with LightScribe Template Labeler and create a LightScribe Label CD Step 1 Launch the LightScribe Template Labeler By clicking the shortc...

Страница 62: ...tegories 2 Click on your Template choice to activate 3 If you prefer more advanced design capabilities instead of the pre designed templates you can do following a Design your own CD label artwork usi...

Страница 63: ...he picture you d like to use 4 Use the Zoom button or the scroll wheel of your mouse to size the picture and then drag it to position where you want it within the selection window 5 For text just clic...

Страница 64: ...name of the label file s you wish to generate In addition due to the system display limitation make sure the file name does not contain any foreign characters other than those in the 26 Greek alphabet...

Отзывы: