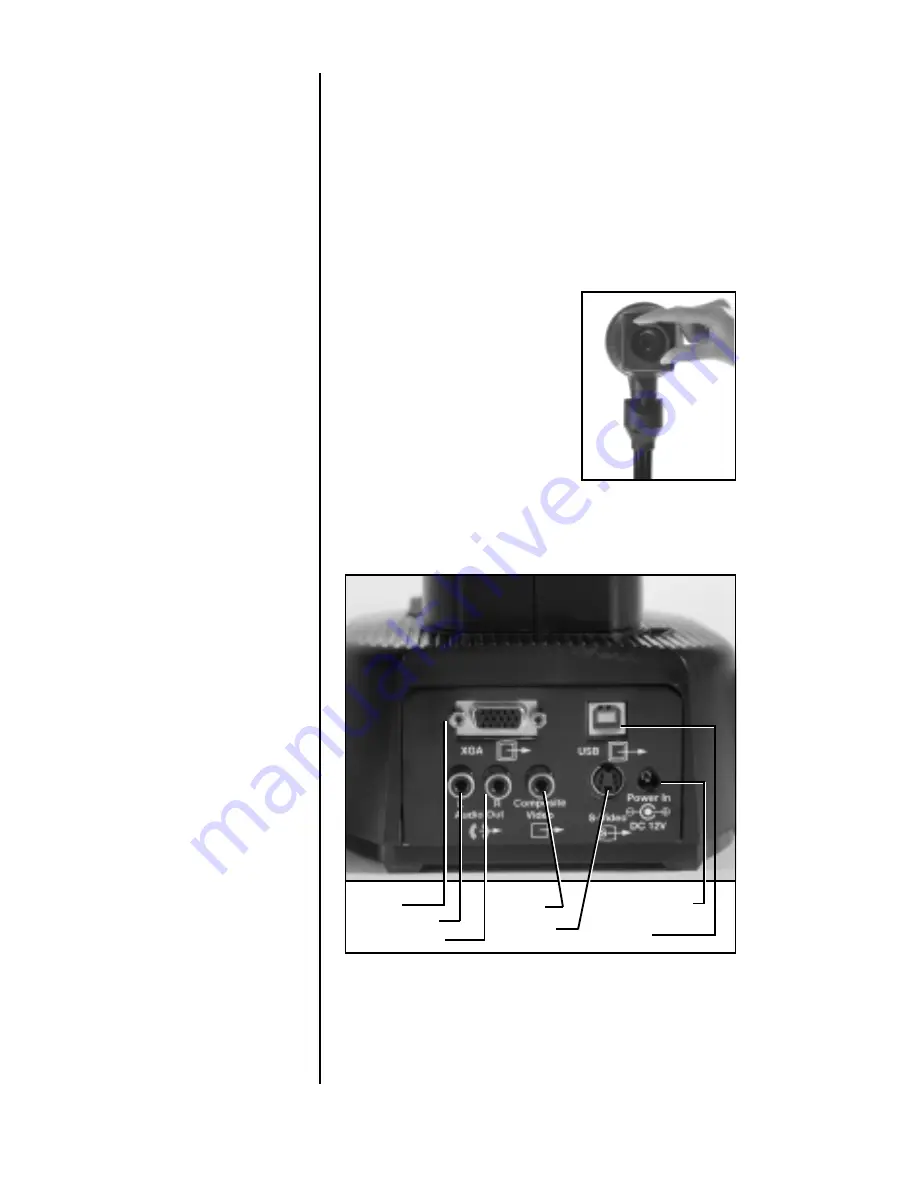
Connect the Cables and Power Supply
1.)
First connect the power supply to the jack
on the base of the camera. Then connect the
wall plug cable to the power supply brick. Plug
into a wall outlet. The camera should power
up immediately.
NOTE:
Use both hands when-
ever adjusting the
neck of the camera;
this will avoid any un-
necessary strain on
the camera’s base
and will keep the
camera from tipping
over unexpectedly.
4.)
Unwrap the two IllumaFlex™ light units and
insert in the connectors on each side of the
camera’s base.
5.)
Position camera head. The head rotates
forward and back and spins in its bracket to
allow use as a document camera or as an aux-
Figure 2 – Unscrewing
the camera’s lens.
Figure 3 – The DocCam Pro Digital’s backplate.
iliary camera for presentation viewing.
•
For document viewing
, spin the camera
head so the arrow is pointing down and pivot
the camera head down to face the document.
4
The lens will focus auto-
matically.
•
For use as an auxiliary
camera
, spin the camera
head so the arrow is
pointing up. Then pivot the
head to face the subject.
Unscrew the close-up
lens and store it in the
receptacle
on
the
camera’s base.
VIDEO GRAPHICS
OUTPUT
LEFT AUDIO OUT
RIGHT AUDIO OUT
COMPOSITE
VIDEO OUT
S-VIDEO OUT
USB CONNECTION TO
COMPUTER
12V CENTER
POSITIVE POWER IN
•
•
•
•
•
•
•
•
•
•
•
•
•
•


