e
10
ASSEMBLY
PROCEDURES
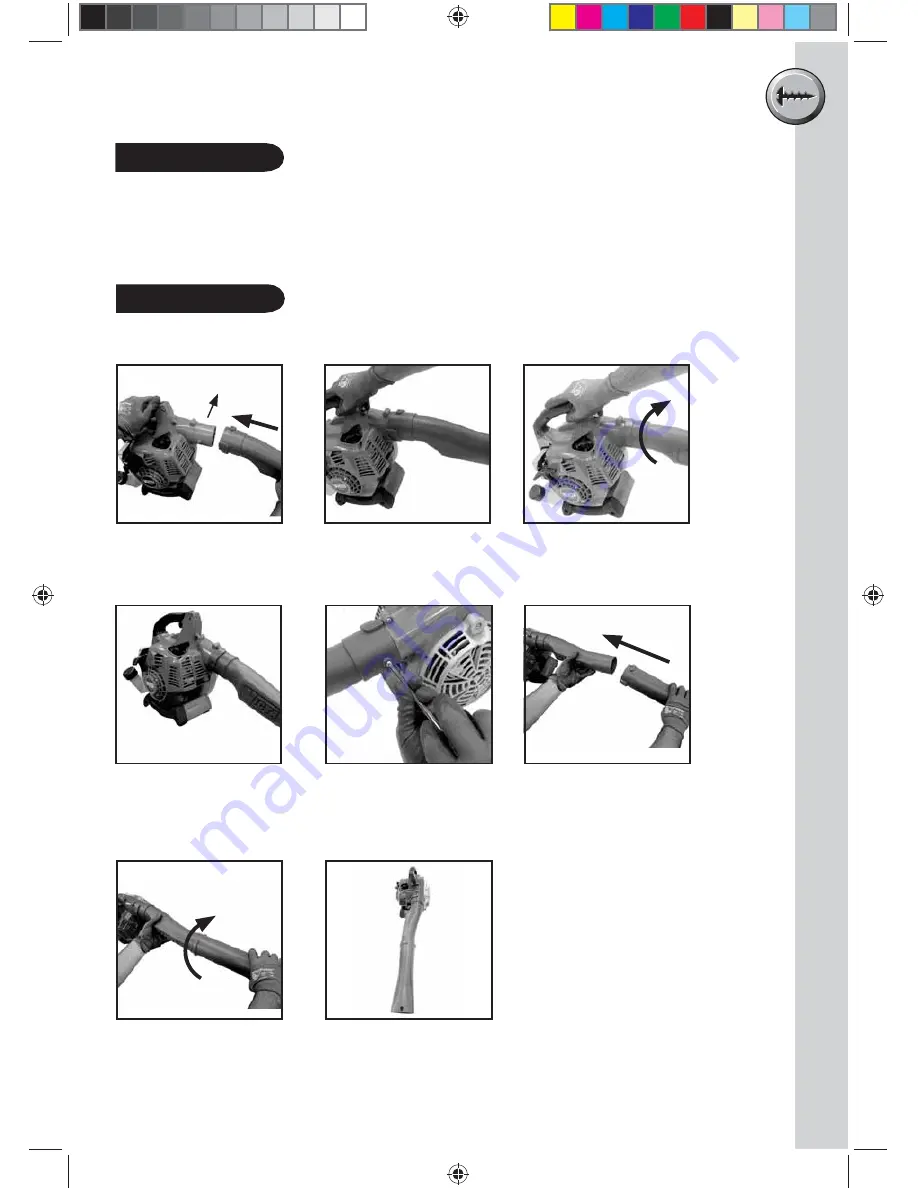
The following instructions are to assemble for blow mode use.
Ensure that the engine is in the OFF position before assembly.
Blower Assembly
Unit Configuration
The unit requires assembly before use.
This unit works as both a vacuum and a blower.
Both configurations require different assemblies. The following steps explain how to
configure the unit as a blower and the steps on page 11 explain how to configure the unit
as a vacuum.
Assembly
2. Slide the blower air
tube into place.
4. Note: Bayonet fitting
key to be assembled so
that the blower air tube
will align with the centre
of the machine.
5. Fasten screw to
lock blower air
tube to the blower
housing.
8. The correct assembly
should align the blower
nozzle with the upper
handle of the unit.
3. Turn clockwise to
secure blower air tube.
7. Slide the blower nozzle
into place and turn
clockwise. The blower
nozzle does not require
a screw fastener.
1. Remove screw from
blower housing and
align the bayonet
fitting as shown.
Remove screw
6. Align the bayonet
fitting of the blower
nozzle with the
blower air tube
outlet.
LR02390A-A.indd 11
22/07/2014 4:36:51 PM
Not for
Reproduction


