Viasat Business Hotspots Installation Guide
Page | 14
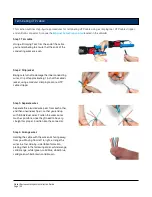
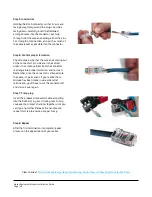
Step 5: Insert wires
Holding the RJ45 connector so that its pins are
facing away from you and the plug-clip side is
facing down, carefully insert the flattened,
arranged wires into the connector, pushing
through until the wire ends emerge from the pins.
For strength of connection, also push as much of
the cable jacket as possible into the connector.
Step 6: Confirm proper formation
Check to make sure that the wire ends coming out
of the connector's pin side are in the correct
order; if not, remove them from the connector,
rearrange into proper formation, and re-insert.
Remember, once the connector is crimped onto
the cable, it's permanent. If you realize that a
mistake has been made in wire order after
termination, you'll have to cut the connector off
and start all over again.
Step 7: Crimp plug
Insert the prepared connector/cable assembly
into the RJ45 slot in your crimping tool. Firmly
squeeze the crimper's handles together until you
can't go any further. Release the handles and
repeat this step to ensure a proper crimp.
Step 8: Repeat
After the first termination is complete, repeat
process on the opposite end of your cable.
View online at
http://www.cableorganizer.com/learning-center/how-to/how-to-terminate-RJ45.htm


