11
/
14
(7).
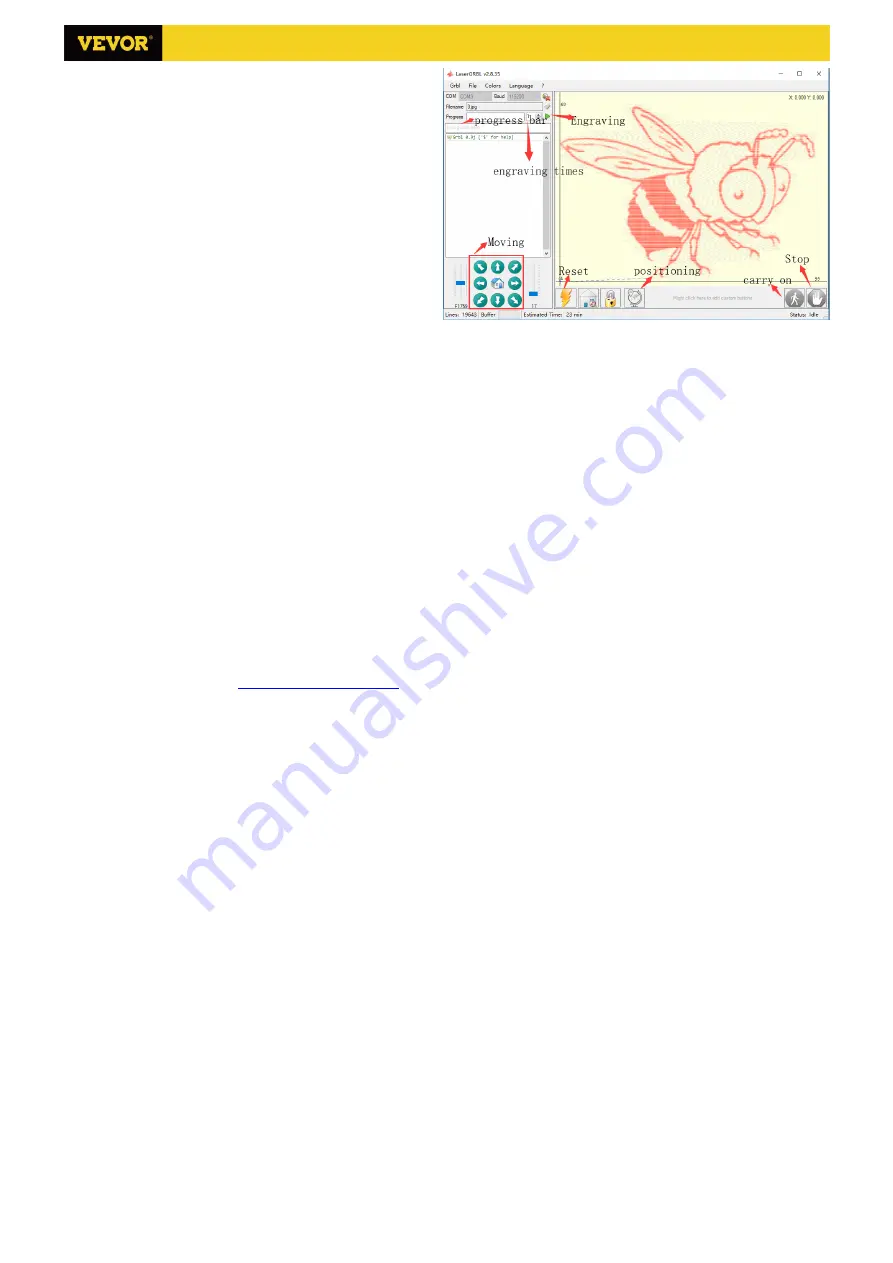
After clicking "Create", enter the preparation for
engraving.
Move to the position you want to engrave, click the
Posi ion b
on ( he
position where the laser head is
located at the lower left corner of the engraved pattern),
set the number of times to be engraved, and click the
S ar Engra ing b
on o s ar he engra ing. Af er
the engraving is completed, the machine returns to the
zero position.
5.3 About Engraving effect
In general, the use of relatively high power, the
engraving depth is relatively deep, but due to the focal
length, it will be less detailed than the low power. Small power engraving is shallow but very fine. When engraving, you
can adjust the power, engraving speed, and moving speed for better results. In addition, when the speed is slow, it can
be cut, but if the edge is not fine and the degree of burning is obvious, you can try to adjust the speed and repeat the
engraving several times to achieve better results. If it is cutting, please adjust the speed as appropriate to achieve the
cutting effect. If it is engraving, please adjust the parameters such as power and speed according to the depth of
engraving.
5.4 FAQ
Q: What's the difference between different power levels?
The higher the power, the greater the luminous energy of the laser head, the higher the temperature of the material hit,
the harder the material of the material that can be engraved, and even the full cutting can achieve the cutting effect. If
cutting, it is recommended to choose high power; if it is required to engrave shallower, more delicate, it is
recommended to choose low power.
Q: Which formats are supported?
Support all formats of images, support GCODE, NC files. If you want to engrave .DXF file, please use the
VigoWorks
Q: Whether to support the grayscale engraving function
Supports the grayscale engraving function, which can engrave pictures and photos of different shades of color by
controlling the intensity of the laser according to the color depth of the image.
Q: What is the reason why the engraved picture is very light?
Quality: ** line / mm, generally set to 10 lines / mm, the larger the value, the darker the color, the set according to your
needs Engraving speed: the moving speed when the laser is turned on, the faster the speed is engraved the shallower.
Minimum maximum power: The general minimum power is set to 0 and the maximum power is set to 1000. The greater
the maximum power, the deeper the engraved color.
Q: Why does the fan of the laser module not turn?
Please confirm that the laser head is working properly. If the laser head does not work, there may be a bad contact of
the power supply line of the laser head; if the laser head works normally, the fan may be broken.
Q: What is the reason for the software connection failed?
Please confirm whether the USB interface is in contact with normal. Please confirm whether the COM port is selected
correctly (do not select COM1); please confirm whether the baud rate is selected correctly (select 115200).
Q: How long does it take to engrave a picture?
The length of time required for engraving depends mainly on the speed of the engraving, the speed of the idling, and
the size of the picture. Users can view the total time spent on the software or on the progress bar on the touch screen.
S3018 Pro Ver 2.3


