・
・
・
・
Once you have recorded a sample you are able to play it back by using the KEY FADERS. To check the quality of
your sample, first make sure that you have lowered the volume of your external source to a suitable level or turned
this external source off. Please note that if the OCTAVE SWITCH is not set to '0' then playback of your sample will
not sound the same as your external source.
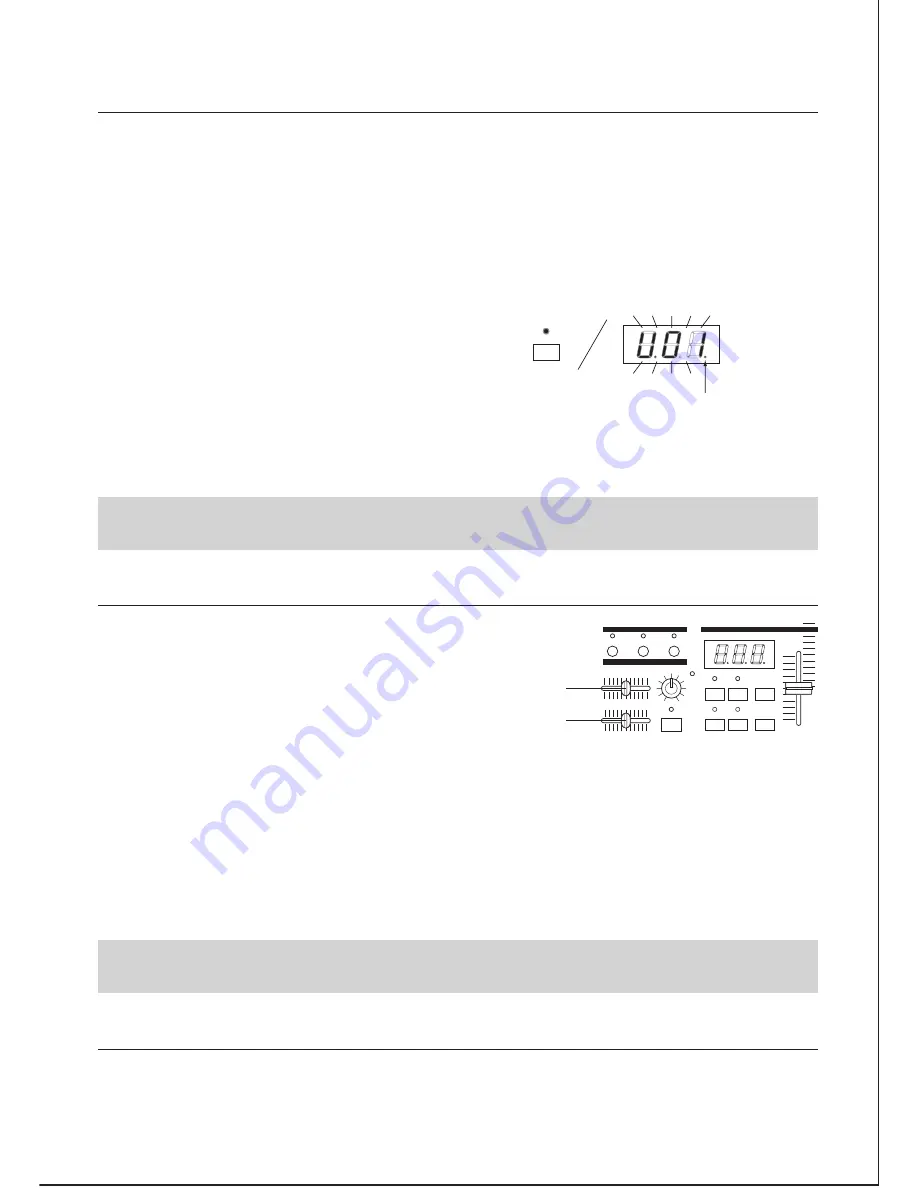
Saving. If you are happy with your sample press the SAVE LED. By pressing the SAVE LED, the FADERBOARD will
look for the lowest numbered availabe User Defined Program Bank to save to. This bank number will be displayed
on the DISPLAY. You can also select a preferred number, assuming it is available by using the CONTROL FADER.
If a User Defined Program Bank is empty there will be a dot following the number. (As illustrated).
You can overwrite a pre-recorded program bank so
pleas take care when selecting a preferred bank
number.
Once an available or desired User defined program bank number is selected
press the ENTER / - SWITCH to complete the saving process. Once pressed the
DISPLAY will flash. When the saving is completed the DISPLAY will stop flashing.
This sample that you have now recorded can be used over and over again by selecting the appropriate bank
number and then using the KEY FADERS to control output.
2. SAVING A SAMPLE
・
・
Select the User Defined Program to be deleted by using the CONTROL FADER or the EXIT / - and ENTER / + SWITCHS.
Press the TONE and SAVE SWITCHS simultaneously to start deleting the selected program bank. The program
bank chosen will flash.
4. DELETING A USER DEFINED PROGRAM BANK
The start and end points of any given sample can be
adjusted according to your needs. To control the start
and end points use the START POINT / END POINT
FADERS.
To access a User Defined Program / Sample press the TONE SWITCH and then select from the program banks
available. You can use either the CONTROL FADER or the EXIT / - and ENTER / + SWITCH to select an available program.
SMART MEDIA
PARAMETER
SAMPLE
CONTROL
SAVE
LOAD
REC
MIDI
ENTER /
-
EXIT /
+
SAVE
TONE
TUNE / BPM
WAV
MIN
MAX
I NPUT LEVEL
START POINT
END POINT
SIGNAL
/ PEAK
・
・
・
3. SETTING THE START AND END POINTS FOR A SAMPLE
START POINT FADER
END POINT FADER
Select an appropriate sample and start it playing by using the KEY FADERS. To adjust the start point move the
START POINT FADER. An initial movement from left to right (assuming the fader is set to its full position) will result
in the sample starting from a point after which it was recorded. Adjustments to the end point can be made in the
same manor but will work from right to left. It is also possible to reverse your sample by moving the start point all
the way to the right and the end point all the way to the left.
Saving start and end point adjustments. When the start or end point of a sample is altered the SAVE LED will flash.
To save these changes press the SAVE SWITCH and select the appropriate User Defined Program bank to save to.
Once an available or desired User Defined Program bank number is selected press the ENTER / + SWITCH to complete
the saving process. Once pressed the DISPLAY will flash. When the saving is completed the DISPLAY will stop flashing.
a dot following the number
SAVE
11
When you change or renew the play range on the User Defined Program and save it, the other space will
automatically be deleted. If you do not wish to save at all, Please use another bank.
SAVE LED : Illuminate
DISPLAY : Flash
Содержание FADERBOARD
Страница 21: ......


