83
Camera
4. Aim the camera at the subject, then press the
Middle Select
key to capture the
image.
5. To zoom in or out before capturing an image, use the Up/Down scroll keys, or the
Volume
keys. A slider displays on the right hand side showing the extent of the
zoom.
A preview of the photo is displayed. Press
Back
to return to the camera function, or
work with the image, as described in
“Working with captured Images and
.
To capture a video clip
1. From the
Home screen
, press the
Right Select
key to activate the camera.
2. The icon in the top left corner shows if the camera is in image
or video
mode. Press the
Left Select
key or
Right Select
key to display the tool bar. Select
the Video mode icon from the toolbar using the Up/Down scroll keys. Then select
the
option with the
Middle Select
key.
3. Press and release the
Middle Select
key to start the recording. Use the
Left
Select
key or
Right Select
key that is,
Stop
or
Pause
to control the recording. If
Pause
is selected, press the
Right Select
key to continue with the recording.
4. To zoom in or out, use the Up/Down scroll keys, or the
Volume
keys. A slider
displays on the right hand side showing the extent of the zoom.
The status bar at the top of the screen displays information about the recording, as
displayed in the table below.
The video clip is available for reviewing by pressing the
Play
icon.
Press
Back
to return to the camera function.
Panorama mode
Panorama mode can be selected from the
Options
menu or from the
Panorama
icon
in the Toolbar.
Panorama
applies only to still images, and enables you to take a
selection of images which are automatically joined together giving you a panoramic
view.
To take an image in panoramic view, press the
Middle Select
key to take the first
image, then move round to the next position, as shown by the red rectangle on
screen, and the phone will automatically take the next image. Move on round to
subsequent locations, and the camera will take up to six images as it captures the
panoramic view. The camera then joins the individual images into one panoramic
view. Press
Cancel
or
Stop
if you want to end the process early.
Scene modes
The options present for the scene mode will differ when in image mode and when in
video mode.
A variety of image capture modes are available, which are optimised for certain
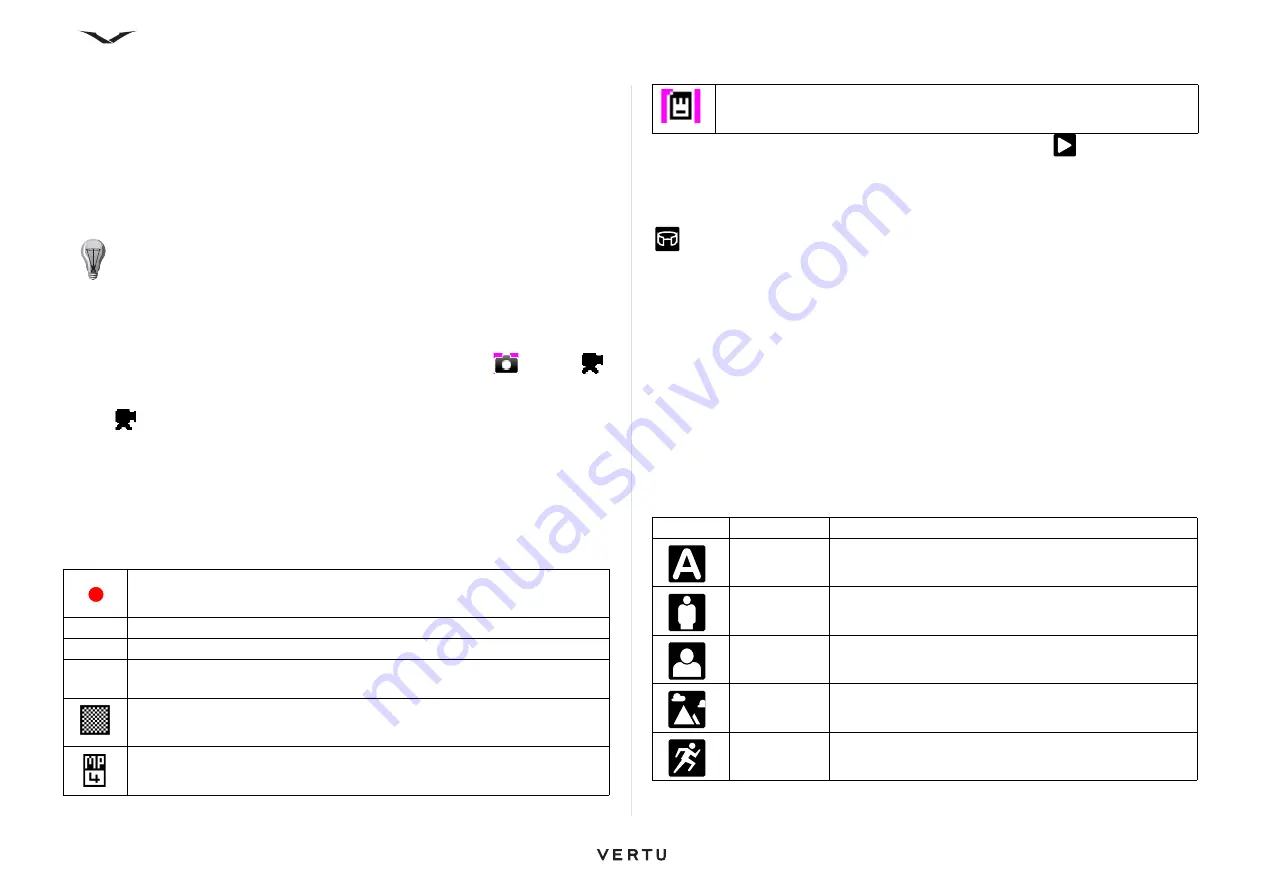
conditions. Below is a list of options present when in image mode.
TIP:
The number of photos that you can store on your Vertu phone with the
current settings is shown at the top right of the screen when the toolbar is
displayed.
Red dot indicates recording is in progress; flashing blue lines indicate that
recording is paused.
0.54.10 Elapsed time run for the current video clip
Graphical representation showing the elapsed time of the recording.
1.23.15 Remaining memory for video clip storage in H:MM:SS on the selected
storage medium.
Symbol displays the quality of the recording (small blocks =
High
; larger
blocks =
Normal
)
Format of the video recording, such as MP4
Icon indicates the selected storage for the video clip, such as phone or
memory card
Image
Mode
Description
Automatic
All camera settings are adjusted automatically
User
Defined
Creates, edits and saves your personalised settings
Portrait
Ideal to capture portrait images
Landscape
Ideal to capture outdoor images
Sport
Ideal to capture fast moving images
Содержание Constellation Quest RM-582V
Страница 1: ...VERTU Constellation Quest Reference Manual...
Страница 2: ......
Страница 14: ...14 Getting started Vertu phone layout back Vertu phone Left and right view Top view...


