Zippers
PT
EN
IT
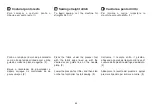
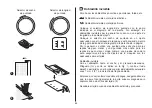
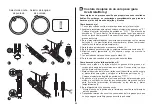
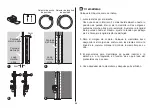
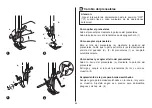
Impostare la macchina come illustrato.
1. Appaiare i due lati destri del tessuto.
Praticare una cucitura del bordo
inferiore a 2cm dal bordo destro in
direzione del punto inferiore di arresto
della cerniera lampo. Praticare alcuni
punti in retromarcia, per fissare.
Aumentare la lunghezza di punto al
massimo, impostare la tensione sotto il
2 e imbastire la rimanente lunghezza
del tessuto.
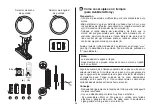
2. Premere per aprire il margine di
cucitura. Collocare la cerniera rivolta
verso il basso, con i denti rivolti verso la
linea di cucitura. Imbastire la fettuccia
della cerniera in posizione.
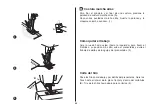
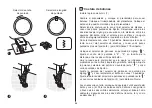
3. Il piedino per cerniera può essere
inserito a destra o a sinistra, a seconda
del lato del piedino su cui si intende
cucire.
4. Cucire interamente la cerniera lampo e
rimuovere l'imbastitura.
Configure a máquina como ilustrado.
1. Coloque os lados do direito do tecido
juntos.
Costure um cordão inferior de 2 cm da
orla direita para a posição fechada
inferior do fecho de correr. Dê alguns
pontos e inverta para fechar. Aumente
o comprimento do ponto ao máximo,
defina a tensão abaixo de 2 e alinhave
o comprimento restante do tecido.
2. Abra a costura do cordão. Vire o fecho
de correr para baixo na costura do
cordão com os dentes contra a linha de
cordão. Alinhave o fecho no sítio.
3. Pode meter o pé calcador do fecho de
correr à direita ou à esquerda,
conforme o lado que vai cozer.
4. Ponteie em volta do fecho de correr e
tire os alinhavos.
Set the machine as illustrated.
1. Place the right sides of the fabric
together.
Sew a bottom seam 2cm from the right
edge to the zipper bottom stop position.
Sew a few stitches in reverse to lock.
Increase the stitchlengthto maximum,
set the tension below 2, and baste the
remaining length of the fabric.
2. Press open the seam allowance. Place
the zipper face down on the seam
allowance withthe teethagainst the
seam line. Baste the zipper tape in
place.
3. The zipper foot can be inserted right or
left, depending on which side of the foot
you are going to sew.
4. Stitching around the zipper, then
remove the basting.
Fechos de correr
Cerniere lampo
59
Содержание Greta
Страница 1: ......
Страница 2: ......
Страница 3: ......
Страница 46: ...Presione la marca en la placa del patrón de puntadas para abrirla ES Placa del patrón de puntadas 40 ...
Страница 85: ......
Страница 86: ......
Страница 87: ......
Страница 88: ...021K3K0201 ES PT EN IT ...

