WEATHER CAB SETUP INSTRUCTIONS
Setup - 21
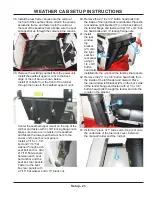
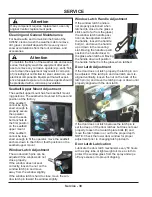
38. Install the rear frame canvas onto the velcro at
the front of the seat box frame, stretch the canvas
across the frame, and fasten onto the velcro at
the rear of the seat box frame. Make sure the seat
springs stick up through the cutouts in the canvas.
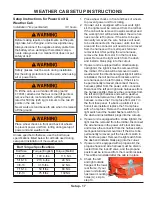
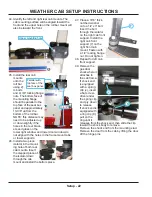
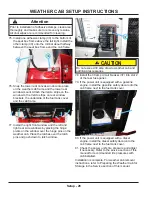
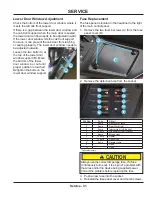
39. Remove the existing seat belt from the power unit.
Install the seatbelt upper mount to the back
edge of the roll bar as shown below.
Install 2) U-bolts from the front of the roll bar
through the holes in the seatbelt upper mount.
Center the seatbelt upper mount on the top of the
roll bar and fasten with 4) 3/8” locking flange nuts.
Make sure there are no twists in the seatbelt
and fasten the lower seat belt anchors to the
power unit’s seat box rear panels.
Install a 7/16 x 1-1/4”
bolt and 7/16” flat
washer through each
seat belt anchor. Add
2) 7/16” flat washers
between each seat
belt anchor and the
seat box rear panels.
Fasten to the seat
box rear panels with
a 7/16” flat washer and a 7/16 lock nut.
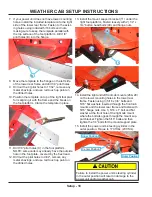
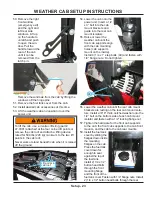
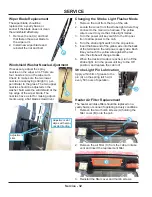
40. Remove the 2) 1/4 x 3/4” button head bolts from
the inside of the right fender and discard. Place the
rear window right bracket (17) on the back side of
the fender flange and fasten with 2) 1/4” x 3/4” but
-
ton head bolts and 1/4” locking flange nuts.
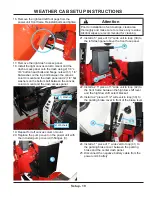
41. Install
17
21
the rear
window
top
bracket
(21) onto
the right
seat boc
rear panel
using 2)
1/4 x 3/4”
button
head bolts
installed into the u-nuts on the toolbox liner panels.
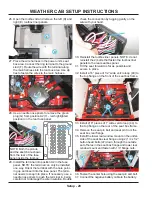
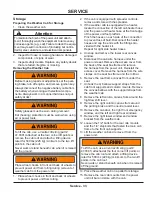
42. Remove the 2) 1/4 x 3/4” button head bolts from
the inside of the left fender and discard. Place
the rear window left bracket (23) on the back side
of the fender flange and fasten with 2) 1/4 x 3/4”
button head bolts through the fender and into the
u-nuts on the bracket.
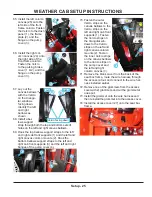
43.
23
Install a 4” piece of 1” wide velcro loop (43) onto
the underside of the fuel tank cover, between
the manual holder and the roll bar.
43


