14/15
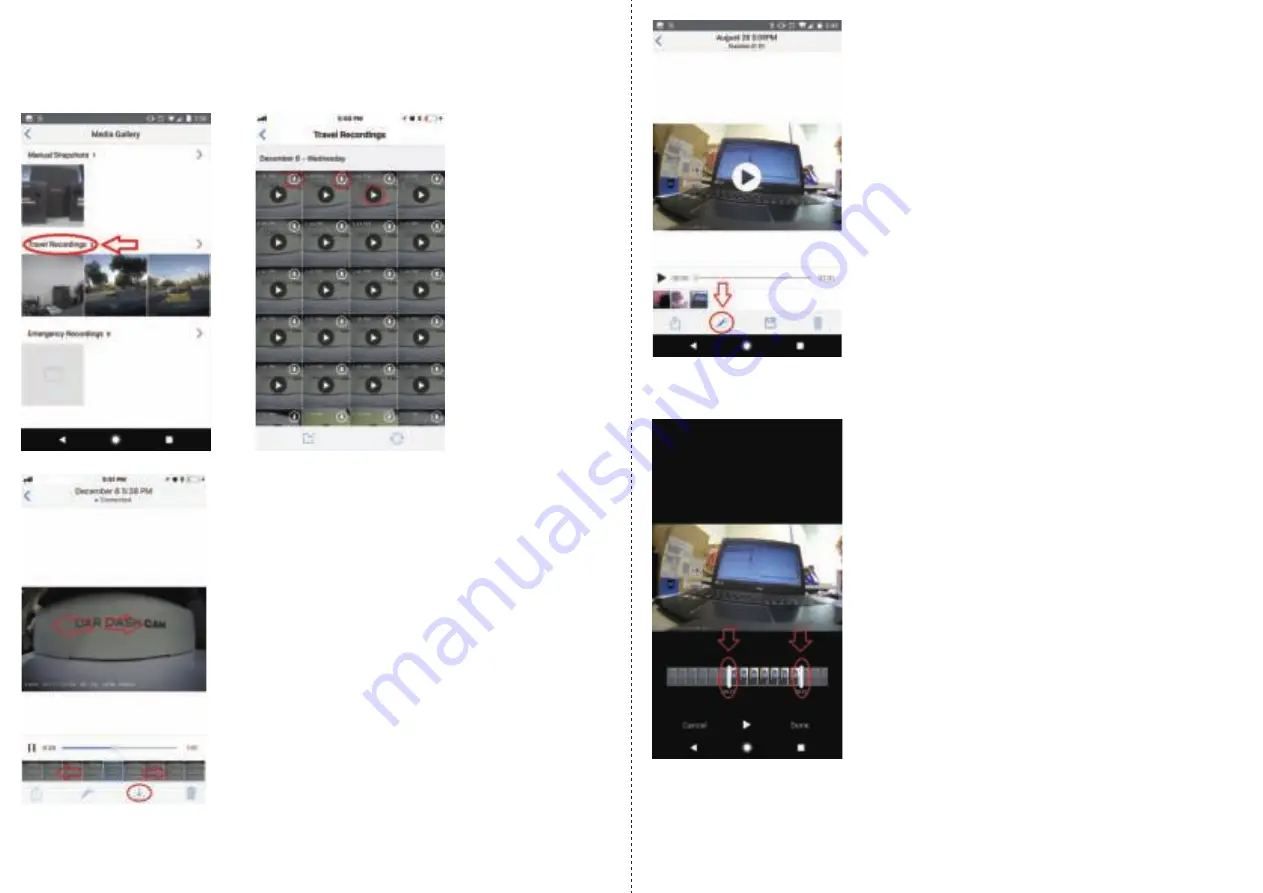
Second Step: Tap on the Travel Recordings to pull up all the automatic travel recordings
that have been taken by the VAVA Dash Cam. Click the video icon to preview one video.
Then you can choose the video you want to download via left/right sliding the video or the
thumbnails at the bottom. Download the video you wish to make a clip from. You can also
download the video directly from the Travel Recordings gallery. At present, the videos can
only be downloaded one by one.
Click the download icon to download a video. And click the preview icon to preview a video.
Left/right sliding the video or the thumbnails at the bottom to choose a video.
Step Three: Once the video is downloaded, tap on the video to open up in the viewer.
At the bottom of the screen will show that magic wand icon here as well! Tap on this icon
to bring up the video clip edit feature.
Step Four: On the next screen you can tap and drag the white bars to create the starting
point and ending point of the clip you wish to create. Tap on done when you have made
your selection.
Once you tap on ‘Done’, the app will save the clip you have created. This clip will be saved
as a separate file, so you will have the original video file as well as the new clip you created.
At the moment, this will lower the resolution of the video when saving the clip.
We hope this tip is helpful and informative in creating your own video clips from your
travel recordings! Once again, please do share any video clips you create with the Dash
Cam! Make sure you tag us @letsVAVA when you share.


