background image

Page 26

INSTALLER AND OWNER GUIDE

© 

Baxi Heating U.K. Limited 2009.

Содержание 844

Страница 1: ...5132354 01...

Страница 2: ...ission to reproduce any part of this publication should be made giving details of the proposed use to the following address The Company Secretary Baxi Heating UK Limited The Wyvern Business Park Stani...

Страница 3: ...ity performance and safety requirements to provide our customers with many years of trouble free service This guide aims to improve your understanding and appreciation of your new Valor Fires heater b...

Страница 4: ...ift the heater If for any reason this weight is considered too heavy then obtain assistance When lifting always keep your back straight Bend your legs and not your back Avoid twisting at the waist It...

Страница 5: ...r with a timer switch or similar device Important Electrical Safety The heater must not be located in front of or under an electrical socket the socket must always be accessible in order to disconnect...

Страница 6: ...model Elevated installation kit 0584091 This kit is not applicable for the Regalia model Page 6 INSTALLER AND OWNER GUIDE Baxi Heating U K Limited 2009 Contents Quantity Illustrations are not to scal...

Страница 7: ...being hung on the wall It is important that the electrical socket is accessible and located adjacent to but not above or behind the heater The Classica and Regalia fascias have been designed for tradi...

Страница 8: ...inst the surface to which it is to be fixed and measure the distance from the top of the fascia If fitting the heater onto a reflective or shiny surface such as a hearth we recommend that this surface...

Страница 9: ...INSTALLER AND OWNER GUIDE Baxi Heating U K Limited 2009 Contents Quantity Illustrations are not to scale Heater 1 Spacer frame Not included with Regalia model 1 No 8 x 3 8 pan head screw 5 Tension wi...

Страница 10: ...er onto a decorative hearth surface such as marble or tile it is advisable to protect the hearth surface Do not drag the heater as the surface finish may be damaged Method A Securing with screws Note...

Страница 11: ...all plug 6 Position the heater in front of the fireplace opening 7 At the top of the heater there are four small holes two each side of the heater From the front of the heater thread about 50mm of the...

Страница 12: ...ace 2 The top rear flange of the spacer frame has two screw locations Mark the positions of the two screw locations on the rear wall See figure 7 3 Remove the spacer frame from the fireplace and place...

Страница 13: ...move the spacer frames from the fireplace and place away from the work area 4 Drill the screw locations using a suitably sized masonry drill bit for the wall plugs supplied 5 Insert two wall plugs pro...

Страница 14: ...be no more than 700mm from the floor See figure 10 Mounting the heater above this may affect the visual appearance of the fuel effect If fitting to a conventional brick wall then use the outer slotte...

Страница 15: ...ecure the lower bracket to the rear of the heater using one of the No 8 x 3 8 screws supplied See figure 12 4 Hang the heater body on the wall hanging bracket 5 Underneath the heater mark on the wall...

Страница 16: ...into those on top of the heater See figure 13 Lower the fascia into place and swing the bottom of the fascia towards the heater to engage the magnets Fitting the Regalia fascia 1 Remove the fascia fr...

Страница 17: ...igure 15 Lower the fascia into place and swing the bottom of the fascia towards the heater to engage the magnets Fitting the Innova baffle When fitting the Innova into an elevated position there is ba...

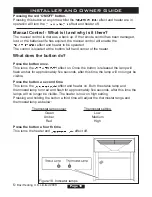
Страница 18: ...will therefore cycle off and on during normal operation Remote Control What do the buttons do Pressing the red ON OFF button To activate the remote handset it is necessary to press the red ON OFF butt...

Страница 19: ...Once the button is released the lamp will flash amber for approximately five seconds after this time the lamp will no longer be visible Press the button a second time This turns the effect and heater...

Страница 20: ...em checked by an electrician 3 My heater is on but there is no heat and the heater fan has stopped The heating element on the heater has a fixed 2kW output and is controlled by an electronic thermosta...

Страница 21: ...void you having to make a second call Your Post Code Type of Heater Electric or gas The fault problem or request Model Name and serial number This information can be found on a small label attached to...

Страница 22: ...e heater Read section 7 of this guide Cleaning and maintaining the heater If the problem cannot be resolved simply call our service division heateam on 08706 090 081 to book an engineer visit or for a...

Страница 23: ...t of any third party repair or replacement costs that we haven t been told about or agreed with you in advance Compensation or consequential losses e g loss of earnings business losses stress and inco...

Страница 24: ...Page 24 INSTALLER AND OWNER GUIDE Baxi Heating U K Limited 2009...

Страница 25: ...Page 25 INSTALLER AND OWNER GUIDE Baxi Heating U K Limited 2009...

Страница 26: ...Page 26 INSTALLER AND OWNER GUIDE Baxi Heating U K Limited 2009...

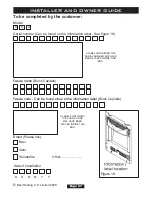
Страница 27: ...e Block Capitals Fascia code Can be found close to the information label Block Capitals Figure 19 Model 8 4 4 Serial number Can be found on the information label See figure 19 To be completed by the c...

Страница 28: ......
Отзывы: