MSC-400 Reference Manual
Rev 4
37
Moving Commands in a Smart Macro
When creating Smart Macros, it may be necessary to move commands in the list to have specific
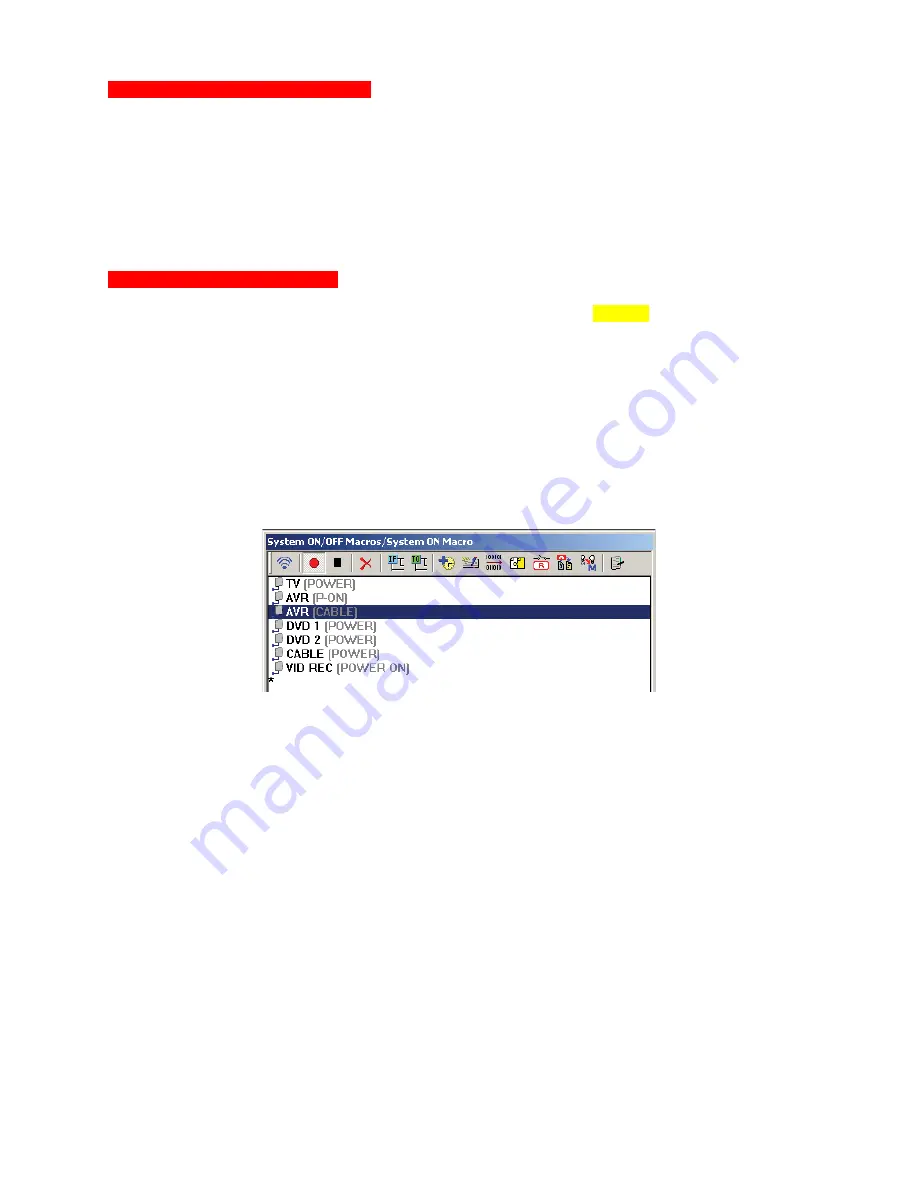
commands execute before others. In the Example System ON Macro, the TV is going to be moved to the
top of the list, because it is a CRT that takes a few seconds to warm up before coming on. Putting it at the
top of the list will allow the TV to come on while the other devices are turning on. Other commands should
also be put in logical order such as placing the AVR Cable Input select command after the Power ON
command, etc. To move commands in a Smart Macro:
1.
In the SMART MACRO FUNCTION LIST, click the command to be moved, then DRAG AND DROP
the command to the desired position in the list.
2.
Repeat as needed until commands are organized in the proper sequence.
Adding Delays To Smart Macros
Once the commands have been recorded to the Smart Macro Function List, some attention to device
behavior is going to be necessary. Look for things like: When turning ON a device, how long does it take
to turn on before it is ready to do anything? Or when already on, how long does a device take to execute
a specific command before it is ready to ‘see’ and execute the next command? Most A/V receivers take at
least 4-5 seconds, after receiving the Power ON Command, before they are ready to take any more
instructions, such as input commands (or output audio or video signals) so some duration of delay will
typically be added after the Power ON command for an AV Receiver. All devices vary, so where and
when to add delays will depend upon the devices used and what the specific commands in the macro are
for. To add Delays to Smart Macros:
1.
In the SMART MACRO FUNCTION LIST, click the command AFTER the position where the DELAY
is to be inserted. (In the Example System a 5 SECOND DELAY will be added after the AVR POWER
ON COMMAND to allow the AVR to come on and be ready to accept the CABLE INPUT COMMAND,
so AVR (Cable) is selected as the insertion point.)
2.
In the SMART MACRO WINDOW TOOL BAR, click the DELAY ICON. The DELAY SETTING
WINDOW will appear.
3.
In the DELAY SETTING WINDOW,
do one of:
a)
Select a DELAY from the QUICK SELECT BUTTONS and click OK. The window will close and
the delay will be placed in the MACRO FUNCTION LIST.
b)
Type a value from .1 TO 99.9 SECONDS in the ENTER DELAY TIME BOX. Click OK. The delay
will be placed in the MACRO FUNCTION LIST.
c)
Use the UP/DOWN ARROWS to set DELAY
from .1 TO 99.9 SECONDS in the ENTER DELAY
TIME BOX. Click OK. The delay will be placed in the MACRO FUNCTION LIST.
1
2
3b
Содержание MSC-400
Страница 1: ...MSC 400 Reference Manual ...
Страница 3: ...MSC 400 Reference Manual Rev 4 3 MSC 400 Reference Manual Section One Features and Parts ...
Страница 12: ...MSC 400 Reference Manual Rev 4 12 MSC 400 Reference Manual Section Two Installation ...
Страница 21: ...MSC 400 Reference Manual Rev 4 21 MSC 400 Reference Manual Section Three Programming ...
Страница 57: ...MSC 400 Reference Manual Rev 4 57 5 Click OK The MSC 400 is ready for action 5 ...
Страница 60: ...MSC 400 Reference Manual Rev 4 60 MSC 400 Reference Manual Section Four Programming RS 232 Devices ...
Страница 83: ...MSC 400 Reference Manual Rev 4 83 MSC 400 Reference Manual Section Seven Master Slave Systems ...
Страница 91: ...MSC 400 Reference Manual Rev 4 91 MSC 400 Reference Manual Section Eight Troubleshooting ...


