29
1.
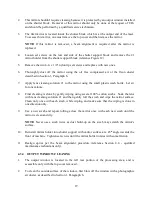
The fourth mirror is located just above the final focus lens and is held in place by a single
2-56 socket head cap screw and 2-56 washer (reference Figure 12).
2.
Hold on to the #4 mirror bracket, then remove the 2-56 screw. Lift the mirror and holder
straight off the angled portion of the optics holder.
3.
Thoroughly dust off the mirror using the oil free compressed air or the freon duster as
described in Section 1, Paragraph h.
4.
Apply lens cleaning solution #1 to the mirror using the small plastic bottle. Let sit for one
minute.
5.
Using a clean, 100% cotton, swab, gently roll across mirror once.
6.
Use a new swab and repeat rolling across mirror once with each new swab until the mirror
is clean and dry.
OTE:
Never use a swab twice as dust build-up on the swab may
scratch the mirror's surface.
7.
Replace mirror on the optics by setting mirror and bracket straight down onto the angled
portion of the optics holder and screw in the 2-56 screw and washer.
OTE:
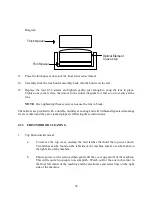
Sliding mirror on optics holder will cause scratching of mirror (reference Figure 12).
4.4
LASER REPLACEMET
Tools required: 1/4" Flat screwdriver, Crimper, Wire Cutters, 9/64" Allen (Hex) Wrenches (for
8-32 and 10-32 screws).
The ULS system has been designed with a field replaceable laser.
Follow the procedure below to replace the laser:
1.
Confirm through your distributor or ULS that laser replacement is necessary.
2.
Turn off power to the system and disconnect the power cord.
3.
Shut off water supply to/from water chiller and disconnect water lines at the laser. Place
hose ends in a bucket to catch water.
4.
Remove the top enclosure.
a.
To remove the top cover, unclasp the four latches that hold the top cover down. Two
latches can be found on the left side of the machine and two can be found on the right
side of the machine.

