background image

Setup menu

40

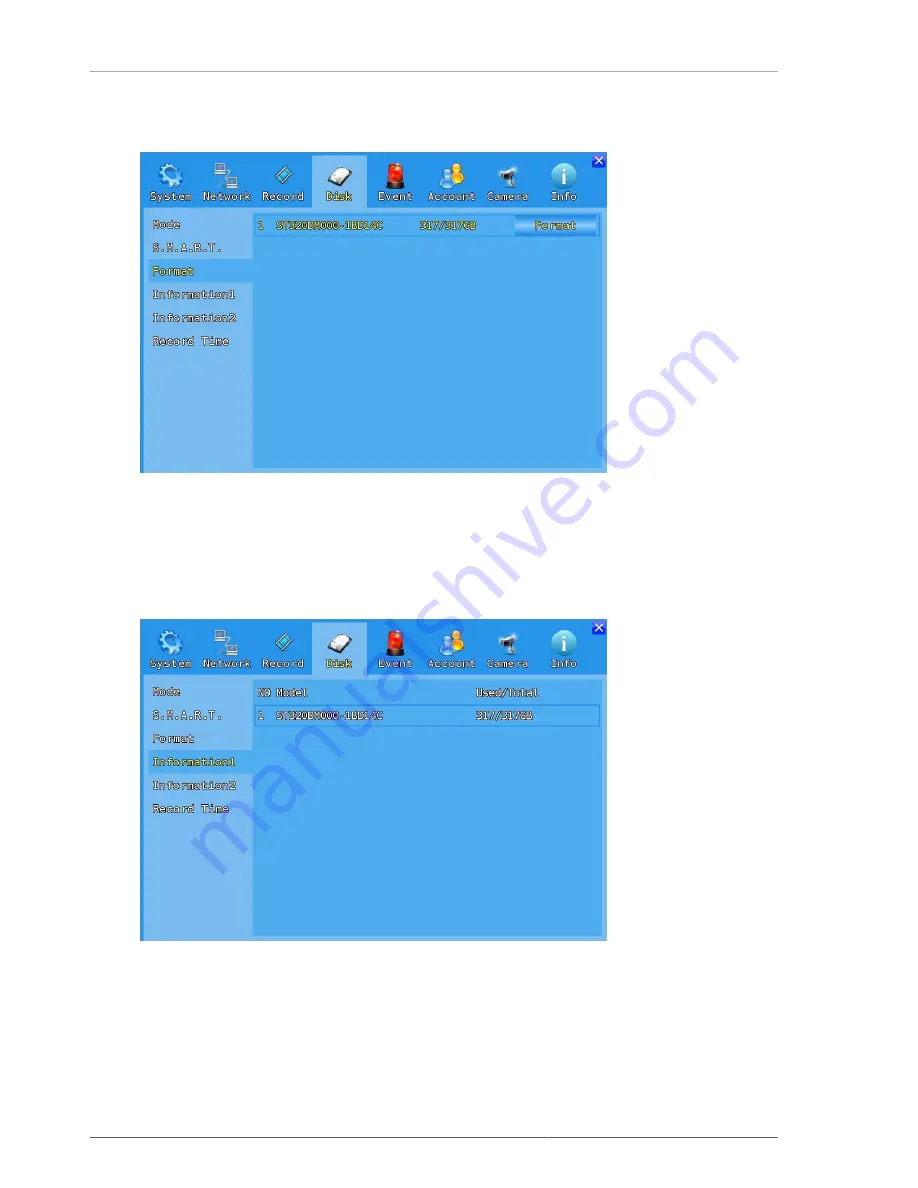
3.4.3. Format

Figure 3.35. Format

Format the hard disk by the disk unit. Recording data is erased completely so be sure to backup the data.

3.4.4. Information1

Figure 3.36. Information1

Display the information of harddisk. It shows the model name and used capacity of the harddisk driver.

Содержание Watchman H3004

Страница 1: ...FULL MANUAL 960H Recording Full HD Display Version 0 1 0 by Publication date 2014 03 14 18 07 12 r2804...

Страница 2: ...c capabilities in the network connection Set your own domain name is possible with default Mac address based domain name Possible to recover system by power outages during upgrade S M A R T function f...

Страница 3: ...PTZ PTZ control Button 12 MENU Menu Button 13 BACKUP Backup Button 14 SEARCH Search Button 15 DISPLAY Multi channel switch button 16 ALT Alternative function button 17 UP Move up in the menu Increase...

Страница 4: ...5 30 NTSC 10 Steps 1 2 3 4 5 7 9 13 20 25 PAL 10 Steps Quality 4 Levels Low Medium High Super Max Speed 120fps at 960H NTSC 100fps at 960H PAL 240fps at 960H NTSC 200fps at 960H PAL 480fps at 960H NTS...

Страница 5: ...xternal Backup USB Flash Memory Network Password Protection 101 Level admin 100 users PTZ Control RS 485 Interface Serial Port RS 232 TTL Level RS 232 Method USB Flash Memory Network SW Upgrade Blacko...

Страница 6: ...fault setting is sufficient also the user can change the recording setting depending on the purpose the network setting for one s network environment 2 2 System operating 2 2 1 The boot image Figure 2...

Страница 7: ...it 4 split screen 3 9split 9 split screen 4 16split 16 split screen 5 Search Enter the search menu 6 Backup Enter the backup menu 7 Record Turning on and off the recording 8 Power Power off Table 2 1...

Страница 8: ...creen mode 7 Freeze Runnning freeze 8 ZOOM Running zoom only single xcreen mode 9 RECORD Turning on and off the recording 10 Menu Enter the setup menu 11 Search Enter the search menu 12 Backup Enter t...

Страница 9: ...Operation 8 2 4 Search Figure 2 5 Search menu Search menu displays as shown above Depending on search method Quick Calendar Bookmark Event USB search options are available...

Страница 10: ...go Playback the video just two minutes ago from the current time 10 minutes ago Playback the video just 10 minutes ago from the current time 1 hour ago Playback the video just 1 hour ago from the curr...

Страница 11: ...rch Calendar search function is supported Identifying the presence of recorded video per channel is easy The time zone which the recording data exists is displayed with different colors Red Manual or...

Страница 12: ...he list of bookmarks are displayed It is convenient to use bookmarks on the plaback buckup 2 4 4 Event Figure 2 9 Event Event search is supported Select start time end time and channels that you want...

Страница 13: ...layback 4 Reverse Reverse Playback 5 Playback Playback 6 Pause Pause 7 Slow Playback Slow playback x1 4 x1 2 8 Fast Playback Fast playback x2 x256 Table 2 3 Playback menu 2 5 2 Playback Mouse menu Fig...

Страница 14: ...ked up data is displayed using EZPlayer without an additional program installation The backed up files using AVI format can be playbacked as a normal media player Time Setting Select the time to back...

Страница 15: ...Operation 14 2 7 Network monitoring 2 7 1 CMS Figure 2 13 CMS Network monitoring program is provided It supports Windows PC and Mac PC...

Страница 16: ...Operation 15 2 7 2 Mobile Figure 2 14 Mobile Smart Phone application is also supported iPhone iPAD Android smartphones are supported...

Страница 17: ...ID Data Format Time Format Time Zone NTP Time Date Date Language SW Upgrade Type Application Kernel Factory Default Conf file export Configuration Conf file import Sensor Motion Video Loss Record Fai...

Страница 18: ...60x240 720x240 720x480 960x480 Quality LOW MEDIUM HIGH SUPER Framerate Channel Mode MANUAL CONTINUOUS MOTION SENSOR MOTION SENSOR CONTINUOUS EVENT SCHEDULE Schedule Number 1 4 Audio Record Misc Record...

Страница 19: ...Sensor Motion Record Fail Record Warning Relay Keep Time NONE 5SECS 10SECS 30SECS Address Sender Receiver SMTP Address Port ID Password SSL MIME Condition Period Prohibition Email Contents Motion Sens...

Страница 20: ...1200 2400 4800 9600 19200 38400 57600 115200 Channel CH 1 CH 16 M1 4 M5 8 M9 12 M13 16 M1 9 M8 16 M1 16 Sequence Dwell Time 1SEC 2SECS 4SECS 5SECS 8SECS 10SECS 15SECS 30SECS Spot Mode Single Quad 9Spl...

Страница 21: ...et the name you want Press the CapsLock button for switching input mode of the letters OK button saves the information you entered and CANCEL button exits to the previous menu without saving 3 1 1 2 I...

Страница 22: ...ere the DVR is installed Daylight saving time is set by the time zone 3 1 2 4 NTP Select whether to use NTP When it is ON states it takes time from network time server and applys to DVR Depending on t...

Страница 23: ...to use 3 1 4 Upgrade software Figure 3 5 Upgrade software Application or kernel of the DVR can be upgraded by USB memory After receiving an upgrade file from homepage you can copy it to a USB memory 3...

Страница 24: ...ory will recover the DVR Please refer to the emergency recovery mathod on the appendix 3 1 5 Setup Figure 3 6 Setup 3 1 5 1 Factory default DVR setting is initialized to the factory default 3 1 5 2 Ex...

Страница 25: ...r inputs are detected Motion Select whether to operate the buzzer when motions are detected Video Loss Select whether to operate the buzzer when video loss is detected Record Fail Select whether to op...

Страница 26: ...reen Status Bar Select whether to display status bar on the screen Resolution Select the output resolution for HDMI and VGA ports Selectable resolutions are 1024x768 1280x720 1280x1024 1440x900 1920x1...

Страница 27: ...ose If there are no problems on the status menu then network settup is done Bandwidth Limitation function is used for limiting the network data bandwidth 3 2 1 1 2 Static Figure 3 11 Static IP Address...

Страница 28: ...e DDNS connection To access the DVR from an external network in most cases user must choose it ON Only access from the internal network or using Public Static IP then user can choose OFF Bandwidth Lim...

Страница 29: ...fault Show the default address based on MAC address for network access 3 2 2 2 Hostname Figure 3 14 Hostname Input Window Hostname input window is opened by pressing the keyboard icon After entering t...

Страница 30: ...ability from the DDNS server 3 2 3 Stream Figure 3 16 Stream 3 2 3 1 Channel Network stream type is H 264 Individual channel setup or all channel setup is possible Resolution 352 240 NTSC 352 288 PAL...

Страница 31: ...30 3 2 4 Status Figure 3 17 Status After setting the network user can check the current state of the network Figure 3 18 Status testing Presse the Test button in order to check the current status of t...

Страница 32: ...signed external public IP address number Network Test Display the results of connection test with the router UPnP Test Check the operation state of UPnP function DNS Test Check the state of the DNS se...

Страница 33: ...client information 3 2 6 Remote DVR Figure 3 21 Remote DVR Add delete modify the information of remote DVR to connect Figure 3 22 Input the information of remote DVR Input the network information of...

Страница 34: ...3 Port Port No User ID Password Password Figure 3 23 Connecting the remote DVR On the mouse menu click Remote DVR in order to connect the remote DVR that you set in the menu Figure 3 24 Live screen of...

Страница 35: ...played on the lower right corner Figure 3 25 The playback screen of the remote DVR The recorded data in the remote DVR can be searched using same user interface and playbacked Figure 3 26 Disconnectin...

Страница 36: ...ALL function is conveniant when user set all channel wite same setting value Resolution 4 different modes 360x240 720x240 720x480 960x480 can be selected Quality 4 different modes LOW MEDIUM HIGH SUPE...

Страница 37: ...mode This is CONTINUOUS EVENT mode The image quality frame rate can be set up differently at the Continuous mode and the Event mode 3 3 2 Schedule Figure 3 29 Schedule Recording schedule can be set U...

Страница 38: ...e MANUAL CONTINUOUS MOTION SENSOR MOT SEN MOTION SENSOR and CONT EVENT CONTINUOUS EVENT When you use a remote controller or the button of front panel press the OK button to change the recording mode s...

Страница 39: ...layback Figure 3 32 Playback 3 3 4 1 Playback Channel Select the channel to playback If ALL is selected 16 channels will be playbacked simultaneously Start Point Choose the start point of the playback...

Страница 40: ...h capacity to store more data than the selected date OFF 1day 99 days can be set 3 4 2 S M A R T Figure 3 34 S M A R T 3 4 2 1 S M A R T Choose whether to check S M A R T test The test works only ON c...

Страница 41: ...ormat the hard disk by the disk unit Recording data is erased completely so be sure to backup the data 3 4 4 Information1 Figure 3 36 Information1 Display the information of harddisk It shows the mode...

Страница 42: ...ormation2 Display temperature and SMART test results 3 4 6 Record Time Figure 3 38 Record Time The available record time will be displayed based on the current state The available record time is autom...

Страница 43: ...itivity detection area whether to pop up the duration of the channel by channel 3 5 1 1 Channel Select a channel to make setting 3 5 1 1 1 Sensitivity Set the motion detection sensitivity From 0 to 31...

Страница 44: ...n be selected 3 5 2 Sensor Figure 3 41 Sensor It s for sensor setting Action type connection channels whether to pop up the related channel on the sensor input condition the dwelling time of the pop u...

Страница 45: ...2 Motion Whether to output the relay when the motion is detected 3 5 3 3 Record Fail Whether to output the relay when the record fail is occured 3 5 3 4 Record Warning Whether to output the relay whe...

Страница 46: ...r the e mail address of the recipient Up to four can be set 3 5 4 2 SMTP Figure 3 44 SMTP Enter the related SMTP information It should be confimed from the SMTP service provider that you want to use A...

Страница 47: ...lt is ON MIME The default is ON 3 5 4 3 Conditon Figure 3 45 Condition Set the sending conditions of the email Period Set the sending period interval of the email NO 30min 1hour 2hours 5hours 12hours...

Страница 48: ...email content Sensor Sensor operation information is included in the e mail information Video Loss Video loss information is included in the email content Record Status Recording status is included i...

Страница 49: ...s 20s 30s 40s 50s 60s can be selected 3 6 Account Motion detection setting User can set the sensitivity detection area whether to pop up the duration of the channel by channel 3 6 1 Admin Figure 3 48...

Страница 50: ...count 3 6 2 2 Password Set a password for a user account 3 6 2 3 Permission Set account specific feature The channel PTZ control playback backup network monitoring network connections network access t...

Страница 51: ...Setup menu 50 3 7 Camera 3 7 1 Name Figure 3 51 Name Enter the name of the channel 3 7 2 Covert Figure 3 52 Covert Covert a channel The selected channel will not be displayed on the screen...

Страница 52: ...ess Hue Vertical sharpness Horizental sharpness can be adjusted 3 7 4 PTZ Figure 3 54 PTZ Per channel Model ID Reverse Control Baudrate will be set and can be tested After setting the details user can...

Страница 53: ...reverse control function 3 7 4 4 Baudrate Set the baud rate 1200 2400 4800 9600 19200 38400 57600 115200 is possible 3 7 5 Sequence Figure 3 55 Sequence Automatic screen switch setting 3 7 5 1 Channe...

Страница 54: ...3 7 6 Spot Figure 3 56 Spot Set the screen output mode Single Quad 9Split 16Split Sequence is possible Figure 3 57 Spot Mode Sequence On sequence mode the display screen mode and screen switching tim...

Страница 55: ...Information 3 8 1 Event Log Figure 3 58 Event Log Related event log shows Setting the event log search time the channel can be selected 3 8 2 System Log Figure 3 59 System Log Bring the system log is...

Страница 56: ...yed the latest one sequentially Press the Export button to export the system log information to a USB memory device The file format is txt file 3 8 3 Information Figure 3 61 Information Model name Vid...

Страница 57: ...m 4 3 0GHz Intel Core 2 Duo 2 2GHz Main Memory 1GB 2GB Video Memory 128MB 256MB Display Resolution 1280 x 1024 with 32bit color or higher 1280 x 800 with 32bit color or higher Hard disk 120GB or highe...

Страница 58: ...r the network 3 Function selection LiveS Icon is displayed in blue when LivsS mode is working 4 DVR name account time The currently connected client s name account and the current time of the DVR are...

Страница 59: ...iveM Figure 4 3 LiveM screen description Multiple DVR control mode Up to 256 channels that is divided into 4 pages cofigured by 64 channels can be managed No Name Function 1 Computer s time Computer t...

Страница 60: ...particular the Maximize button maximize not only the video but also including all function buttons so user can control all functions at the maximized window Table 4 3 LiveM screen description 4 4 4 Se...

Страница 61: ...l or Continuous record Green Motion record Orange Sensor record All channels or specific channels can be selected using ALL button CH 1 CH 16 button The selected channel will be playbacked 12 Program...

Страница 62: ...otton 10 Playback related button Reverse Playback Pause Stop Move backward one frame Move forward one frame Slow playback Fast playback button 11 Calendar Recorded data is displayed on the calendar Us...

Страница 63: ...ar will be displayed In the state select start or end radio button and select a time button 10 minutes 30minutes 1 hour Then amount of time selected data is displayed in dark red If start radio button...

Страница 64: ...indow Display map and images 4 Camera icon Display the location of camera on the map 5 Video monitoring window Camera images are displayed 6 List of map management window Add modify and delete the lis...

Страница 65: ...n window for confimation of DVR Info Log group selection is possible 4 Information display window Displayy the information and system log of DVR 5 Program window control button Program window minimize...

Страница 66: ...ogram Date Time Change Date Time Reset Exit Exit Configuration 3 Group selection window Group selection window for configuraton System network recording hard disk events accounts cameras can be select...

Страница 67: ...e to use Alarm sound Select whether to turn on off the sound of the alarm Stream Type Select the type of network transmission stream Main Sub can be selected Deinterlaced Video output Deinterlaced cho...

Страница 68: ...CMS 67 Figure 4 11 PC configuration information screen description Display the program version information and the computer s storage device information...

Страница 69: ...d phone Install the app using android market or download AVMS apk file and copy it to the smart phone after that install AVMS app to your smart phone 5 2 2 iPhone After connecting App Store enter IVMS...

Страница 70: ...VMS above screen will be displayed 5 3 2 DVR List Management menu Figure 5 2 DVR List Management menu If you press the menu button DVR s list management menu will pop up at the bottom of the screen Th...

Страница 71: ...Mobile 70 5 3 2 1 Add Figure 5 3 DVR list Add After clicking the Add button enter the information of DVR which you want to Add Press OK button the DVR will be added on the list...

Страница 72: ...Mobile 71 5 3 2 2 Modify Figure 5 4 DVR list Modify Press the Edit button to edit the information of the selected DVR...

Страница 73: ...Mobile 72 5 3 2 3 Delete Figure 5 5 DVR list Deletion Press the Delete button to delete the selected DVR on the list Clicking OK on the confirmation message completes the deletion...

Страница 74: ...Mobile 73 5 3 3 Connection Figure 5 6 Connection After selecting the DVR from the list press the Connection button then DVR will be connected...

Страница 75: ...4 DVR time Display the currently connected DVR s time 5 Video monitoring window Display Currently connected DVR s video 6 Screen mode selection menu Select the Split Screen 7 PTZ control PTZ control m...

Страница 76: ...Mobile 75 5 3 5 Screen mode selection menu Figure 5 8 Screen mode selection menu Select screen mode 4 split 9 split 16 split can be selected...

Страница 77: ...urrently connected DVR s time 4 Video monitoring window Display Currently connected DVR s video 5 Preset Associated preset button Set Run Delete can be selected 6 PAN TILT speed selection Pan Tilt spe...

Страница 78: ...Mobile 77 5 3 7 Search menu Figure 5 10 Search menu Press the OK button after selecting the time to search the playback screen will be displayed...

Страница 79: ...ton 5 DVR time Display the currently connected DVR s time 6 Display speed of playback Display playback speed 7 Video monitoring window Display playback video 8 Screen mode selection menu Select the Sp...

Страница 80: ...n be selected 15 Fast playback x2 x256 Fast playback button x2 x256 can be selected Table 5 3 Playback screen configuration 5 3 9 Remote control Figure 5 12 Remote control DVR relay control window Aut...

Страница 81: ...Mobile 80 5 3 10 Setup Figure 5 13 Setup Preferences menu for application Network stream types Main Sub Audio ON OFF OSD visibility can be selected 5 3 11 Landscape view Figure 5 14 Landscape view...

Страница 82: ...Mobile 81 Support landscape view In landscape view cellular phone s status bar is not displayed and the bottom menu is toggled by menu button in order to use the video monitoring screen widely...

Страница 83: ...re bin XX 04 4ch 08 8ch 16 16ch Copy the files to a USB memory Copy the bootloader file to recover bootloader copy the kernel file to recover kernel or copy the applicaton file to recover application...

Страница 84: ...recovery After the recovering is successfully finished booting logo is displayed and automatically boots After the completion of the booting process you can confirm the version of the file in the inf...

Отзывы: