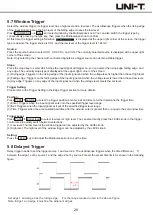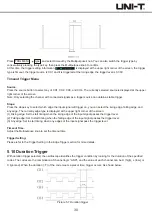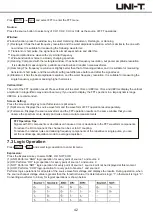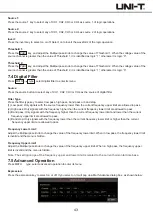
5.7 Window Trigger
Select
the
window
trigger
,
its
trigger
level
has
a
high
level
and
a
low
level
.
The
oscilloscope
triggers
when
the
rising
edge
of
the
input
signal
crosses
the
high
level
or
the
falling
edge
crosses
the
low
level
.
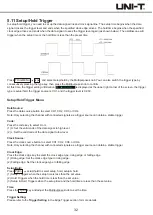
Press
TRIG
MENU type , and select window by the Multipurpose knob. You can also switch the trigger type by
consecutively pressing the type key, then press the Multipurpose knob to confirm.
At this time, the trigger setting information is displayed at the upper right corner of the screen, the trigger
type is window, the trigger source is CH1, and the low level of the trigger level is 124mV.
Source:
Press the source button to select CH1, CH2, CH3, and CH4. The currently selected source is displayed at the upper right
corner of the screen.
Note: Only selecting the channel with connected signals as a trigger source can obtain a stable trigger.
Slope:
Press the slope key to select which slope the input signal will trigger on, you can select the rising edge, falling edge, and
any edge. The currently slope type is displayed at the upper right corner of the screen.
(1) Rising edge: Triggers on the rising edge of the input signal and when the voltage level is higher than the set high level.
(2) Falling edge: Triggers on the falling edge of the input signal and when the voltage level is lower than the set low level.
(3) Any edge: Triggers on any edge of the input signal and when the voltage level meets the set level.
Trigger Setting:
Please refer to the Trigger Setting in the Edge Trigger section for more details.
Position:
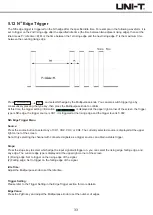
Press PgDn position to select the trigger position of enter, exit and time to further determine the trigger time.
(1) Enter: Triggers when the input signals enter into the specified trigger level range.
(2) Exit: Triggers when the input signals exit out of the specified trigger level range.
(3) Time: Triggers when the accumulated hold time after the window enter is greater than or equal to the set window time.
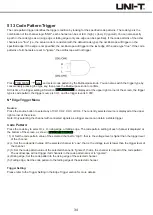
Trigger Level:
Press PgDn trigger level to select low level or high level. You can also directly press the LEVEL knob in the trigger
control area to quickly switch between selections.
(1) Low level: The low level of the window trigger can be adjusted by the LEVEL knob.
(2) High level: The high level of the window trigger can be adjusted by the LEVEL knob.
Setting:
Press the PgDn key and adjust the Multipurpose knob to set the time.
5
.
8
Delayed
Trigger
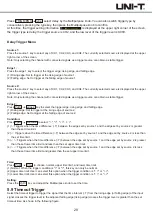
Delay trigger needs to set the trigger source 1 and source 2. The oscilloscope triggers when the time difference (
T)
between the edge 1 set by source 1 and the edge 2 set by source 2 meets the preset time limit. As shown in the following
figure.
Set edge 1 and edge 2 as the rising edge,
T is the range marked in red in the above figure.
Note: Edge 1 and edge 2 must be the adjacent edges.
28
Содержание UPO2000E Series
Страница 1: ...UPO2000E Series Ultra Phosphor Oscilloscope User Manual...
Страница 66: ......

