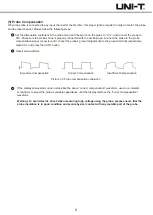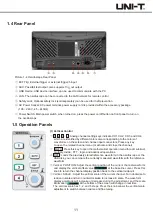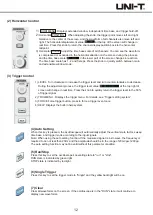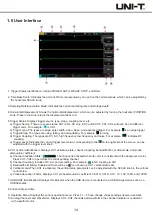
(3) Trigger Coupling
Trigger coupling determines which part of the signal will be transmitted to the trigger circuit. The coupled type includes DC,
AC, low/high frequency suppression, and noise suppression.
DC: Allows all of the signal
AC: Blocks the DC component and attenuates any signal components below 10Hz.
High frequency suppression: Attenuates high frequency components over 80kHz.
Low frequency suppression: Blocks the DC component and attenuates low frequency components below 8kHz.
Noise suppression: Suppress high frequency noise in the signal, and reduces probability of error.
(4) Trigger Sensitivity
The minimum signal required to generate a correct trigger. For example, normally the input channel (CH1~CH4) trigger
sensitivity is 1div, which means the source signal should be at least 1div.
(5) Pre-trigger / Delayed Trigger
Data collected before / after the event.
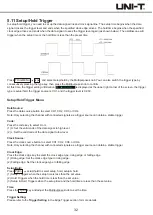
Trigger position is usually set at the level of the screen, and you can observe 7 grids of pre-trigger and delay trigger
information. The horizontal displacement of the wave can be adjusted by the horizontal displacement POSITION knob in
order to observe more pre-trigger information. By observing the pre-trigger data, you can observe the waveform situation
before the trigger. For example, capturing the burr generated at the start of the circuit, by observing and analyzing the
pre-trigger data, it can help to find out the cause of the burr.
(6) Forced Trigger
Press the FORCE key to generate a forced trigger signal.
If the waveform is not displayed in normal or single shot mode, press the FORCE button to collect signal baseline to
ensure acquisition is normal.
5.2 Edge Trigger
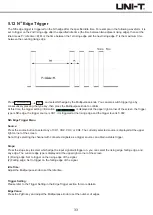
The edge can be triggered by the rising or falling edge of the signal.
Press the TRIG MENU
→
type to select edge with the Multipurpose knob, and the defaulted trigger type is edge. User
can also switch the trigger type by consecutively pressing the type button, and then press the Multipurpose knob to confirm.
At this time, the trigger setting is displayed at the upper right corner of the sreen, the trigger type is
edge, the trigger source is CH1, rising edge triggered, and the trigger level is 0.00V.
The Edge Trigger Menu
Source:
Press the source button to select any of CH1, CH2, CH3, CH4, AC Line, EXT, and EXT/5. Thr selected source will be
displayed on the upper right corner of the screen.
Note: only selecting the channel with connected signals as the trigger source can obtain a stable trigger.
Edge Type:
Press the edge type key to select the edge that the input signal will trigger on, user can select the rising edge, failing edge,
and any edge. The current edge type will be displayed on the upper right corner of the screen.
(
1
)
R
ising edge: triggers at the rising edge of the signal.
(
2
)
Falling edge: triggers at the falling edge of the signal.
(
3
)
Any edge: triggers at the rising edge and the falling edge of the signal.
23
Содержание UPO2000E Series
Страница 1: ...UPO2000E Series Ultra Phosphor Oscilloscope User Manual...
Страница 66: ......

