


Chapter 12: Troubleshooting Issues
00.053.101, Revision C SonixMDP/SP/OP Service Manual
12-4
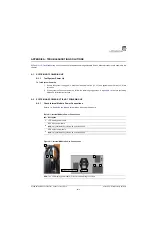
12.9 IMAGE HAS WAVY INTERFERENCE
To mitigate wavy interference on the ultrasound image, ensure:
• the Ultrasonix system is the only device connected to a dedicated wall outlet. (Sharing a wall outlet with other devices that
emit magnetic interference - such as an X-ray machine, computer server or halogen light - can cause noise on the power
line which interferes with the ultrasound image.)
• the copper fingers around the edge of the modulo have been depressed. In the event the copper fingers are no longer in
firm contact with the front block, gently lift them back into place to restore proper transducer grounding
• a medical grade power cable connects the system to a wall outlet in order reduce/eliminate interference from the power
line.
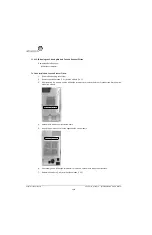
12.10 IMAGE HAS THREE (3) UNIFORM BLACK AREAS (LEFT, MIDDLE, RIGHT)
A system with an image that has there are three (3), uniform and evenly spaced dark areas likely has a faulty Ultrasound
(US) Module board.
Test (and if necessary, replace) the US Module:
•
12.11 REGEDIT
Some settings in the registry may need to be edited.
•
A.8 Regedit – Ensure Settings are Correct
.
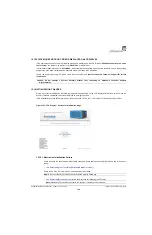
12.12 LCD DISPLAY BLANK, TOUCH SCREEN DISPLAYS CORRECTLY
If the system is powered on with the LCD display unplugged, it will be blank. After approximately 2 minutes, the touch screen
will display correctly. Either
OK
,
End Exam
, the
B
tab or the
Presets
tab will be displayed. Even after repeated restarts, the
LCD display will still be blank. There are two options to try when this occurs:
•
A.9.1 Reset LCD Display to Factory Defaults
•
A.9.2 Create a Temporary Video Connection/Restore LCD Display with Tech Support Help
.
12.13 LCD DISPLAY BLANK, TOUCH SCREEN DISPLAYS ULTRASONIX LOGO ONLY
Check the following items:
•
A.10.1 Check Trackball and Mouse Port Connections
•
A.10.2 Check for Interference from a USB Device
.
12.14 LCD DISPLAY WORKS, BUT TOUCH SCREEN STILL DISPLAYS ULTRASONIX LOGO EVEN IN
IMAGING MODE
Check the following items:
•
A.11.1 Check the Serial Cable Connection
•
A.11.2 Check the Serial Expansion Card Driver
.
Note:
A medical grade power cable has a green dot on the wall plug
Note:
Contact an Ultrasonix Technical Support Representative for details on the changes.
Содержание SonixMDP
Страница 1: ...SonixMDP SP OP Ultrasound System Service Manual...
Страница 2: ......
Страница 4: ......
Страница 10: ...Table of Contents 00 053 101 Revision C SonixMDP SP OP Service Manual vi...
Страница 12: ...List of Service Drawings 00 053 101 Revision C SonixMDP SP OP Service Manual ii...
Страница 44: ...Chapter 4 Performance Testing 00 053 101 Revision C SonixMDP SP OP Service Manual 4 4...
Страница 48: ...Chapter 5 Software 00 053 101 Revision C SonixMDP SP OP Service Manual 5 4...
Страница 124: ...Chapter 9 Network Configuration 00 053 101 Revision C SonixMDP SP OP Service Manual 9 8...
Страница 142: ...Chapter 11 Maintenance 00 053 101 Revision C SonixMDP SP OP Service Manual 11 16...
Страница 150: ...Chapter 12 Troubleshooting Issues 00 053 101 Revision C SonixMDP SP OP Service Manual 12 8...
Страница 166: ...Appendix C Ultrasonix Limited Warranty 00 053 101 Revision C SonixMDP SP OP Service Manual C 2...
Страница 168: ...Appendix D Service Drawings 00 053 101 Revision C SonixMDP SP OP Service Manual D 2...


