SECTION 3
OPERATION AND USE
3.1 FRONT PANEL / REMOTE
3.1.1
Front Panel / Display
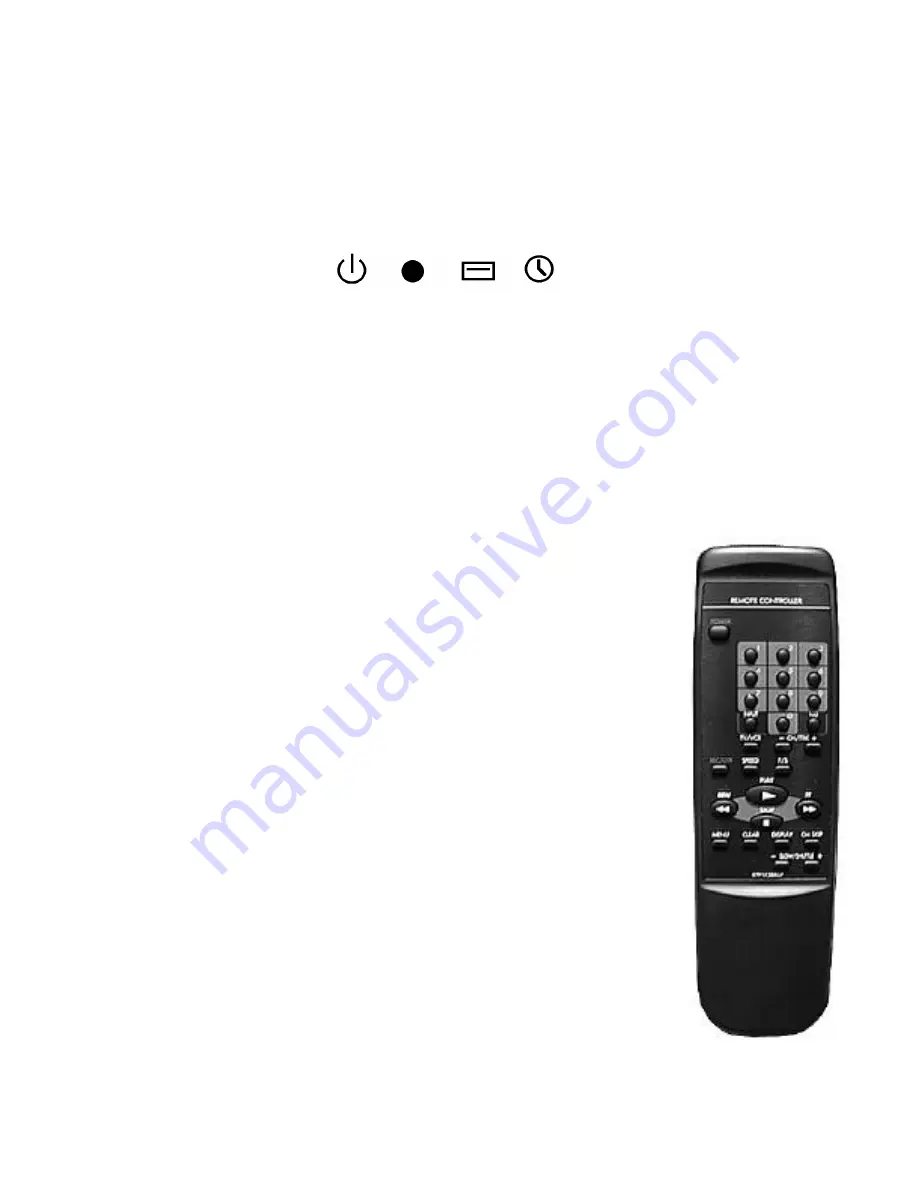
The front panel of the recorder incorporates the basic functions: POWER, STOP/EJECT, CH(Channel)/TRACKING,
RECORD, REWIND, PLAY/PAUSE, and FF (Fast Forward). The front panel display has visual indicators showing
machine status:
The GREEN power indicator shows the VCR power is on. The RED record indicator shows when the VCR is in the
record mode. The RED VCR indicator shows when the machine is in the VCR mode. This is only important when a TV is
connected to the RF OUT jack on the rear of the VCR (disregard when a monitor is connected to the video out connec-
tion). The RED OTR (one touch recording) indicator shows when the unit is in the OTR recording mode.
OTR (One Touch Recording)
OTR can be used to place the VCR into record for a preset time of 30 minutes to 4 hours, in 30 or 60 minute increments
(:30, 1:00, 1:30, 2:00, 3:00, 4:00). Pressing the RECORD button on the front panel (while the unit is already in record)
enables the OTR function. Each time the RECORD button is pressed, there will be an on screen indication of the time
requested for OTR. To clear the OTR time, hold in on the FRONT PANEL stop button for approx. 5 seconds until the
machine stops recording and the OTR indicator disappears. OTR can not be activated via the remote control.
PWR REC VCR OTR
3.1.2
Remote Functions
A.
POWER:
Press to turn your VCR on and off.
B.
NUMBERS:
Press to set times and enter menu screens.
C.
INPUT:
Switches between tuner and AV rear panel input. AV is the automatic
default selection.
D.
TV/VCR:
When a TV is used as a monitor and is connected to the rear RF
OUT jack, it must be placed in the VCR mode.
E.
CH/TRK -/+:
During playback of a tape, -/+ will adjust tracking to assist in delivering
a clear video picture. Pressing - or + in the video mode (not recording) will move
the machine into the tuner mode and allow the user to select cable TV signals, and
increment the tuner one channel at a time. The -/+ buttons are also used to change
certain menu items during setup.
F.
SPEED:
Press to select recording speed (SP or EP). EP is the default speed until
changed. If your recorder is left unplugged for an extended period, the speed will
default to EP.
G.
P/S:
press to pause the video cassette during record or playback.
H.
PLAY:
Press to view a video cassette.
I.
REW:
Press to REWIND a video tape.
J.
FF:
Press to FAST FORWARD through a video cassette.
L.
STOP:
Press to STOP a video cassette
M.
MENU:
Press to enter into the setup and selection menus.
N.
CLEAR:
Press to reset the real time tape counter when the counter is visible in the
upper right hand screen. Clear is also used to clear certain security functions during
security setup.
O
. DISPLAY:
Press once to display the on screen status and counter. Press twice to
enable counter to remain on screen in upper right hand corner (the counter is NOT
recorded).
P.
CM SKIP:
Not used on this model.
Q.
- SLOW/S
: Use these buttons to increase or decrease the slow
motion playback.
3


