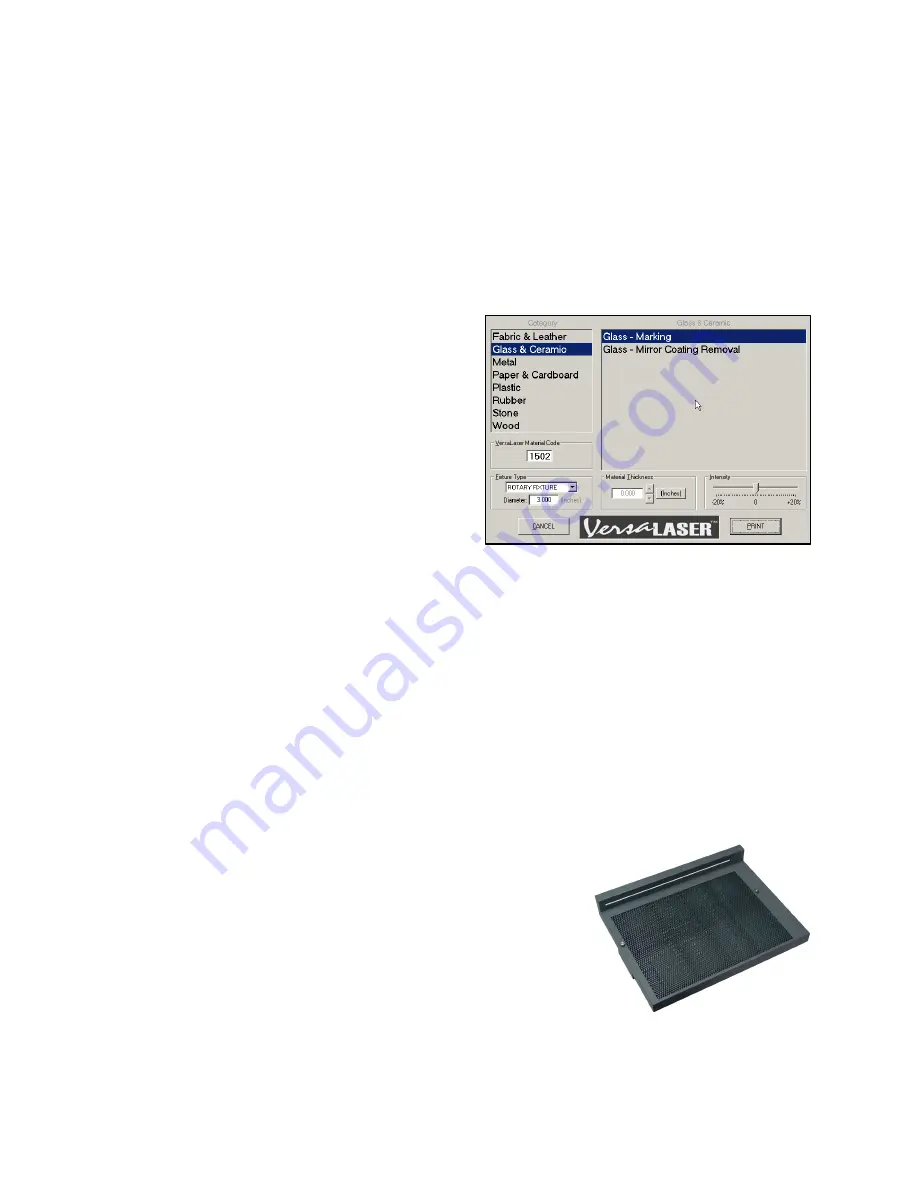
Printing
WARNING:
The
following
steps
are
critical.
Make
sure
that
you
enter
the
correct
information
otherwise
the
VersaLASER
might
not
only
adjust
the
Z
‐
axis
and
scale
the
graphic
incorrectly,
which
can
ruin
your
material,
but
it
can
also
damage
itself
if
the
moving
parts
of
the
X
‐
axis
crash
into
the
CORA.
as
if
you
were
etching
a
flat
object.
When
the
VersaLASER
Settings
dialog
box
pops
up,
choose
your
category
and
type
of
material
as
usual.
In
the
Fixture
section,
select
CORA
from
the
dropdown
list
and
also
type
in
the
diameter
of
the
glass
that
you
measured
earlier
and
click
print.
As
usual,
the
job
will
be
stored
on
your
hard
disk
and
become
available
in
the
VCP
as
the
next
job
ready
to
be
processed.
For
each
glass
that
you
would
like
to
etch
your
graphic
in
a
precise
location,
you
must
follow
each
of
the
steps
from
the
beginning
of
this
section.
If
it
does
not
matter
to
you
if
the
etching
begins
anywhere
around
the
circumference
of
the
glass,
then
simply
load
the
next
glass
and
run
the
job
again
without
having
to
make
any
marks
or
lining
up
the
Red
Dot.
Once
you
have
practiced
using
the
CORA,
you
will
naturally
come
up
with
some
shortcuts
to
save
on
setup
time.
Vector
Cutting
Accessory
(VCA)
The
Vector
Cutting
Accessory,
with
its
honeycomb
design,
assists
with
the
vector
cutting
of
materials
by
minimizing
the
surface
contact
area
of
the
backside
of
the
material.
This
simple
yet
functional
design
also
provides
a
slight
vacuum
for
sheet
stock
to
hold
it
flat
while
cutting,
and
it
assists
with
smoke
removal
by
drawing
it
down
and
underneath
the
material.
Содержание VersaLaser VL-200
Страница 1: ...Models VL 200 VL 300 Safety Installation Operation...
Страница 17: ......


