EN
EN
C -INSTALLATION OF YOUR COOLER.
Electric Connection Rules
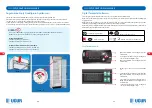
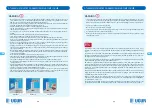
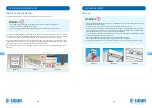
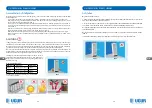
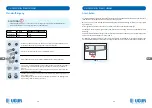
The product will start when you insert the plug into the outlet as shown in picture 10.
The outlet you will use must be grounded. Furthermore, the outlet to be used must have the resistance of at least
10-16 A and be protected with a suitable fuse. Definitely take assistance from our technical service or a competent
electrician with regards to the fuse that should be present on the mains where the outlet is connected.
Mains voltage and frequency must be same with the value written on the label inside your product. If your mains
voltage is extremely below or above the value indicated, definitely supply demanded voltage by using a voltage
regulator. You can get assistance from an expert electrician with this regard.
Do not place your product’s cord onto passageways. This may cause you to get injured and damage your cooler.
(Picture 12)
WARNING!
WARNING!
• It is forbidden to insert the plug into multiple socket and to use extension cord. (Picture 11)
• There is no separate on-off switch on your product.
• Do not contact the cables of your product, which are connected to the mains, to hot surfaces.
Picture 10
Picture 11
Picture 12
D-USING YOUR COOLER
Start-up
• This operating manual applies for various device models. Hardware scopes of the models may vary. There
may be differences in the pictures.
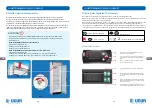
• Clean inside and all accessories of your product before the first start up (see page 23).
• If your product has been shaken so much during the transportation and positioning, wait for one (1) our
without running your cooler. Thus, the compressor oil, which may enter into the system, will return back.
You may damage the compressor if you run it without considering this.
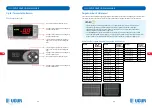
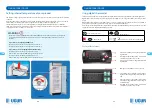
• Insert your product’s plug into an outlet with alternative current of 220-240V/50 Hz only, which has been
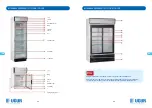
installed according to the regulations. (Picture 13)
• You will hear a slight sound from the compressor when your product is running.
• The fan inside your product will stop when you open the door of your refrigerator.
• If the lights of your product are not on, set the 0-1 switch under the canopy to position 1. (Picture 14-15)
Picture 13
Picture 14
Picture 15
48
49
Содержание USS 60 DTKL
Страница 89: ...RU RU A B C D E F U ur 176 177 http torgoborud com ua torgovoe oborudovanie dlya produktovyh magazinov...
Страница 90: ...RU RU A A 1 220 240 50 2 3 23 1 2 20 24 CD www U ur com tr AEEE WEEE 2002 96 EC U ur WEEE 1 2 3 178 179...
Страница 91: ...RU RU U ur U ur U ur U ur U ur U ur U ur 5 R600a R290 U ur U ur 4 R744 U ur U ur U ur A A 180 181...
Страница 92: ...RU RU B B EN23953 2 U ur So utma A 182 183...
Страница 95: ...RU RU C 10 10 16 12 11 D 23 1 220 240 50 13 0 1 1 14 15 10 11 12 13 14 15 188 189...
Страница 98: ...RU RU E D 18 U ur So utma A 2 U ur 18 194 195...
Страница 99: ...RU RU F U ur U ur U ur U ur U ur U ur D 65 196 197...
Страница 102: ...AR AR PCT PCB CFC R600a R134a R404a R290 10 U UR SO UTMA A 202 203...
Страница 103: ...AR AR 204 205...
Страница 104: ...AR AR 1 50 240 220 2 3 1 2 20 24 WEEE EC 2002 96 WEEE 1 2 3 206 207...
Страница 105: ...AR AR R290 R600a 208 209...
Страница 106: ...AR AR EN23953 2 U ur So utma A 210 211...
Страница 107: ...AR AR 4 5 1 6 15 150 7 51 051 1 51 051 2 8 3 25 16 60 4 30 16 55 5 40 16 45 7 4 5 6 8 212 213...
Страница 108: ...AR AR USS100 USS 60 USS 95 USS 95 DTKL 360 30 Kg USS 60 DTKL 345 20 Kg 7 40 8 4 8x38 YSB DIN NO 7981 2 3 2 9 9 214 215...
Страница 109: ...AR AR 10 61 01 21 11 10 11 12 23 1 13 50 240 220 15 14 1 1 0 13 14 15 216 217...
Страница 112: ...AR AR 81 2 81 222 223...
Страница 113: ...AR AR 20 65 224 225...
Страница 115: ......

