409–10052
SDE Electric Bench Terminator 1490076–2
Rev O
7 of 13
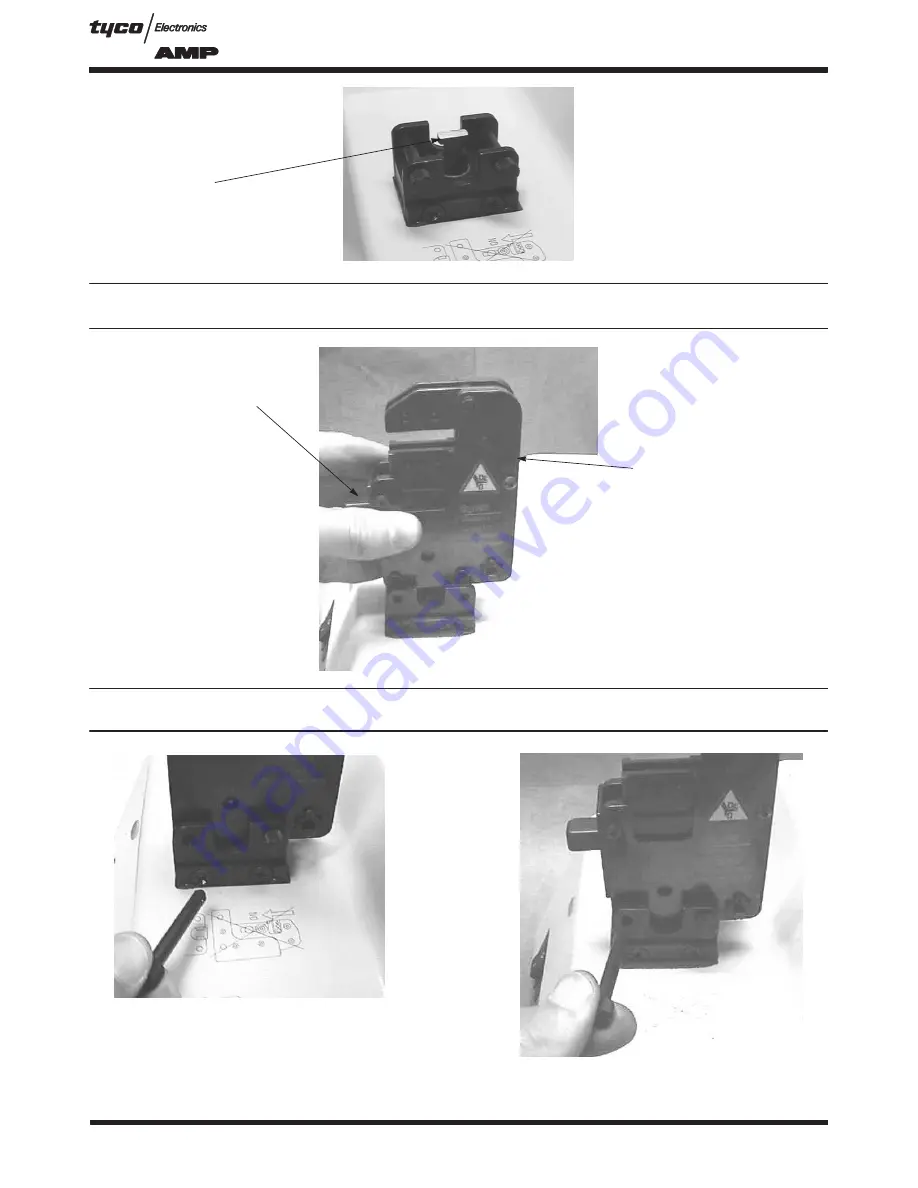
Figure 6
Guide Ram
Figure 7
Tool Head
Control Lever
Figure 8
Страница 1: ...minator 1490076 2 1 INTRODUCTION 3 2 DESCRIPTION 3 3 RECEIVING INSPECTION AND INSTALLATION 6 3 1 Receiving Inspection 6 3 2 Installation 6 4 OPERATION 6 4 1 Installation and Removal of SDE Tool Head 1...
Страница 2: ...age resulting from improper usage void the manufacturer s warranty S Terminator cycle is initiated by means of a safety foot pedal which must be held down during the entire cycle NOTE The safety lock...
Страница 3: ...or severe injury Denotes a condition which may result in product or equipment damage Highlights special or important information Dimensions in this manual are in metric units with U S customary units...
Страница 4: ...076 2 are contained in Figure 2 SPECIFICATIONS Dimensions 390mm X 260mm X 200mm 15 5 in X 10 in X 8 in Weight 13kg 29 lbs Power Requirements 220 Vac 240 Vac 50 60 Hz 110 Vac 120 Vac 60 Hz Power Consum...
Страница 5: ...Switch Position Standard Operation Press One Time for a Full Cycle 180 Jogging Switch Position Vario Operation Adjustment by Knob on Left Side of Terminator Press 2 Times for a Full Cycle Double Thro...
Страница 6: ...4 A for instructions on plugging the cord into the outlet If required secure the terminator to the bench 4 OPERATION To avoid personal injury do not cycle the SDE Electric Bench Terminator without the...
Страница 7: ...409 10052 SDE Electric Bench Terminator 1490076 2 Rev O 7 of 13 Figure 6 Guide Ram Figure 7 Tool Head Control Lever Figure 8...
Страница 8: ...lever to open the head and install the anvil die into the moving jaw of the tool head The die assembly should be oriented so that the chamfers are positioned toward the front of the head assembly and...
Страница 9: ...s are opened retracted with the control lever at the front of the tool head in order to insert the connector to be crimped 4 After the connector is properly positioned in the crimp dies release the co...
Страница 10: ...mp height with a flat bladed screwdriver There are four different crimp heights Refer to Figure 10 Although Tyco Electronics normally recommends Position No 2 adjustment of the manufacturer Positions...
Страница 11: ...k stepwise by means of the double throw switch until tool head can be removed Figure 11 7 MAINTENANCE AND INSPECTION To avoid personal injury ALWAYS disconnect the SDE Electric Bench Terminator before...
Страница 12: ...ekly basis S Lubricate the head assembly used weekly on a monthly basis Wipe the excess grease from the head assembly particularly in the die closure areas The grease transferred from the die closure...
Страница 13: ...409 10052 SDE Electric Bench Terminator 1490076 2 Rev O 13 of 13 9 CIRCUIT DIAGRAM Figure 13 contains the terminator circuit diagram Figure 13 10 REVISION SUMMARY New release per EC 0990 0301 04...