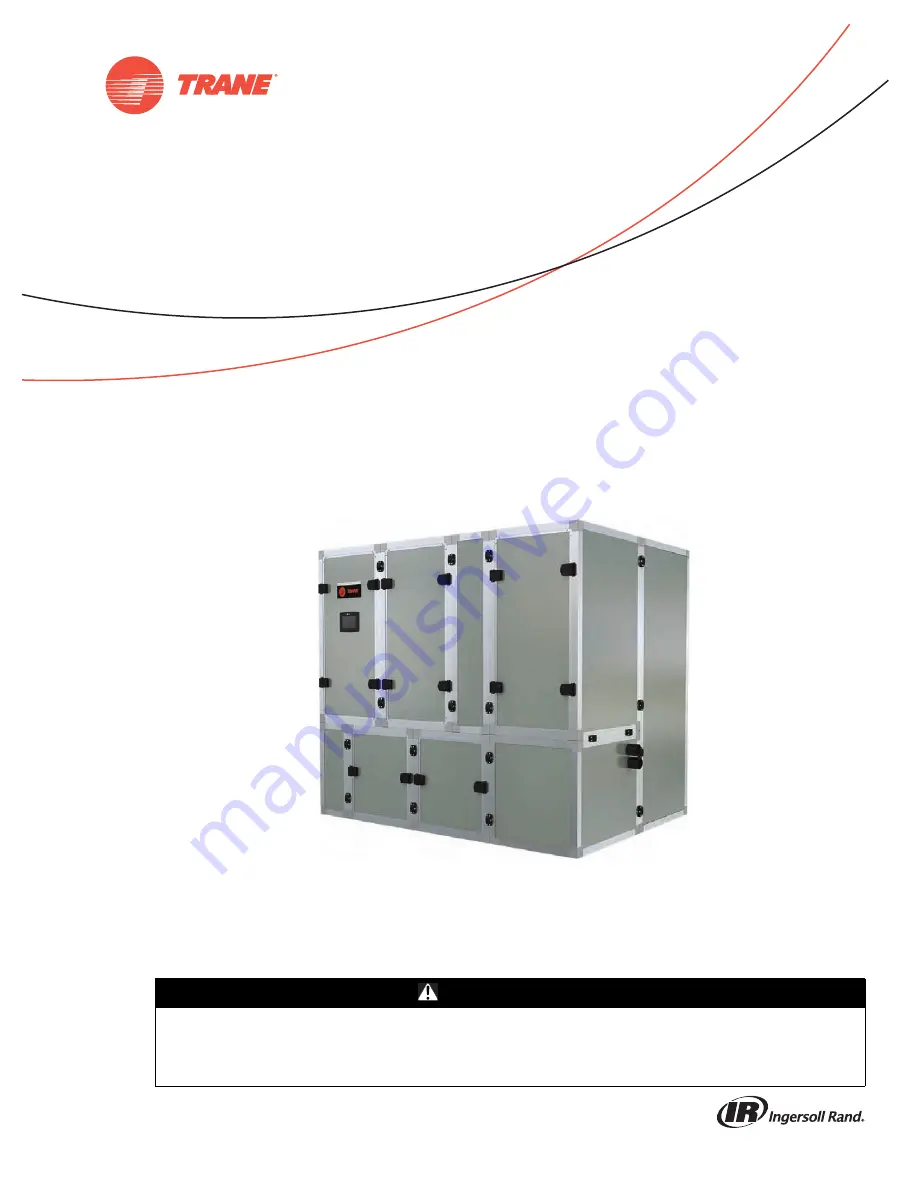
Trane SCWM Series Скачать руководство пользователя страница 1

SAFETY WARNING

Only qualified personnel should install and service the equipment. The installation, starting up, and servicing 
of heating, ventilating, and air-conditioning equipment can be hazardous and requires specific knowledge and 
training. Improperly installed, adjusted or altered equipment by an unqualified person could result in death or 
serious injury. When working on the equipment, observe all precautions in the literature and on the tags, 
stickers, and labels that are attached to the equipment.

Modular Self-Contained

40 to 80 Tons

Installation, Operation,
and Maintenance

SCWM

40 to 80 Tons

PKG-SVX027A-EN

October 2019

Содержание SCWM Series

Страница 1: ...ecific knowledge and training Improperly installed adjusted or altered equipment by an unqualified person could result in death or serious injury When working on the equipment observe all precautions in the literature and on the tags stickers and labels that are attached to the equipment Modular Self Contained 40 to 80 Tons Installation Operation and Maintenance SCWM 40 to 80 Tons PKG SVX027A EN O...

Страница 2: ...on which if not avoided could result in minor or moderate injury It could also be used to alert against unsafe practices NOTICE Indicates a situation that could result in equipment or property damage only accidents WARNING Proper Field Wiring and Grounding Required Failure to follow code could result in death or serious injury All field wiring MUST be performed by qualified personnel Improperly in...

Страница 3: ...al assemblies are tested and meet the requirements as such but is not tested as a completed unit Important Installer is responsible for proper installation and for properly following assembly instructions found in this IOM WARNING Follow EHS Policies Failure to follow instructions below could result in death or serious injury All Ingersoll Rand personnel must follow Ingersoll Rand Environmental He...

Страница 4: ...nts 28 Water Piping Verification 28 Refrigerant System 28 Interconnecting Piping 29 Preliminary Refrigerant Charging 29 Charging and Wiring the Unit 30 Fan Installation 32 Duct Connections 33 Final Installation 34 Electrical Installation 35 TD7 Installation 35 Installation Electrical 36 Unit Wiring Diagrams 36 Supply Power Wiring 36 Voltage Range 36 Voltage Imbalance 36 Phase Monitor 36 Control Po...

Страница 5: ...t 53 All Points Report 53 Starting the Unit 53 Local Auto Stop Value 53 Setpoint Adjustments 54 Compressor Alarms 57 Fan Alarms 57 General Alarms 57 Water Purge 57 Pre Startup 58 Pre Startup Checklist 58 Supply Fan 58 Ductwork 58 Water Cooled Unit Piping 58 Units with Hydronic Heat 58 Electrical 58 Components 58 Startup 59 Final Refrigerant Charge 59 Startup Procedure 59 Operating Programming Inst...

Страница 6: ...7A EN Table of Contents Flow Switch 69 Maintenance Periodic Checklists 69 Monthly Checklist 69 Annual Maintenance 70 Diagnostics 71 Troubleshooting 71 System Checks 71 Operating Procedures 71 Voltage Imbalance 71 ...

Страница 7: ...orbs potentially damaging moisture from air Control box includes a phase monitor to detect phase loss line voltage imbalance and reversal Modular Self Contained Unit Components Modular self contained units are complete HVAC systems used in floor by floor applications A cassette design for easily transporting components into the building even in the most demanding environments Left or right hand po...

Страница 8: ... a microelectronic programmable control system that has been programmed from the factory specifically for the Modular Series self contained application If additional input or output points are needed expansion modules can be used See the Owner s section of this manual for a detailed description of the controls points provided Optional Controls Optional controls include a disconnect switch dirty fi...

Страница 9: ... Connections Digit 18 Unit Water Connections 1 Victaulic 2 Pipe Connections Digit 19 Air Discharge H Horizontal Discharge V Vertical Discharge Digit 20 Electrical Connections L Left Hand Connections R Right Hand Connections Digit 21 Unit Electrical Connections 1 Disconnect Switch 2 Terminal Block Digit 22 Drain Pan G Galvanized Drain Pan S Stainless Steel Drain Pan Digit 23 Industrial Options 0 No...

Страница 10: ...750 13 750 16 500 16 500 19 250 19 250 22 000 22 000 Maximum Design cfm 16 000 16 000 20 000 20 000 24 000 24 000 28 000 28 000 32 000 32 000 Refrigerant Charge lbs R 410A b Circuit A 18 0 18 0 18 0 18 0 18 0 18 0 18 0 18 0 18 0 18 0 Circuit B 18 0 18 0 18 0 18 0 18 0 18 0 18 0 18 0 18 0 18 0 Circuit C x x 18 0 18 0 18 0 18 0 18 0 18 0 18 0 18 0 Circuit D x x x x x x 18 0 18 0 18 0 18 0 Filter Dat...

Страница 11: ... performance is rated at 80F EDB 67F EWB with 85 EWT for water cooled performance and 95F Ambient for air cooled performance 3 EER IEER and AHRI Net Cooling Capacity are tested in accordance with the AHRI 340 360 I P and certified to 10 CFR Part 431 from the US Department of Energy Table 2 SCWM EER IEER ratings continued Tonnage Model No EER IEER VAV AHRI Net Cooling Capacity BTUH Table 3 SCWM wat...

Страница 12: ...S N A SCWMN050 1 15T VS 1 13T FS 1 13T FS N A 60 SCWMN06L 1 10T VS 1 15T FS 1 15T FS N A SCWMN060 1 15T VS 1 15T FS 1 15T FS N A 70 SCWMN07L 1 10T VS 1 13T FS 1 13T FS 1 13T FS SCWMN070 1 15T VS 1 13T FS 1 13T FS 1 13T FS 80 SCWMN08L 1 10T VS 1 15T FS 1 15T FS 1 15T FS SCWMN080 1 15T VS 1 15T FS 1 15T FS 1 15T FS Note VS Variable Speed Compressor FS Fixed Speed Compressor Table 5 Waterside economi...

Страница 13: ...plate Make certain the floor or foundation is level solid and sufficient to support the unit and accessory weights Level or repair the floor before positioning the unit if necessary Allow minimum recommended clearances for routine maintenance and service Allow space at end of the unit for servicing Refer to the unit submittals for dimensions See also the Service Clearances p 20 section in the Dime...

Страница 14: ...damage with the carrier and consignee Stop unpacking the unit Do not remove damaged material from receiving location Take photos of the damage if possible The owner must provide reasonable evidence that the damage did not occur after delivery Repair Notify the appropriate sales representative before arranging unit installation or repair Important Do not repair unit until the damage has been inspec...

Страница 15: ...a Figure 3 Unit dimensions in inches WIDTH HEIGHT 24 16 DEPTH 28 30 Condenser pipe Connections Table 6 Unit dimensions in inches Model Width Height Depth 40 40L 96 84 69 50 50L 96 84 69 60 60L 96 84 69 70 70L 126 84 69 80 80L 126 84 69 ...

Страница 16: ...Dimensional Data 16 PKG SVX027A EN Figure 4 Fan assembly footprint in inches FRONT VIEW 1384 54 49 876 34 50 700 27 56 SIDE VIEW TOP VIEW ...

Страница 17: ...Dimensional Data PKG SVX027A EN 17 Figure 5 Variable speed compressor assembly footprint in inches TOP VIEW FRONT VIEW SIDE VIEW 870 34 26 749 29 50 700 27 56 ...

Страница 18: ...Dimensional Data 18 PKG SVX027A EN Figure 6 Starter cassette assembly footprint in inches 700 27 56 1384 54 49 HEIGHT 876 34 50 WIDTH DEPTH ...

Страница 19: ...9 Figure 7 Evaporator cassette assembly footprint in inches HEIGHT WIDTH DEPTH Table 7 Evaporator cassette dimensions in inches Model Width Height Depth 40 40L 96 84 34 50 50L 96 84 34 60 60L 96 84 34 70 70L 126 84 34 80 80L 126 84 34 ...

Страница 20: ...vice Clearances Figure 8 Condensate drain location 1 5 DIA CONDENSATE DRAIN PIPE 30 7 3 7 Table 8 Service code clearance requirements Side Distance in mm Purpose Front 42 1066 Fans Compressors Condensers Refrigeration access Left Left Hand Starter 42 1066 NEC Code Requirement Starter Panel Right Hand Starter 9 229 Right Left Hand Starter 9 229 Right Hand Starter 42 1066 NEC Code Requirement Starte...

Страница 21: ...365 34 5 x 54 5 x 27 6 1 408 1 308 716 60 Ton 70 x 84 x 95 5 3500 34 5 x 54 5 x 27 6 2 408 0 308 816 70 Ton 70 x 84 x 126 4545 34 5 x 54 5 x 27 6 2 408 1 308 1124 80 Ton 70 x 84 x 126 4545 34 5 x 54 5 x 27 6 2 408 1 308 1124 Table 11 Unit shipping weights Compressor cassette Unit Size Overall Dimensions Unit Weight lbs Compressor Cassette Number Fixed Spd FS Condensing Unit Cassette Number Var Spd...

Страница 22: ...54 5 x 27 6 323 70 Ton 70 x 84 x 126 4545 34 5 x 54 5 x 27 6 388 80 Ton 70 x 84 x 126 4545 34 5 x 54 5 x 27 6 388 Table 13 Unit shipping weights evaporator cassette Tonnage Overall dimensions Unit Weight lbs Evaporator Cassette Total Weight of Cassette exc Economizer 40 Ton 70 x 84 x 95 5 2933 34 5 x 84 x 94 1127 50 Ton 70 x 84 x 95 5 3365 34 5 x 84 x 94 1219 60 Ton 70 x 84 x 95 5 3500 34 5 x 84 x...

Страница 23: ... the isolator option Unit Vibration Isolator Option Isopads Important Vibration isolation is not necessary for the unit since the factory internally isolates the compressors thus creating double isolation Trane strongly recommends that you consult a vibration specialist when considering double isolation In general Trane does not recommend double isolation 1 Cut appropriate sized waffles from the s...

Страница 24: ... WATER IN WATER OUT FAN 3 WATER IN WATER OUT SPACER SPACER EMPTY C FIXED SPEED B VARIABLE SPEED A EVAP DOOR FAN 1 2 STARTER CONTROL Figure 11 Typical layout of units 40 to 80 tons right hand electrical and left hand water 40 TON 50 TON 60 TON 70 80 TON FAN 3 WATER OUT WATER IN SPACER SPACER FIXED SPEED C FIXED SPEED B VARIABLE SPEED A EVAP DOOR FAN 1 2 STARTER CONTROL FAN 3 4 WATER OUT WATER IN SP...

Страница 25: ...hat follow depict a 60 ton right hand electrical left hand water unit Water connections will be always be opposite of the electrical panel For a left hand electrical unit the installation would be reversed 1 Set evaporator into final location 2 Add fixed speed compressor C condensing unit cassette for left hand electrical unit add fixed speed condensing unit C on right side of evaporator cassette ...

Страница 26: ...hanical 26 PKG SVX027A EN 6 Add fans 3 and 4 cassette for left hand electrical unit add this cassette on right side of unit 7 Add fan spacer 8 Add fans 1 2 cassette 9 Add starter control panel cassette 10 Complete unit ...

Страница 27: ... 5 Attach the water supply line to the inlet of the tee strainer and the return line to the outlet connection If the unit has a waterside economizer and or control valves these components will need to be installed at this time 6 If using a cooling tower refer to Figure 15 p 28 for a typical piping circuit from the unit 7 Ensure the water pressure to the unit does not exceed 400 psig 8 It is recomm...

Страница 28: ...anent thermometers to check the waterside balance during startup and routine maintenance checks Also include strainers at each pump inlet and unit Install drain valves at the riser s base to allow drainage points for system flushing during startup and routine maintenance For condenser draining and header removal include a shutoff balancing valve on the entering and leaving waterside pipes drain te...

Страница 29: ...orizontal run of each suction line and insulate Attach vacuum pump and begin evacuation as soon as piping installation is complete This starts system dehydration and helps prevent POE compressor oil contamination This will also indicate large leaks if vacuum does not hold below 400 microns and hold for 2 hours Complete Leak Test and Evacuation for procedures see Refrigerant Leak Test Procedure p 6...

Страница 30: ...ion of the cylinder CAUTION Refrigerant at Freezing Temperature Direct contact with liquid refrigerant could result in minor or moderate injury Avoid contact with skin If working with refrigerant is necessary you MUST wear all Personal Protective Equipment PPE including eye protection safety gloves long sleeves and pants In case of contact treat the injury similar to frostbite Slowly warm the affe...

Страница 31: ... communication wiring Figure 18 Variable speed power and communication wiring Figure 19 Fixed speed compressor power and communication wire routing Figure 20 Compressor communication terminations Note Pluggable connectors are color coded and individually keyed for ease of installation ...

Страница 32: ...s are started Use an accurate scale to measure and record preliminary amount of refrigerant added to each circuit 9 Record charge amount added 10 If total charge is not reached see Final Refrigerant Charge in Startup 11 Verify wiring is complete 12 Install 3D Intelliclamp between all cassettes Fan Installation 1 Place fan and fan spacer cassettes above the condensing unit cassettes 2 Connect fan c...

Страница 33: ...stallallairductsaccordingtothe NationalFire Protection Association standards for the Installation of Air Conditioning and Ventilation Systems other than ResidenceType NFPA 90A andResidence Type WarmAir Heating and Air Conditioning Systems NFPA 90B Figure 24 Fan power and communication wire routing Figure 25 Fan power and communication wiring Figure 26 Fan communication terminations pluggable conne...

Страница 34: ... elbows with splitters or turning vanes to minimize static losses Poorly constructed turning vanes may cause airflow generated noise Align the fan outlet properly with the ductwork to decrease noise levels in the duct and to increase fan performance To complete trunk ductwork to the VAV terminal units refer to the VAV box manuals for specific requirements Check total external static pressures agai...

Страница 35: ...ounted disconnect switch Important With a phase rotation meter verify clockwise rotation at the terminal block using standard electrical safety procedures 6 After clockwise rotation is confirmed remove main power unit and verify the unit is de energized 7 With fixed speed compressor circuit breakers still open and variable speed compressor enable plug still removed close fan fuse holders and re ap...

Страница 36: ...zed Control Power In this example 2 2 imbalance is not acceptable Whenever a voltage imbalance of more than 2 0 exists check the voltage at the unit disconnect switch If the imbalance at the unit disconnect switch does not exceed 2 0 faulty unit wiring is causing the imbalance Conduct a thorough inspection of the unit electrical wiring connections to locate the fault and make any repairs necessary...

Страница 37: ...dard over current protective device rating use the next lower standard rating as the maximum Table 14 Number of compressors MSC SCWMN 04L SCWMN 040 SCWMN 05L SCWMN 050 SCWMN 06L SCWMN 060 SCWMN 07L SCWMN 070 SCWMN 08L SCWMN 080 66cc ZPV0662 1 0 1 0 1 0 1 0 1 0 96cc ZPV0962 0 1 0 1 0 1 0 1 0 1 ZP154KCE TE 0 0 2 2 0 0 3 3 0 0 ZP181KCE TE 1 1 0 0 2 2 0 0 3 3 Table 15 Number of fans unit MSC 40 Ton 50...

Страница 38: ... 375 350 3 51 28 300 1 56 5 6 15 18 6 SCWMN070F 208 230 60 3 187 253 356 9 450 375 3 51 28 300 1 84 5 6 15 18 6 SCWMN07L4 460 60 3 414 506 154 2 175 175 3 23 1 150 1 30 5 6 15 9 SCWMN0704 460 60 3 414 506 191 7 250 200 3 23 1 150 1 60 5 6 15 9 80 SCWMN08LF 208 230 60 3 187 253 335 3 400 375 3 55 77 340 1 56 5 6 15 18 6 SCWMN080F 208 230 60 3 187 253 370 3 450 400 3 55 77 340 1 84 5 6 15 18 6 SCWMN...

Страница 39: ... 300 1 84 5 6 15 18 6 SCWMN07L4 460 60 3 3 23 7 150 1 30 5 6 15 9 SCWMN0704 460 60 3 3 23 7 150 1 60 5 6 15 9 80 SCWMN08LF 208 230 60 3 3 55 77 340 1 56 5 6 15 18 6 SCWMN080F 208 230 60 3 3 55 77 340 1 84 5 6 15 18 6 SCWMN08L4 460 60 3 3 23 72 110 1 30 5 6 15 9 SCWMN0804 460 60 3 3 23 72 110 1 60 5 6 15 9 Table 20 Compressor electrical data 40 to 80 tons Tonnage Model Number Nameplate Voltage Comp...

Страница 40: ...oper pressure measurement See the figure below 2 Connect the pneumatic tubing from the sensing head to the push on tubing connection in the control panel Use a plastic static pickup tubing Do not exceed 250 feet for 1 4 OD tubing or 500 feet for 3 8 OD tubing 80 SCWMN08LF 208 230 60 3 3 55 77 340 1 56 SCWMN080F 208 230 60 3 3 55 77 340 1 84 SCWMN08L4 460 60 3 3 23 72 110 1 30 SCWMN0804 460 60 3 3 ...

Страница 41: ... Job Center Zone Sensor Installation Figure 34 Static pressure tube Figure 35 Static pressure sensor installation Duct Pressure Sensor Static Pressure Head Assembly Connector for 1 4 Tubing Sheet Metal Screws provided by installer NOTE Pleace sensor inlet perpendicular to airflow WARNING Hazardous Voltage w Capacitors Failure to disconnect power and discharge capacitors before servicing could resu...

Страница 42: ...onductor Any resistance greater than 2 5 ohms may cause the control to malfunction due to excessive voltage drop Do not run low voltage control wiring in same conduit with high voltage power wiring Wiring 1 Run wires between the unit control panel and the zone sensor subbase To determine the number of wires required refer to the unit wiring diagrams 2 Connect the wiring to the appropriate terminal...

Страница 43: ...ied modes to prevent over pressurization of the supply air duct work However if for any reason the supply air pressure exceeds the supply air static pressure limit the supply fan VFD is shut down and a manual reset diagnostic sets and displays at the human interface panel Supply Air Temperature Control Unit Sequence of Operation Occupied Supply Air Temperature Control Fan Operation When all alarms...

Страница 44: ...ses 24 VAC power sourced from the Control Power Transformer where the VS compressor enable circuit uses 24 VDC power sourced from the VS compressor drive Inadvertently applying 24 VAC to the VS drive terminal block will permanently damage the drive On the fixed speed compressors if an HPC opens the 24 VAC power that energizes the compressor start contactor is interrupted and the compressor will tu...

Страница 45: ... will shut off The Unit Controller can distinguish between an HPC switch opening and any of the other devices in the circuit opening It will annunciate either High Pressure Cutout Compressor X or Compressor Safety Circuit X Variable Speed Compressor VS The VS compressor does not have an external crankcase heater like FS compressors Instead whenever the VS compressor is off the VS drive applies a v...

Страница 46: ...harge pressure sensor The Unit Controller s TD7 will annunciate a Limit Condition if an FS compressor circuit enters one If the unit is equipped with WRV the Unit Controller can open the valve to allow more flow through the condenser to help mitigate an HPC trip If the VS circuit enters either a High or Low Pressure limit condition the Unit Controller can reduce compressor speed to help mitigate e...

Страница 47: ...he HI See Figure 39 p 48 for detailed piping configuration information With compatible piping configurations the unit can be configured to provide Constant water flow with basic or intermediate piping or Variable water flow head pressure control Constant water flow is for condenser pumping systems that are not capable of unloading the water pumping system Variable water flow maximizes energy savin...

Страница 48: ...urn headers with removable clean out and vent plugs High Duct Temperature Thermostat Anoptionalfactory suppliedtemperaturelimitswitchwith reset element detects the supply air duct temperature This sensor should be field installed downstream from the discharge in the supply air duct If the supply air duct temperature exceeds 240 F 115 6 C the unit shuts down and displays a diagnostic A manual reset...

Страница 49: ...harge suction pressure sensors suction temperature and WRV position control XM30 11 Compressor D discharge suction pressure sensors suction temperature and WRV position control Table 23 Points list Hardware Connection Point Name Point Setup UC600 PI Supply Duct Static Pressure Sensor Honeywell Pressure Sensor BO1 BO2 BO3 BO4 AO1 UI9 Water Side Economizer 2VDC 0 10VDC 100 AO2 UI10 High Duct Temp Cu...

Страница 50: ...ompressor 2 Start Stop Command NO Open Stop NO Closed Run NC not used BO3 Compressor 3 Start Stop Command NO Open Stop NO Closed Run NC not used BO4 Compressor 1 VFD Reset NO Open Normal NO Closed Reset NC not used XM32 4 BO1 Supply Fan 5 Start Stop Command NO Open Stop NO Closed Run NC not used BO2 Supply Fan 6 Start Stop Command NO Open Stop NO Closed Run NC not used BO3 Compressor 4 Start Stop ...

Страница 51: ...Request for On NC Not Used BO2 Unit Alarm Output Command NO Open No Alarm NO Closed Alarm NC not used BO3 VAV Box Drive Open Command NO Open Normal Operation NO Closed Drive Max Valve Position NC Not used BO4 Comp 1 VFD E Stop Alarm Contact NO Open Normal NO Closed Emergency Stop NC Not used XM32 13 BO1 Dirty Filter Alarm NO Open Normal NO Closed Alarm NC Not used BO2 Refrigeration Circuit Failure...

Страница 52: ...nfo tile is included on units with an economizer installed Displays a snapshot of economizer operations and the mode of the economizer G Displays fan status on off duct static pressure setpoint and actual and fan percentage H Compressor 1 is always the lead compressor This tile displays the compressor pressures superheat VFD signal condenser water values if included and operating mode I Tiles for ...

Страница 53: ...ess the All Points report 1 Press the Reports button at the bottom of the screen 2 Press the All Points Report button Use the up and down arrows in the bottom right to scroll through the report Starting the Unit Before starting the unit ensure that All checks are complete Alarms are cleared Compressors that you want to run are made available or locked out Local Auto Stop Value The Local Auto Stop ...

Страница 54: ...tton Or to put the unit in Auto default mode press Release Override Setpoint Adjustments This section details control setpoints that can be modified from factory defaults and how to modify those setpoints Figure 43 Local Auto Stop Figure 44 Stop or release override ...

Страница 55: ...og value named duct static pressure setpoint BAS This value should be set to the desired pressure needed for startup 1 in H20 Duct Static Pressure Safety Lockout Shuts down the unit if the duct static exceeds this setpoint It should be set to the desired pressure needed for startup 2 in H20 Dirty Air Filter DP Generates a diagnostic for a dirty air filter when the differential pressure exceeds the...

Страница 56: ...ompressor has its own condenser purge status value which indicates when the condenser valve is open in the purge mode It can also be used to manually initiate the purge mode for each compressor Off Condenser Water Flow Type On Units with Condenser Valves Only Indicates if the unit is a constant or variable volume flow type unit Even with the condenser water regulating valves installed on each comp...

Страница 57: ...manual reset and there is one alarm reset for these alarms To reset a general alarm 1 Press Reports at the bottom of the display 2 Press Unit Setup 3 In the Setup report press Alarm Reset Use the arrows to scroll through the report if needed 4 Press Reset 5 Press Save Water Purge During the unoccupied mode water cooled units will periodically circulate water through the condensers and waterside ec...

Страница 58: ...e to prevent leaks Verify that all ductwork conforms to NFPA 90A or 90B and all applicable local codes Water Cooled Unit Piping Verify condensate drain water piping drain plugs economizer header strainer pressure transducers and condenser vent plug are installed Units with Hydronic Heat Verify the entering water temperature sensor is installed upstream of the hydronic coil Electrical Verify electr...

Страница 59: ...in the liquid line sight glass Flow should be smooth and even with no bubbles once the system has stabilized WARNING Live Electrical Components Failure to follow all electrical safety precautions when exposed to live electrical components could result in death or serious injury When it is necessary to work with live electrical components have a qualified licensed electrician or other individual wh...

Страница 60: ... EN for available unit operating setpoints and instructions A copy ships with each unit For units with VFD option see installer guide that ships with each VFD Startup Log Unit Unit Location Unit Voltage Evaporator Evaporator fan motor horsepower Evaporator fan motor amps Evaporator fan rpm actual Evaporator system static from test and balance report or actual readings Supply duct static Return duc...

Страница 61: ...rator cassette accessdoor Toreplacethrowawayfilters removethedirty elements and install new filters with the filter s directional arrows pointing toward the fan Verify that no air bypasses the filters See Figure 47 p 61 for proper filter placement Figure 46 Hinge WARNING Hazardous Voltage w Capacitors Failure to disconnect power and discharge capacitors before servicing could result in death or se...

Страница 62: ...ribed in the Installation Mechanical section Preliminary Refrigerant Charging p 29 and final charging is described in the Startup section Final Refrigerant Charge p 59 Refrigerant systems that have been opened must have filter driers replaced and complete leak test and evacuation before recharging Unit is equipped with replaceable filter core option for easy maintenance Refrigerant Leak Test Proce...

Страница 63: ...4 Wrap each refrigerant line component with a wet cloth to keep it cool during brazing Excessive heat can damage the internal components Note 40 45 silver brazing alloy BAg 7 or BAg 28 on dissimilar metals Use BCup 6 brazing alloy on copper to copper joints WARNING Explosion Hazard Failure to follow these instructions could result in death or serious injury or equipment or property only damage Use...

Страница 64: ...e residual moisture or continual or high rate of pressure increase due to hoses Install an electronic micron vacuum gauge in the commonlineaheadofthevacuumpumpshutoffvalve as shown in Figure 48 p 65 94 Close Valves B and C and open Valve A Start vacuum pump After several minutes the gauge reading will indicate the maximum vacuum the pump is capable of pulling Rotary pumps should produce vacuums of...

Страница 65: ...ressure State of equilibrium indicates the true amount of moisture left in the system It indicates that no leaks are present and the system is properly evacuated State of equilibrium indicates the true amount of moisture left in the system It indicates that no leaks but requires further evacuation WARNING Hazardous Chemicals Coil cleaning agents can be either acidic or highly alkalineand canburnse...

Страница 66: ...the cleaning process 7 Allow the unit to dry thoroughly before putting the system back into service 8 Straighten any coil fins that may be damaged with a fin rake 9 Replace all panels and parts and restore electrical power to the unit 10 Ensure that contaminated material does not contact other areas of the equipment or building Properly dispose of all contaminated materials and cleaning solutions ...

Страница 67: ...r flow low temperature difference between inlet and outlet water and abnormally high condensing temperatures To maintain maximum condenser efficiency the condenser must remain free of built up scale and debris Clean the condenser chemically This unit is equipped with removable and cleanable 20 mesh strainer The unit is also equipped with differential pressure sensors that will alert the user when ...

Страница 68: ...luids Mineral Organic Acids Mineral acids have a strong ability to dissolve scale They include hydrochloric acid sulfamic acid nitric acid phosphoric acid and sulfuric acid Under certain conditions hydrochloric acid corrodes stainless steel and nitric acid corrodes copper just like products containing ammonia This is why corrosion inhibitors can be necessary All mineral acids are extremely hazardo...

Страница 69: ...indicate a possible shortage of refrigerant or an obstruction in the liquid lines e g dirty liquid line filter driers 5 Inspect filter driers for leaks flow obstructions or temperature drop across the filter drier A noticeable temperature differential e g 5 F in the liquid line may indicate an obstruction Replace the filter drier if it appears clogged 6 Inspect the optional waterside economizer co...

Страница 70: ...and control contacts Replace badly worn or eroded contacts 5 Inspect the thermal expansion valve sensing bulbs for cleanliness good contact with the suction line and adequate insulation from ambient air 6 Verify the superheat setting is 12 17 F at the compressor When checking operating pressures and conditions establish the following nominal conditions for consistent measurements Leaving air tempe...

Страница 71: ...order for the readings to be useful Voltage Imbalance Voltage imbalance on three phase systems can cause motor overheating and premature failure Maximum allowable imbalance is 2 0 and the readings used to determine it must be measured at the compressor terminals Voltage imbalance is defined as 100 times the sum of the division of the three voltages from the average voltage If for example the three...

Страница 72: ...al state The Pressure sensor is reading either Above or Below its minimum value resulting in a Fault Condition after 3 point updates Sensor has lost its 5VDC Source Signal Verify that the sensor has 5 VDC Sensor is not wired properly Verify wiring to the XM Module XM Module is not communicating Ensure that the XM Module is up and talking to the UC600 System has no charge Verify that the system has...

Страница 73: ...lculated to be in fault and the unit has locked out the compressor from operation Sensor is not wired properly Verify sensor wiring to the XM Module XM Module is not communicating Ensure that the XM Module is up and talking to the UC600 Sensor has Failed Verify if sensor has any resistance on it should be 8 12k of resistance on the thermistor Manual Reset Required once the sensor is in a Normal St...

Страница 74: ...r is not wired properly Verify sensor wiring to the XM Module XM Module is not communicating Ensure that the XM Module is up and talking to the UC600 Discharge Pressure is too high and over the cutout threshold of the High Pressure Switch Verify Condenser Pressure Cutout Switch has failed None alarm clears once sensor is in a normal state Diagnostic Compressor 1 4 Frostat In Alarm Notification Cla...

Страница 75: ...r 1 Failure Reset Diagnostic Compressor 2 4 Safety Circuit Alarm In Alarm Notification Class Action Reason Typical Causes Reset Required HVAC Critical Alarm Compressor will be locked out and prevented from running until this diagnostic is cleared The Compressor Protection module has indicated an alarm or the Compressor is commanded on but does not indicate status VFD has an issue Relay starting co...

Страница 76: ...t required Warning clears when conditions no longer exists Warning Compressor 2 4 FrostatWarning In Alarm Notification Class Action Reason Typical Causes Reset Required HVAC Warning No action is taken on the fixed speed compressor this is an informational warning only The Saturated suction refrigerant temperature is calculated to be below 36 degrees Low Airflow across the coil Malfunctioning TXV D...

Страница 77: ...n a normal state Local Auto Stop In Alarm Notification Class Action Reason Typical Causes Reset Required HVAC Critical Alarm Unit will shut down and be prevented from operating until the sensor is in a normal state The local auto stop value has been commanded to the local stop command Emergency stop binary input is open None alarm clears once sensor is in a normal state Discharge Air Temperature I...

Страница 78: ...ure Failure In Fault Notification Class Action Reason Typical Causes Reset Required HVAC Critical Alarm Unit will shut down and be prevented from running until this sensor is in a normal state The Pressure sensor is reading either above its maximum value or below is minimum value resulting in a Fault Condition after 3 point updates Sensor is not wired properly Verify sensor wiring to the XM Module...

Страница 79: ...solved User must toggle the Alarm Reset value Note These alarms are generated by sensors on the unit not related to the Fans or Compressors and will shut down the unit Table 31 General unit alarming continued Table 32 General unit warning Diagnostic Dirty Air Filter In Alarm Notification Class Action Reason Typical Causes Reset Required HVAC Service Required No action taken other than to notify en...

Страница 80: ...e The Pressure sensor is reading either above is maximum value or below is minimum value resulting in a Fault Condition after 3 point updates Sensor is not wired properly Verify sensor wiring to the XM Module XM Module is not communicating Ensure that the XM Module is up and talking to the UC600 Sensor has Failed Verify if sensor has any resistance on it should be 8 12k of resistance on the thermi...

Страница 81: ... The UC600 Controller has lost communications with the Output XM Module is not communicating Ensure that the XM Module is up and talking to the UC600 Output has gone bad on XM Module None alarm clears once sensor is in a normal state Unit Alarm Output Command In Fault Notification Class Action Reason Typical Causes Reset Required HVAC Service Required Output may not function properly The UC600 Con...

Страница 82: ...es Reset Required HVAC Service Required Output may not function properly The UC600 Controller has lost communications with the Output XM Module is not communicating Ensure that the XM Module is up and talking to the UC600 Output has gone bad on XM Module None alarm clears once sensor is in a normal state Cooling Tower Pump Request In Fault Notification Class Action Reason Typical Causes Reset Requ...

Страница 83: ...The UC600 Controller has lost communications with the Output XM Module is not communicating Ensure that the XM Module is up and talking to the UC600 Output has gone bad on XM Module None alarm clears once sensor is in a normal state Note These Warnings are for informational purposes only and do not shut down or lock out any equipment on the unit Table 32 General unit warning continued ...

Страница 84: ...ldings transport and protect food and perishables and increase industrial productivity and efficiency We are a global business committed to a world of sustainable progress and enduring results ingersollrand com Ingersoll Rand has a policy of continuous product and product data improvement and reserves the right to change design and specifications without notice We are committed to using environmen...

Отзывы: