background image

43

Chapter 4


• 

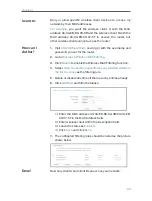
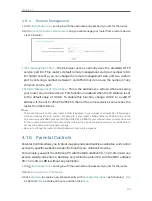
Ignore Ping Packet From WAN Port 

- The default setting is disabled. If enabled, the 

ping packet from the Internet cannot access the router. 

• 

Forbid Ping Packet From LAN Port

 - The default setting is disabled. If enabled, the 

ping packet from LAN cannot access the router. This function can be used to defend 
against some viruses. 

3. Click 

Save

.

4. Click 

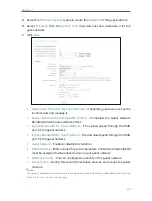
Blocked DoS Host List

 to display the DoS host table by blocking. 

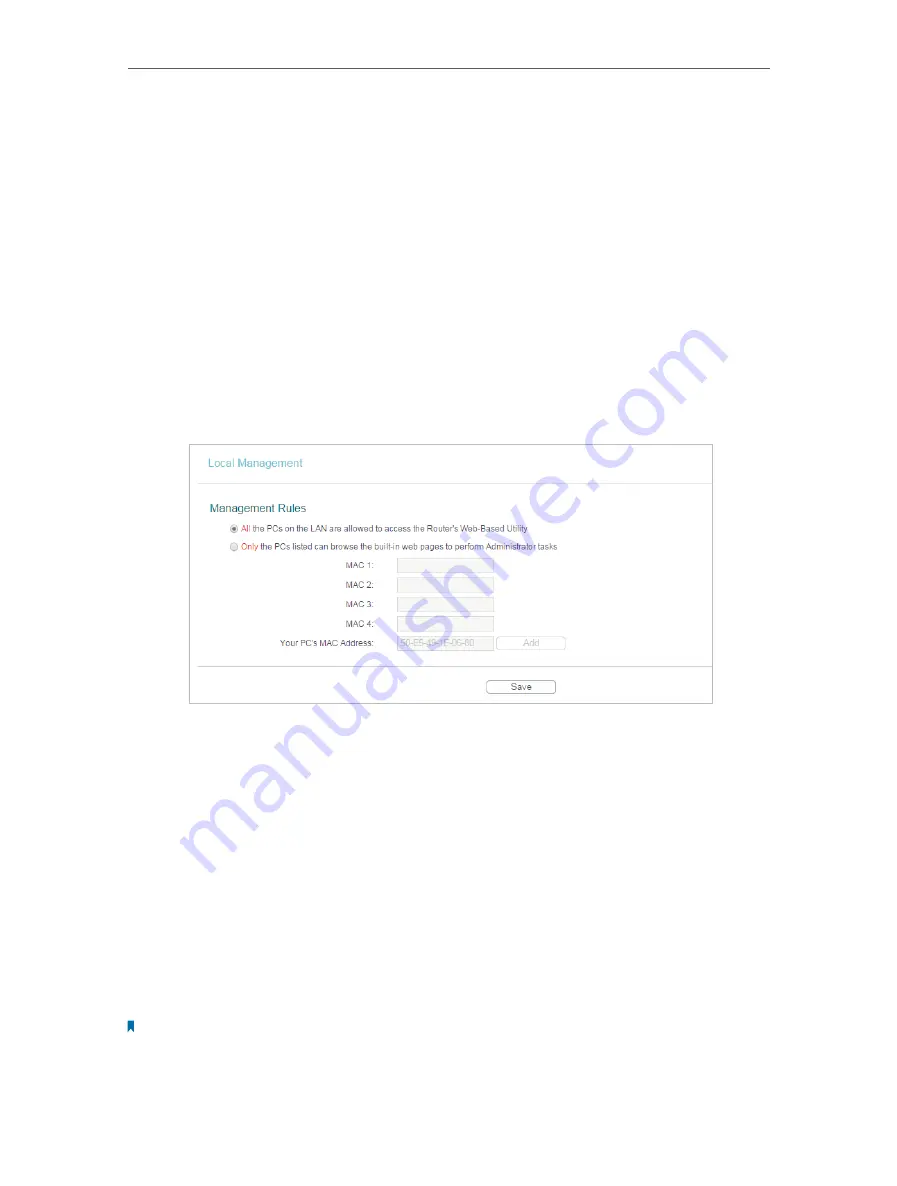
4. 9. 3.  Local Management

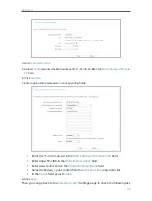
1. Visit 

http://tplinkwifi.net

, and log in with the username and password you set for the router.

2. Go to 

Security 

Local Management

, and you can block computers in LAN from accessing 

the router.


For example

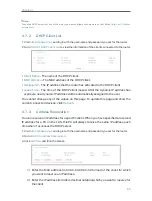
, if you want to allow PCs with specific MAC addresses to access the router’s 

web management page locally from inside the network, please follow the instructions 
below:

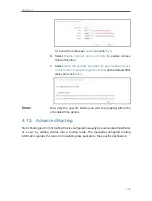
1 )  Select 

Only the PCs listed can browse the built-in web pages to perform 

Administrator tasks

.

2 )  Enter the MAC address of each PC separately. The format of the MAC address 

is XX-XX-XX-XX-XX-XX (X is any hexadecimal digit). Only the PCs with the listed 
MAC addresses can use the password to browse the built-in web pages to 
perform administrator tasks. 

3 )  Click 

Add

, and your PC’s MAC address will also be listed.

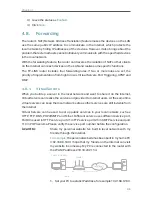
4 )  Click 

Save

Note:

If your PC is blocked but you want to access the router again, press and hold the 

Reset 

button to reset the router to the 

factory defaults.

Содержание TL-WR945N

Страница 1: ...REV1 0 0 1910011989 User Guide 450Mbps Wireless N Router TL WR945N...

Страница 2: ...2 Access Point Mode 9 Chapter 3 Login 11 Chapter 4 Configure the Router in Standard Wireless Router Mode 13 4 1 Status 14 4 2 WPS 15 4 3 Working Mode 17 4 4 Network 17 4 4 1 WAN 17 4 4 2 MAC Clone 25...

Страница 3: ...Table 49 4 13 Bandwidth Control 50 4 13 1 Control Settings 50 4 13 2 Rule List 51 4 14 IP MAC Binding 51 4 14 1 Binding Settings 52 4 14 2 ARP List 53 4 15 Dynamic DNS 53 4 16 IPv6 Support 55 4 16 1 I...

Страница 4: ...ess Statistics 80 5 5 6 Throughput Monitor 81 5 6 DHCP 82 5 6 1 DHCP Settings 82 5 6 2 DHCP Client List 83 5 6 3 Address Reservation 84 5 7 System Tools 84 5 7 1 Time Settings 84 5 7 2 Control the LED...

Страница 5: ...texts on the web page are in teal including the menus items buttons and so on The menu structures to show the path to load the corresponding page For example Advanced Wireless MAC Filtering means the...

Страница 6: ...Chapter 1 Get to Know About Your Router This chapter introduces what the router can do and shows its appearance It contains the following sections Product Overview Panel Layout...

Страница 7: ...red devices Moreover it is simple and convenient to set up and use the TP LINK router due to its intuitive web interface and the powerful Tether app 1 2 Panel Layout 1 2 1 Top View The router s LED is...

Страница 8: ...for about 3 seconds If you have a WPS supported device you can press this button to quickly establish connection between the router and your device and automatically configure wireless security for yo...

Страница 9: ...Chapter 2 Connect to the Internet This chapter contains the following sections Position Your Router Connect the Hardware...

Страница 10: ...dless phones and microwaves 2 2 Connect the Hardware The Router provides two working modes Standard Wireless Router and Access Point You can choose the mode to better suit your network needs and follo...

Страница 11: ...ngs of your smart device and then select the SSID to join the network OR Connections are available Wireless Network Connection TP LINK_XXXX Connect automatically Connect Wi Fi Wi Fi TP LINK_XXXX CHOOS...

Страница 12: ...as been set to a proxy Go to Tools menu Internet Options Connections LAN Settings in the screen that appears cancel the Using Proxy checkbox and click OK to finish it 4 After successfully login follow...

Страница 13: ...r wirelessly by using the SSID network name and password printed on the Information Card 4 Enter http tplinkwifi net in the address bar of a web browser Use admin for password and then click Login Not...

Страница 14: ...10 Chapter 2 7 Enjoy For wireless devices you may have to reconnect to the wireless network if you have customized the SSID wireless name and password during the configuration...

Страница 15: ...Chapter 3 Login This chapter introduces how to log in to the web management page of router...

Страница 16: ...orer Mozilla Firefox or Apple Safari Follow the steps below to log in to your router 1 Set up the TCP IP Protocol in Obtain an IP address automatically mode on your computer 2 Visit http tplinkwifi ne...

Страница 17: ...to configure the various features of the router It contains the following sections Status WPS Working Mode Network Wireless Guest Network DHCP Forwarding Security Parental Controls Access Control Adva...

Страница 18: ...router s hardware LAN This field displays the current settings of the LAN and you can configure them on the Network LAN page MAC address The physical address of the router IP address The LAN IP addre...

Страница 19: ...hem DNS Server The IP addresses of DNS Domain Name System server Traffic Statistics The router s traffic statistics Received Bytes Traffic in bytes received from the WAN port Received Packets Traffic...

Страница 20: ...Connect 3 Within two minutes press the WPS button on your client device 4 A success message will appear on the WPS page if the client device has been successfully added to the router s network Method...

Страница 21: ...i net and log in with the username and password you set for the router 2 Go to Working Mode 3 Select the working mode as needed and click Save 4 4 Network 4 4 1 WAN 1 Visit http tplinkwifi net and log...

Страница 22: ...ally from your ISP Host Name This option specifies the name of the router Get IP with Unicast DHCP A few ISPs DHCP servers do not support the broadcast applications If you cannot get the IP address no...

Страница 23: ...P These fields are case sensitive Confirm Password Enter the Password provided by your ISP again to ensure the password you entered is correct Secondary Connection It s available only for PPPoE connec...

Страница 24: ...ction cannot be terminated although you have specified the Max Idle Time because some applications are visiting the Internet continually in the background If you want to do some advanced configuration...

Страница 25: ...ddress or host name Auth Domain Type in the domain suffix server name based on your location MTU Size The default MTU size is 1480 bytes It is not recommended that you change the default MTU size unle...

Страница 26: ...the Max Idle Time because some applications are visiting the Internet continually in the background L2TP Russia L2TP If your ISP provides L2TP connection please select L2TP Russia L2TP User Name Passw...

Страница 27: ...rnet access disconnects Connect Automatically The connection can be re established automatically when it is down Connect Manually You can click Connect Disconnect to connect disconnect immediately Thi...

Страница 28: ...IP address subnet marsk gateway and DNS also provided by your ISP Internet IP Address Internet DNS The Internet IP address and DNS server address assigned by L2TP server Connection Mode Connect on De...

Страница 29: ...twork MAC Clone 3 Configure the WAN MAC address and click Save WAN MAC Address This field displays the current MAC address of the WAN port If your ISP requires you to register the MAC address please e...

Страница 30: ...dress you must use the new IP address to log in If the new IP address you set is not in the same subnet as the old one the IP address pool in the DHCP Server will be configured automatically but the V...

Страница 31: ...less radio of the router can be enabled or disabled to allow or deny wireless access If enabled the wireless clients will be able to access the router Enable SSID Broadcast If enabled the router will...

Страница 32: ...connect needs password you need to fill the password in this blank 4 5 2 Wireless Security 1 Visit http tplinkwifi net and log in with the username and password you set for the router 2 Go to Wireles...

Страница 33: ...ion type automatically based on the wireless client s capability and request WEP Key Format Hexadecimal and ASCII formats are provided here Hexadecimal format stands for any combination of hexadecimal...

Страница 34: ...AC Filtering 3 Click Enable to enable the Wireless MAC Filtering function 4 Select Allow the stations specified by any enabled entries in the list to access as the filtering rule 5 Delete or disable a...

Страница 35: ...rger than the specified RTS Threshold size the router will send RTS frames to a particular receiving station and negotiate the sending of a data frame The default value is 2346 Fragmentation Threshold...

Страница 36: ...ts Packets received by the wireless client Sent Packets Packets sent by the wireless client Configure The button is used for loading the item to the Wireless MAC Filtering list Allow If the Wireless M...

Страница 37: ...The upload speed through the WAN port for the guest network Ingress Bandwidth For Guest Network The download speed through the WAN port for the guest network Guest Network Enable or disable this func...

Страница 38: ...an IP address for the DHCP Server to start with when assigning IP addresses 192 168 0 100 is the default start address EndIPAddress SpecifyanIPaddressfortheDHCPServertoendwithwhenassigning IP addresse...

Страница 39: ...xpired a new dynamic IP address will be automatically assigned to the user You cannot change any of the values on this page To update this page and show the current connected devices click Refresh 4 7...

Страница 40: ...ver in the local network and want to share it on the Internet Virtual Servers can realize the service and provide it to Internet users At the same time virtual servers can keep the local network safe...

Страница 41: ...he Service Port should not be overlapped Users on the Internet can enter http WAN IP in this example http 218 18 232 154 to visit your personal website Note If you have changed the default Service Por...

Страница 42: ...art with For example 2000 2038 2050 2051 2085 3010 3030 4 8 3 DMZ When a PC is set to be a DMZ Demilitarized Zone host in the local network it is totally exposed to the Internet which can realize the...

Страница 43: ...Internet can freely communicate with each other realizing the seamless connection of the network You may need to enable the UPnP if you want to use applications for multiplayer gaming peer to peer con...

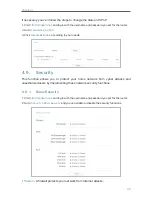
Страница 44: ...o your needs 4 9 Security This function allows you to protect your home network from cyber attacks and unauthorized users by implementing these network security functions 4 9 1 Basic Security 1 Visit...

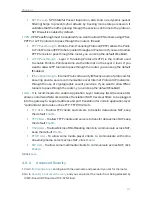
Страница 45: ...t Protocol IP networks through the use of cryptographic security services If you want to allow IPSec tunnels to pass through the router you can keep the default Enabled ALG It is recommended to enable...

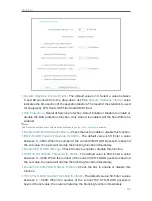
Страница 46: ...isable this function ICMP FLOOD Packets Threshold 5 3600 The default value is 50 Enter a value between 5 3600 When the number of the current ICMP FLOOD packets is beyond the set value the router will...

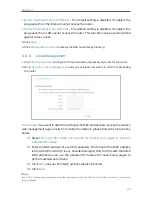
Страница 47: ...k computers in LAN from accessing the router For example if you want to allow PCs with specific MAC addresses to access the router s web management page locally from inside the network please follow t...

Страница 48: ...er your router s WAN IP address in your browser s address bar followed by a colon and the custom port number For example if your router s WAN address is 202 96 12 8 and the port number used is 8080 pl...

Страница 49: ...sponding fields Enter 00 11 22 33 44 AA in the MAC Address of Children s PC field Enter Allow TP LINK in the Website Description field Enter www tp link com in the Allowed Website Name field Select Sc...

Страница 50: ...set for the router 2 Go to Access Control Host and configure the host settings 1 Click Add New 2 Select MAC Address as the mode type Create a unique description e g host_1 for the host in the Host De...

Страница 51: ...e schedule in the Schedule Description field and set the day s and time period 3 Click Save 5 Go to Access Control Rule and add a new access control rule 1 Click Add New 2 Give a name for the rule in...

Страница 52: ...he Router as the default filter policy and click Save Now only the specific host s can visit the target s within the scheduled time period 4 12 Advanced Routing Static Routing is a form of routing tha...

Страница 53: ...the default gateway device that allows the contact between the router and the network or host 3 Select Enabled or Disabled for this entry on the Status drop down list 4 Click Save You can also do the...

Страница 54: ...Bandwidth Control 4 13 1 Control Settings 1 Visit http tplinkwifi net and log in with the username and password you set for the router 2 Go to Bandwidth Control Control Settings 3 Configure the bandwi...

Страница 55: ...is field displays the max and min download bandwidth through the WAN port The default is 0 Enable This field displays the status of the rule Modify Click Modify Delete to edit delete the rule To add a...

Страница 56: ...Click Save To add IP MAC Binding entries 1 Click Add New 2 Select the Bind checkbox 3 Enter the MAC address and IP address 4 Click Save To modify or delete an existing entry 1 Find the desired entry...

Страница 57: ...o the IP MAC Binding list if the IP address of the item has been loaded before Error warning will prompt as well Likewise Load All only loads the items without interference to the IP MAC Binding list...

Страница 58: ...DDNS account 3 Enter the Password for your DDNS account 4 Click Login 5 Click Save Connection Status The status of the DDNS service connection is displayed here Logout Click Logout to log out of the D...

Страница 59: ...r you select is www noip com the following page will appear To set up for DDNS follow these instructions 1 Enter the User Name for your DDNS account 2 Enter the Password for your DDNS account 3 Enter...

Страница 60: ...ction shows the current IPv6 information of the router s WAN port including Connection Type IPv6 Address information IPv6 Default Gateway Primary IPv6 DNS and Secondary IPv6 DNS LAN This section shows...

Страница 61: ...Pv6 address assignment DHCPv6 Connections which use dynamic IPv6 address assignment Static IPv6 Connections which use static IPv6 address assignment PPPoEv6 Connections which use PPPoEV6 that requires...

Страница 62: ...your ISP Secondary IPv6 DNS Enter another DNS IPv6 address in colon hexadecimal notation provided by your ISP Use the following IPv6 DNS Servers If your ISP gives you one or two DNS IPv6 addresses se...

Страница 63: ...s Note If you get Address not found error when you access a web site it is likely that your DNS servers are set up improperly You should contact your ISP to get DNS server addresses Static IPv6 IPv6 A...

Страница 64: ...x by router advertisement DHCPv6 Get the IPv6 address and prefix by DHCPv6 IPv6 Address The IPv6 address assigned by your ISP dynamically Default Gateway Display the default gateway in colon hexadecim...

Страница 65: ...Tunnel 6to4 Address Subnet Mask Default Gateway The IPv4 address subnet mask default gateway assigned in dotted decimal notation Tunnel Address The 6to4 tunnel address created by the device to access...

Страница 66: ...Type The type of IPv6 address prefix Delegated Get the IPv6 address prefix from the ISP automatically and the device will delegate it to the LAN Static Configure the Site Prefix and Site Prefix Length...

Страница 67: ...htSaving 2 Select the start time from the drop down list in the Start field 3 Select the end time from the drop down list in the End field 4 Click Save Note This setting will be used for some time bas...

Страница 68: ...no reply in the specified time the connection is overtime Traceroute Max TTL The max number of hops for a Traceroute connection 3 Click Start to check the connectivity of the Internet 4 The Diagnosti...

Страница 69: ...red as a configuration file in the router You can backup the configuration file in your computer for future use and restore the router to the previous settings from the backup file when needed 1 Visit...

Страница 70: ...automatically Restore the router to its factory defaults system will reboot automatically Update the configuration with the file system will reboot automatically 4 17 7 Password 1 Visit http tplinkwi...

Страница 71: ...the logs of the router Auto Mail Feature Indicates whether the auto mail feature is enabled or not Mail Settings Set the receiving and sending mailbox address server address validation information as...

Страница 72: ...t effective rule Enter the desired time or intervals in the corresponding field Click Save to apply your settings Click Back to return to the previous page Log Type By selecting the log type only logs...

Страница 73: ...al number of bytes received and transmitted by the router Current Packets The total number of packets received and transmitted in the last Packets Statistic interval seconds Bytes The total number of...

Страница 74: ...n Access Point Mode This chapter presents how to configure the various features of the router working as an Access Point This chapter contains the following sections Status WPS Working Mode Network Wi...

Страница 75: ...ter s hardware Wired This field displays the current settings of the LAN and you can configure them on the Network LAN page MAC address The physical address of the router IP address The LAN IP address...

Страница 76: ...last powered on or reset Click Refresh to get the latest status and settings of the router 5 2 WPS WPS Wi Fi Protected Setup can help you to quickly and securely connect to a network This section will...

Страница 77: ...page if the client device has been successfully added to the router s network Method TWO Enter the Client s PIN 1 Keep the WPS Status as Enabled and click Add Device 2 Select Enter the new device s PI...

Страница 78: ...er s Wi Fi network 5 3 Working Mode 1 Visit http tplinkwifi net and log in with the username and password you set for the router 2 Go to Working Mode 3 Select the working mode as needed and click Save...

Страница 79: ...be in the same subnet as your IP address Note If you have changed the IP address you must use the new IP address to login If you select Smart IP DHCP the DHCP server of the router will not start up I...

Страница 80: ...o that all 802 11b g n wireless devices can connect to the router Note If 11bg mixed mode is selected the Channel Width field will turn gray and the value will become 20M and cannot be changed Channel...

Страница 81: ...r AES Wireless Password Enter ASCII or Hexadecimal characters For Hexadecimal the length should be between 8 and 64 characters for ASCII the length should be between 8 and 63 characters Group Key Upda...

Страница 82: ...his WEP key entry is invalid 64 bit Enter 10 hexadecimal digits any combination of 0 9 a f and A F Null key is not permitted or 5 ASCII characters 128 bit Enter 26 hexadecimal digits any combination o...

Страница 83: ...drop down list 4 Click Save and click Back 7 The configured filtering rules should be listed as the picture shows below Now only client A and client B can access your network 5 5 4 Wireless Advanced 1...

Страница 84: ...is recommended DTIM Interval This value determines the interval of the Delivery Traffic Indication Message DTIM A DTIM field is a countdown field informing clients of the next window for listening to...

Страница 85: ...em to the Wireless MAC Filtering list Allow If the Wireless MAC Filtering function is enabled click this button to allow the client to access your network Deny If the Wireless MAC Filtering function i...

Страница 86: ...ur network or else you must configure the computer manually Start IP Address Specify an IP address for the DHCP Server to start with when assigning IP addresses 192 168 0 100 is the default start addr...

Страница 87: ...nkwifi net and log in with the username and password you set for the router 2 Go to DHCP DHCP Client List to view the information of the clients connected to the router Client Name The name of the DHC...

Страница 88: ...router 2 Go to DHCP Address Reservation 3 Click Add New and fill in the blank 1 Enter the MAC address in XX XX XX XX XX XX format of the client for which you want to reserve an IP address 2 Enter the...

Страница 89: ...from the drop down list in the End field 4 Click Save Note This setting will be used for some time based functions such as firewall You must specify your time zone once you log in to the router succes...

Страница 90: ...g tracerouting the domain name is not you might have a name resolution problem In this case ensure that the domain name you are specifying can be resolved by using Domain Name System DNS queries IP Ad...

Страница 91: ...user defined constraints the router will automatically reboot 1 Visit http tplinkwifi net and log in with the username and password you set for the router 2 Go to System Tools Ping Watch Dog Configur...

Страница 92: ...wse to locate the downloaded firmware file and click Upgrade 5 7 6 Factory Defaults 1 Visit http tplinkwifi net and log in with the username and password you set for the router 2 Go to System Tools Fa...

Страница 93: ...inkwifi net and log in with the username and password you set for the router 2 Go to System Tools Reboot and you can restart your router Some settings of the router will take effect only after rebooti...

Страница 94: ...ame and password Note The new username and password must not exceed 15 characters and not include any spacing 3 Click Save 5 7 10 System Log 1 Visit http tplinkwifi net and log in with the username an...

Страница 95: ...word in the following fields User Name Your mail account name filled in the From field The part behind is included Password Your mail account password Confirm The Password Enter the password again to...

Страница 96: ...and validation information set in Mail Settings Clear Log All the logs will be deleted from the router permanently not just from the page Click Next to go to the next page or click Previous to return...

Страница 97: ...ngs press and hold the Reset button for about 7 seconds and then release 2 Visit http tplinkwifi net and enter admin in lowercase as both username and password to log in Note You ll need to reconfigur...

Страница 98: ...94 1 Click Internet Options on the bottom left 2 Click Connections and select Never dial a connection 3 Click LAN settings and deselect the following three options and click OK...

Страница 99: ...to extend my wireless network For example my house covers a large area The wireless coverage of the router I m using the root router is limited I want to use an extended router to extend the wireless...

Страница 100: ...ss of the router is altered 3 Survey the SSID to be bridged 1 Go to Wireless Wireless Settings and click Enable WDS Bridging 2 Click Survey locate the root router s SSID and click Choose Here we take...

Страница 101: ...to DHCP 2 Enter 8 8 8 8 as Primary DNS and click Save Tips 8 8 8 8 is a safe and public DNS server operated by Google Restart the modem and the router 1 Power off your modem and the router and leave t...

Страница 102: ...ion are different Modify the LAN IP address of the router Note Most TP LINK routers use 192 168 0 1 192 168 1 1 as their default LAN IP address it may conflict with the IP range of your existent ADSL...

Страница 103: ...her parameters 5 Click Save 6 Restart the modem and the router Please upgrade the firmware of the router If you ve tried every method above but cannot access the Internet please contact the technical...

Страница 104: ...Services and Applications Services and find and locate Wireless Zero Configuration in the Services list on the right side 5 Right click Wireless Zero Configuration and then select Properties 6 Change...

Страница 105: ...r wireless router Note Wireless Password Network Security Key is case sensitive Windows unable to connect to XXXX Can not join this network Taking longer than usual to connect to this network Check th...

Страница 106: ...roduct names are trademarks or registered trademarks of their respective holders No part of the specifications may be reproduced in any form or by any means or used to make any derivative such as tran...

Страница 107: ...ed radio TV technician for help This device complies with part 15 of the FCC Rules Operation is subject to the following two conditions 1 This device may not cause harmful interference 2 This device m...

Страница 108: ...device Le pr sent appareil est conforme aux CNR d Industrie Canada applicables aux appareils radio exempts de licence L exploitation est autoris e aux deux conditions suivantes 1 l appareil ne doit p...

Страница 109: ...way to completely shut off power is to disconnect the product or the power adapter from the power source Don t disassemble the product or make repairs yourself You run the risk of electric shock and...

Страница 110: ...label Symbol Explanation DC voltage RECYCLING This product bears the selective sorting symbol for Waste electrical and electronic equipment WEEE This means that this product must be handled pursuant...

Отзывы: