41
Chapter 4
4. 7. 5. Set Up a Dynamic DNS Service Account
Most ISPs assign a dynamic IP address to the router and you can use this IP address to
access your router remotely. However, the IP address can change any time and you don’t
know when it changes. In this case, you might apply the DDNS (Dynamic Domain Name
Server) feature on the router to allow you and your friends to access your router and
local servers (FTP, HTTP, etc.) using domain name without checking and remembering
the IP address.
Note:
DDNS does not work if the ISP assigns a private WAN IP address (such as 192.168.1.x) to the router.
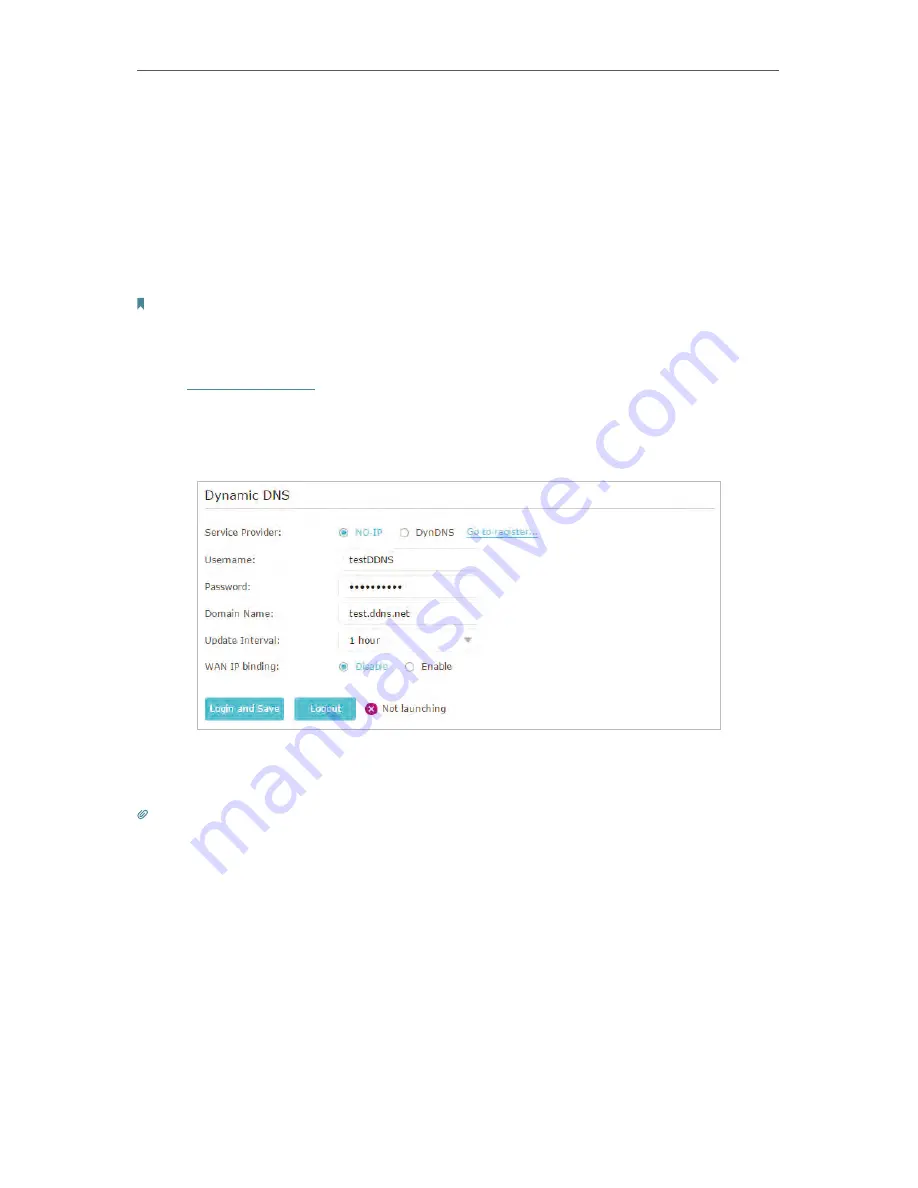
To set up DDNS, please follow the instructions below:
1. Visit
http://tplinkwifi.net
, and log in with password you set for the router.
2. Go to
Advanced
>
Network
>
Dynamic DNS
.
3. Select the DDNS
Service Provider
(NO-IP or DynDNS). If you don’t have a DDNS account,
select a service provider and click
Go to register
.
4. Enter the username, password and domain name of the account.
5. Click
Login and Save
.
Tips:
If you want to use a new DDNS account, please
logout
first, and then login with the new account.
4. 7. 6. Create Static Routes
Static routing is a form of routing that is configured manually by a network administrator
or a user by adding entries into a routing table. The manually-configured routing
information guides the router in forwarding data packets to the specific destination.
Visit multiple networks and servers at the same time.
For example,
in a small office, my PC can surf the Internet through
Router A, but I also want to visit my company’s network. Now I
have a switch and Router B. I connect the devices as shown in
I want to:
Содержание Archer C28HP
Страница 1: ...REV1 0 0 1910011947 User Guide AC900 High Power Wireless Dual Band Router Archer C28HP...
Страница 17: ...Chapter 3 Log in This chapter shows how to log in to the web management page of router...
Страница 40: ...36 Chapter 4 7 The PPTP VPN connection is created and ready to use...
Страница 96: ...92 Chapter 6...
Страница 98: ...94 3 Click LAN settings and deselect the following three options and click OK...


