On-screen Menus
This section describes the setup menu. The screens shown are for the TLP Pro 520M. The
screens for the TLC Pro 521M are similar. Where there are differences, the screens for both
products are shown.
Setup Menu
To access the setup menu, insert a small screwdriver into the recess on the bottom of the front
panel and press the
Menu
button (see
figure 2
H
, on page 6).
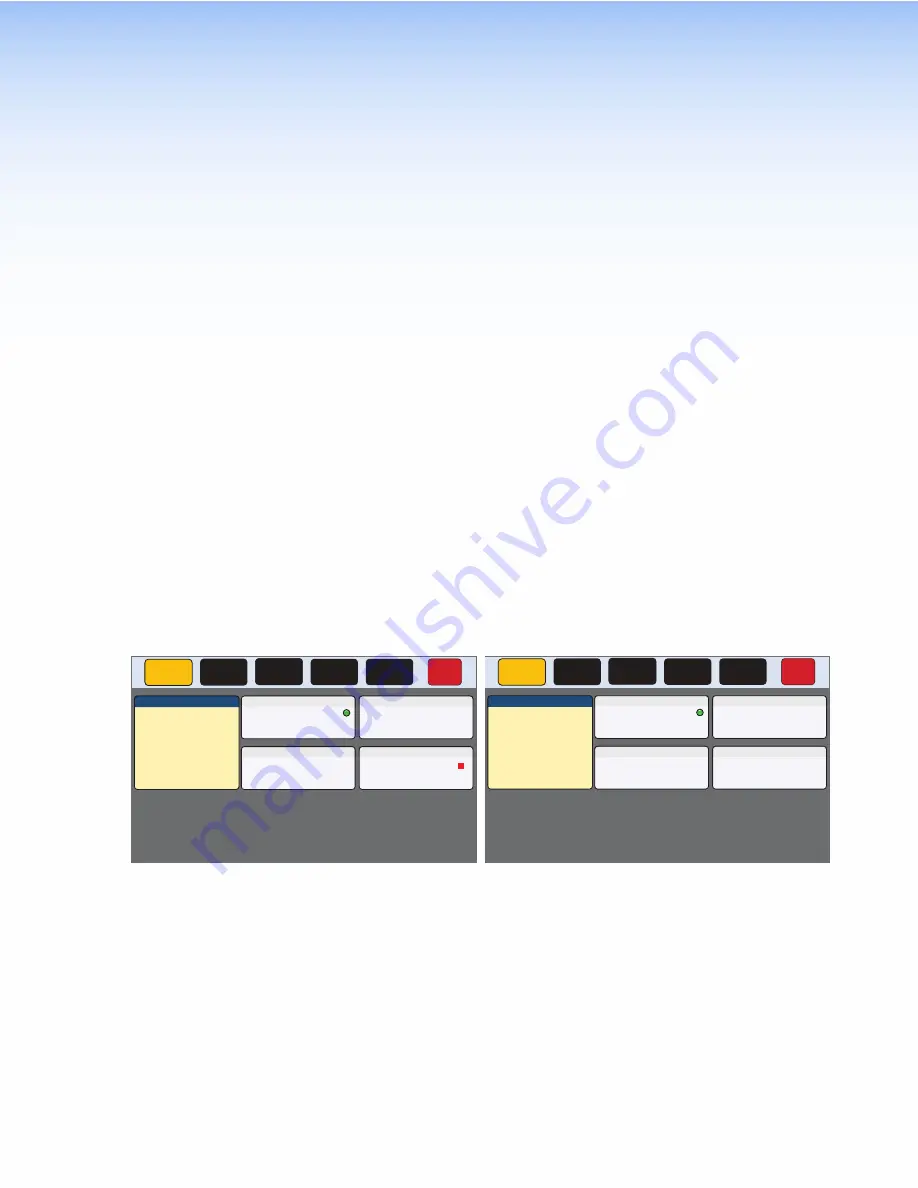
The menu opens at the
Status
screen. There are five different screens (
Status
,
Network
,
Display
,
Audio
, and
Advanced
). These can be selected by pressing the appropriate button
in the navigation panel at the top of the screen. The button for the selected screen is shown in
yellow. The buttons for the remaining screens are shown in black.
There is also a red
Exit
button in the top right corner of the screen. Pressing this button
applies and saves any changes and closes the menu screens.
In this section, the figures will show the screens for the TLP Pro 520M. The screens for the
TLC Pro 521M are similar.
Status Screen
This screen opens by default. To access the
Status
screen from any other part of the Setup
menu, press
Status
in the top menu bar.
There are small differences between the TLP Pro 520M and the TLC Pro 521M, which are
shown in figure 9.
Status
Display
Audio
Advanced
Exit
Network
Info
Network
IP Address:
DHCP:
Host Name:
Off
192.168.254.251
TLP-AB-CD-EF
Display
Resolution:
Project:
Sleep Timer:
800x480
N/A
5 Minutes
Audio
Master Volume:
Master Mute:
Off
99
Advanced
Controller IP:
N/A
Project Size:
N/A
Model:
TLC Pro 520M
Part Number: 60-1185-02
Firmware
Version:
1.00
PoE:
Active
Touchscreen
Version:
2438
Bootloader
Version:
1.03.0000
Status
Display
Audio
Advanced
Exit
Network
Info
Model:
TLC Pro 521M
Part Number: 60-1284-02
Firmware
Version:
1.00
PoE:
Active
Network
IP Address:
DHCP:
Host Name:
Off
192.168.254.252
TLP-AB-CD-EF
Display
Resolution:
Project:
Sleep Timer:
800x480
N/A
5 Minutes
Audio
Master Volume:
Master Mute:
Off
99
Advanced
Project Size:
N/A
Touchscreen
Version:
2438
Bootloader
Version:
1.03.0000
Figure 9.
Status Screen: TLP Pro 520M (left) TLC Pro 521M (right)
The
Status
screen is read-only. The
Info
panel provides basic information about the
touchpanel. Each of the other four panels shows a summary of the information on the
corresponding screen. Pressing any of those four panels opens that screen in exactly the same
way as pressing the buttons in the top navigation panel.
The bubble in the
Network
panel lights green when there is a network connection or a red
square is shown if there is no connection. The bubble in the
Advanced
panel (TLP Pro 520M
only) lights green when a control processor is connected. A red square is shown if no control
processor is connected.
TLP Pro 520M and TLC Pro 521M • On-screen Menus
14
Содержание TLC Pro 521M
Страница 6: ......
Страница 8: ...TLP Pro 520M and TLC Pro 521M Contents viii...


