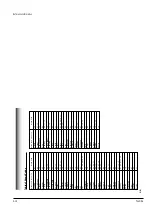
Reference Information
Toshiba
2-7
21
PLAYBACK
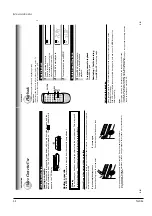
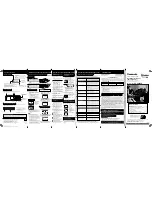
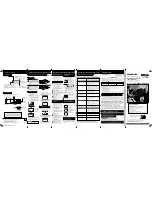
Frame Advance
A picture advances frame by frame.
1
Press
PLA
Y
during still playback.
Each time you press
PLA
Y
, the picture advances one frame.
Slow-motion Picture
The tape runs at 1/7th or 1/15th the normal playback speed.
1
Press
SLOW
during playback.
The tape runs at about 1/7th the normal playback speed.
Each time you press
SLOW
, the speed alternates between 1/7th and
1/15th.
To resume normal playback
Press
PLA
Y
.
Notes
•
The slow-motion picture mode is automatically cancelled after about 5
minutes and returns to normal playback.
•
The slow-motion picture may flicker up and down. This is not a defect in the
unit.
Adjusting the T
racking Manually
If the slow-motion picture is noisy
, hold down one of
CH/TRK
until the
best picture is obtained.
Note
The noise in the slow-motion picture may not be eliminated completely.
To resume
normal
playback
Press
PAUSE
.
20
PLA
YBACK
V
ariable Speed Playbac
k
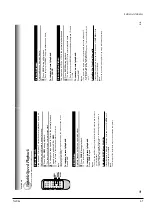
You can play back a tape at various tape speeds.
Picture Search
A tape runs at 5 times or 7 times the normal playback speed so
that you can quickly locate a particular scene.
1
Press
FF
or
REW
during playback.
The tape runs at 5 times the normal playback speed.
2
T
o
change the tape speed to 7 times the normal playback
speed, press and hold
FF
or
REW
.
If you release it, the tape speed returns to 5 times.
Note
If you press
FF
or
REW
during picture search, the mode changes to fast-
forwarding or rewinding.
To resume normal playback
Press
PLA
Y
.
Still Picture
A
picture freezes so that you can watch closer
.
1
Press
P
AUSE
during playback.
The picture freezes.
To resume normal playback
Press
P
AUSE
again.
Notes
•
The still mode is automatically cancelled after about 5 minutes and returns to
normal playback.
•
The still picture may shake if a picture of a fast-moving object or scene is
frozen. This is not a defect in the unit.
Adjusting Still Picture Stability
If the still picture is distorted or flickers, hold down one of
CH/TRK
until
the picture becomes stable.
Note
The distortion of the still picture may not be eliminated completely.
REW
SLO
W
FF PLA
Y
P
A
USE
Содержание W603C
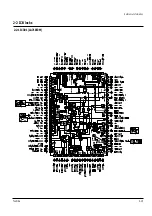
Страница 20: ...Reference Information Toshiba 2 13 2 2 1 IC301 LA71072M 2 2 IC Blocks ...
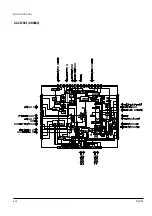
Страница 21: ...Reference Information 2 14 Toshiba 2 2 2 IC501 AN3662 ...
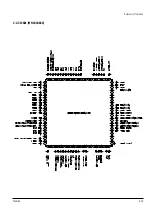
Страница 22: ...Reference Information Toshiba 2 15 2 2 3 IC601 MN101D02X ...
Страница 23: ...Reference Information 2 16 Toshiba MEMO ...
Страница 25: ...Product Specifications 3 2 Toshiba MEMO ...
Страница 56: ...Alignment and Adjustment Toshiba 5 11 Fig 5 21 Main PCB Top View VR501 Location for VR501 ...
Страница 57: ...5 12 Toshiba Alignment and Adjustment MEMO ...
Страница 59: ...Exploded View 6 2 Toshiba 6 1 Packing Assembly A702 A701 A702 Y101 Y102 UT01 ...
Страница 63: ...Exploded View 6 6 Toshiba MEMO ...
Страница 73: ...Replacement Parts List 7 10 Toshiba MEMO ...
Страница 74: ...Toshiba 8 1 8 Block Diagram ...
Страница 75: ...Block Diagram 8 2 Toshiba MEMO ...
Страница 76: ...Toshiba 9 1 9 PCB Diagrams 9 2 9 3 9 3 9 3 9 1 Main 9 2 VFD 9 3 Jack 9 4 Key ...
Страница 77: ...PCB Diagrams 9 2 Toshiba 9 1 Main ...
Страница 78: ...PCB Diagrams Toshiba 9 3 9 2 VFD 9 3 Jack 9 4 Key ...
Страница 79: ...PCB Diagrams 9 4 Toshiba MEMO ...
Страница 82: ...Schematic Diagrams Toshiba 10 3 10 1 S M P S Power ...
Страница 83: ...Schematic Diagrams 10 4 Toshiba IC601 VFD 10 2 Logic ...
Страница 85: ...Schematic Diagrams 10 6 Toshiba 10 3 A V ...
Страница 87: ...Schematic Diagrams 10 8 Toshiba 10 4 Hi Fi MTS ...
Страница 89: ...Schematic Diagrams 10 10 Toshiba 10 5 TM Block Input Ouput ...
Страница 90: ...Schematic Diagrams Toshiba 10 11 10 6 VFD ...
Страница 91: ...Schematic Diagrams 10 12 Toshiba 10 7 Remote Control ...


