36
RemotEye III User Manual – 62330-005
Configuring the RemotEye III via Telnet
The RemotEye III can be configured by establishing a telnet session with the device.
Hardware Setup
Telnet configuration is accomplished through a network link. Follow these steps to setup the RemotEye III for a
telnet session:
Verify network cable connection to NETWORK port of RemotEye III.
Verify active link to LAN or Network.
For further information on the network connection, refer to “Making the Network Connection” on page 18.
Software Setup
The Telnet configuration is accomplished through a TCP/IP network connection. A telnet connection can be
established with RemotEye III by using any Telnet application. Follow these steps to setup the software for Telnet
RemotEye III configuration:
Verify workstation is loaded with Telnet application. If using Windows operating system, “Command Prompt”
application software that is packed with Windows can be used. If a Telnet application is not available or Command
Prompt, download “Tera Term” software from the internet for free.
Note: If using Windows 7 or Vista, make sure that Telnet feature is enabled. By default, Windows 7 and Vista
Operating System have this feature disabled for security reasons. To enable this feature, follow these steps:
1.
Click on “Start”
2.
Go to and click on “Control Panel”
3.
Go to and click on “Programs and Features”
4.
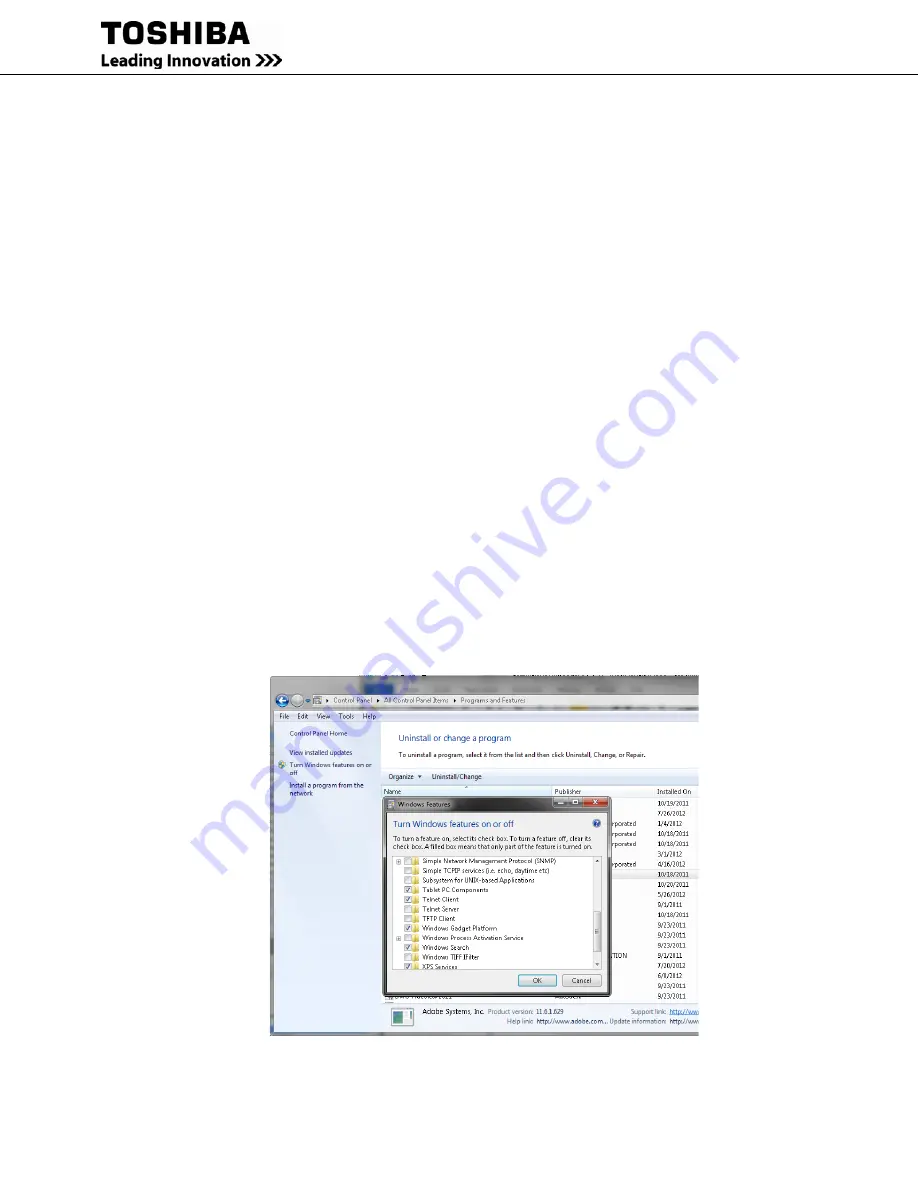
On the left side column, click on “Turn Windows features on or off” (See Figure 28: Enable Telnet Feature
on Windows 7/Vista). Now look for “Telnet Client” and click on the check box to enable. Then click on the
“Ok” button and wait till feature is enabled.
Figure 28: Enable Telnet Feature on Windows 7/Vista
Содержание RemotEye III
Страница 1: ... ...
Страница 117: ...116 RemotEye III User Manual 62330 005 Figure 62 RemotEye Save Log Utility Set Page ...
Страница 166: ......


