background image

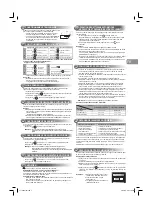
1

Press 

FIX

 : Move the louver in the 

desired vertical direction.

2

Press 

SWING

 : Swing the air 

automatically and press again to stop.

3

For horizontal direction, adjust 
manually.


DANGER

•  Do not install, repair, open or remove the cover. It may expose you to 

dangerous voltages. Ask the dealer or the specialist to do this.

•  Turning off the power supply will not prevent potential electric shock.
•  The appliance shall be installed in accordance with national wiring 

regulation.

•  Means for disconnection from the supply having a contact separation 

of at least 3 mm in all poles must be incorporated in the 

fi

 xed wiring.


WARNING

•  Do not expose your body directly to cool air for a long time.
•  Do not insert your 

fi

 nger or any article into the air inlet/outlet.

•  When an abnormality (burning smell, etc.) occurs, stop the air 

conditioner and disconnect the power supply or turn off the 
breaker.

•  This appliance is not intended for use by persons (including 

children) with reduced physical, sensory or mental capabilities, or 
lack of experience and knowledge, unless they have been given
supervision or instruction concerning use of the appliance by a 
person responsible for their safety.

•  Children should be supervised to ensure that they do not play 

with the appliance.

pp


CAUTION

•  Do not wash the unit with water. It may cause an electric shock.
•   Do not use this air conditioner for other purposes such as 

preserving food, breeding animal, etc.

•   Do not step or put anything on the indoor/outdoor unit. It may 

cause an injury or damage the unit.

•   Do not touch aluminium 

fi

 n because it may cause an injury.

•   Before cleaning the unit, turn off the main switch or the circuit 

breaker.

•   When the unit won’t be used for a long time, turn off the main 

switch or the circuit breaker.

•  It is recommended that maintenance be performed by a specialist 

when the unit has been operated for a long time.

PRECAUTIONS FOR SAFETY

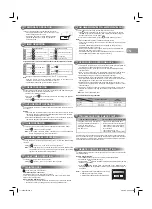
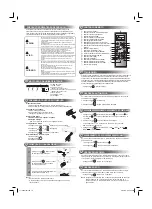
INDOOR UNIT DISPLAY

1

   Hi POWER (Green)

2

   FILTER (Orange)

3

   FAN-ONLY (Orange) 

 (RAS-M07~M16SKCV 

Series)

3

 PRE.DEF 

(DE-FROST) 

(Orange) 

 (RAS-M07~M16SKV 

Series)

4

   TIMER (Yellow)

5

   OPERATION (Green)

6

   RESET button

1

Hi POWER

FILTER

PRE.DEF

TIMER

OPERATION

RESET

1

2

3

4

5

6

PREPARATION BEFORE USE

2

Preparing Filters

  1. Open the air inlet grille and remove the air 

fi

 lters.

 2. 

Attach 

the 

fi

 lters. (see detail in the accessory sheet).

Loading Batteries

  1. Remove the battery cover.
  2. Insert 2 new batteries (AAA type) 
    following the (+) and (–) positions.

Removing the batteries

 1. 

Remove the cover, and take out the batteries.

 2.

 Reattach the cover.

    *  Please dispose of the batteries according to 
   the 

local 

regulation.

Clock Setup

 1. 

Push 

CLOCK 

 by tip of the pencil.

 2. 

Press 

ON

 or 

OFF

: adjust the time.

 3. 

Press 

SET

 : Set the time.

Remote Control Reset

  1. Remove the battery.
 2. 

Press 

.

  3. Insert the battery.

AIRFLOW DIRECTION

  •  Do not move the louver manually by others.
  •  The louver may automation positioning by come operation mode.

Note:

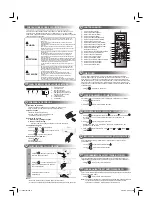
REMOTE CONTROL

4  

PRESET

ONE-TOUCH

QUIET

SWING

TIMER

ON

FILTER

CHK

CLOCK

OFF

CLR

SLEEP

SET

FIX

Hi-POWER ECO

COMFORT

SLEEP

MODE

TEMP

FAN

5
4
3
~

(

&

9

,

"

#

$

%

)

+

-

8

7

6

1

1

   Infrared signal emitter

2

   Start/Stop button

3

   Mode select button (MODE)

4

   Temperature button (TEMP)

5

   Fan speed button (FAN)

6

   Swing louver button (SWING)

7

   Set louver button (FIX)

8

   On timer button (ON)

9

   Off timer button (OFF)

!

   Sleep timer button (SLEEP)

"

   Setup button (SET)

#

   Clear button (CLR)

$

   Memory and Preset button (PRESET)

%

   One Touch button (ONE-TOUCH)

&

   High power button (Hi-POWER)

(

   Economy button (ECO)

)

   Quiet button (QUIET)

~

   Comfort sleep button (COMFORT SLEEP)

+

   Filter reset button (FILTER)

,

   Clock Reset button (CLOCK)

-

   Check button (CHK)

ONE-TOUCH

5

Press the “ONE-TOUCH” button for fully automated operation that is customised 
to the typical consumer preferences in your region of the world. The customised 
settings control temperature air 

fl

 ow strength, air 

fl

 ow direction and other settings 

to provide you alternate contact with “ONE-TOUCH” of the button. If you prefer 
other settings you can select from the many other operating functions of your 
Toshiba unit.

 Press 

ONE-TOUCH

: Start the operation.

AUTOMATIC OPERATION

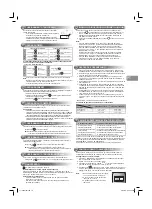
6

To automatically select cooling, heating, or fan only operation

1. Press 

MODE

 : Select A.

2. Press 

TEMP

  : Set the desired temperature.

COOLING / HEATING / FAN ONLY OPERATION

7

1. Press 

: Select Cool 

, Heat 

, or Fan only 

.

  (Fan only is not available for M07, 10, 13, 16SKV series)

2. Press 

: Set the desired temperature.

  Cooling: Min. 17

o

C, Heating: Max. 30

o

C, Fan Only: No temperature indication

3. Press 

: Select AUTO, LOW  , LOW+ 

, MED 

, MED+ 

, or  

 HIGH 

.

DRY OPERATION (COOLING ONLY)

8

For dehumidi

fi

 cation, a moderate cooling performance is controlled 

automatically.

 1. 

Press 

MODE

 : Select Dry  .

 2. 

Press 

TEMP

 : Set the desired temperature.

2

A

C

L

Hi-POWER OPERATION

9

To automatically control room temperature and air

fl

 ow for faster cooling or heating 

operation (except in DRY and FAN ONLY mode)

 Press 

Hi-POWER

: Start and stop the operation.

ECO OPERATION

10

To automatically control room to save energy (except in DRY and FAN ONLY 
mode)

 Press 

ECO

 : Start and stop the operation.

Note:

  Cooling operation; the set temperature will increase automatically 1 degree/

hour for 2 hours (maximum 2 degrees increase). For heating operation the 
set temperature will decrease.

!

MODE

TEMP

FAN

This appliance is not intended for use by person (including children) with reduced 
physical, sensory or metal capabilities, or lack of experience and knowledge, 
unless they have been given supervision or instruction concerning use of the 
appliance by a person responsible for their safety.

1110250160.indb   2

1110250160.indb   2

4/22/09   3:40:45 PM

4/22/09   3:40:45 PM

Содержание RAS-M07SKCV Series

Страница 1: ...EUTSCH PORTUGUÊS POLSKI ČESKY PУCСКИЙ HRVATSKI MAGYAR TÜRKÇE NEDERLANDS ΕΛΛΗΝΙΚΑ SVENSKA SUOMI NORSK DANSK ROMÂNĂ БЪЛГ АРСКИ EESTI LATVISKI SLOVENČINA SLOVENŠČINA 1110250160 indb 1 1110250160 indb 1 4 22 09 3 40 32 PM 4 22 09 3 40 32 PM ...

Страница 2: ...ET Set the time Remote Control Reset 1 Remove the battery 2 Press 3 Insert the battery AIRFLOW DIRECTION 3 Do not move the louver manually by others The louver may automation positioning by come operation mode Note REMOTE CONTROL 4 PRESET ONE TOUCH QUIET SWING TIMER ON FILTER CHK CLOCK OFF CLR SLEEP SET FIX Hi POWER ECO COMFORT SLEEP MODE TEMP FAN 5 4 3 9 8 7 6 1 1 Infrared signal emitter 2 Start ...

Страница 3: ...lated snow Select the position for outdoor unit where it will not be subjected to snow drifts accumulation of leaves or other seasonal debris 7 Some minor cracking sound may occur when unit operating This is normal because the cracking sound may be caused by expansion contraction of plastic Note Item 2 to 6 for Heating model Air conditioner operating conditions Temp Operation Outdoor Temperature R...

Страница 4: ...2 Pulse Ajuste la temperatura deseada Refrigeración Mín 17 C Calefacción Máx 30 C Ventilación No hay indicación de temperatura 3 Pulse Seleccione AUTO LOW LOW MED MED o HIGH FUNCIONAMIENTO DE DESHUMIDIFICACIÓN SÓLO REFRIGERACIÓN 8 Para la deshumidificación el rendimiento de refrigeración moderado se controla automáticamente 1 Pulse MODE Seleccione Deshumidificación 2 Pulse TEMP Ajuste la temperatu...

Страница 5: ...ón recomendado en combinación con el acondicionador de aire 6 Consideración de la nieve acumulada Seleccione para la unidad exterior una ubicación donde no esté sometida a nevadas acumulación de hojas u otros residuos de temporada 7 Puede producirse algún pequeño sonido de rotura durante el funcionamiento de la unidad Esto es normal ya que el sonido de rotura podría causarse por la expansión contr...

Страница 6: ...l n est pas disponible pour les modèles M07 10 13 16SKV 2 Appuyez sur Réglez la température souhaitée Refroidissement Min 17 C Chauffage Max 30 C Ventilation seule Pas d indication de température 3 Appuyez sur Sélectionnez AUTO LOW LOW MED MED ou HIGH DESHUMIDIFICATION REFROIDISSEMENT SEULEMENT 8 Pour la déshumidification un dispositif de refroidissement modéré est contrôlé automatiquement 1 Appuy...

Страница 7: ...ndé d utiliser un autre appareil de chauffage associé au climatiseur 6 Conseils pour éviter les accumulations de neige Choisissez pour l unité extérieure un emplacement qui n est pas exposé aux flocons de neige et à l accumulation de feuilles ou autres débris saisonniers 7 Quelques faibles sons de craquement peuvent se faire entendre pendant le fonctionnement de l appareil Ceci est normal car ces ...

Страница 8: ...n è disponibile per le serie M07 10 13 16SKV 2 Premere Impostare la temperatura desiderata Raffreddamento Min 17 C Riscaldamento Max 30 C Sola ventilazione Indicazione di temperatura assente 3 Premere Selezionare AUTO LOW LOW MED MED o HIGH FUNZIONAMENTOINDEUMIDIFICAZIONE SOLORAFFREDDAMENTO 8 Per la deumidificazione è prevista una moderata azione di raffreddamento con controllo automatico 1 Premer...

Страница 9: ... Per l unità esterna scegliere una posizione in cui essa non risulti soggetta all accumulo di neve foglie o detriti associati alle varie stagioni 7 Durante il funzionamento dell unità potrebbero udirsi dei rumori di urti Tutto ciò è normale in quanto tali rumori sono causati dall espansione contrazione della plastica Nota Procedura da 2 a 6 per il modello per riscaldamento Condizioni di esercizio ...

Страница 10: ...C Heizbetrieb Max 30 C Nur Ventilator Keine Temperaturanzeige 3 Drücken Sie Wählen Sie AUTO LOW LOW MED MED oder HIGH ENTFEUCHTUNGSBETRIEB NUR KÜHLEN 8 Für die Entfeuchtung wird automatisch eine moderate Kühlleistung eingestellt 1 Drücken Sie MODE Wählen Sie den Entfeuchtungsbetrieb 2 Drücken Sie TEMP Stellen Sie die gewünschte Temperatur ein 2 HOCHLEISTUNGSBETRIEB 9 Nur Raumtemperatur Luftstrom u...

Страница 11: ...Außentemperatur sehr niedrig ist empfiehlt es sich zum Heizen nicht allein diese Klimaanlage sondern in Kombination damit ein weiteres Heizgerät zu verwenden 6 Achtung bei Schneeverwehungen Wählen Sie den Standort für das Außengerät so dass die Funktion des Geräts nicht von Schneeverwehungen Laub oder anderen jahreszeitlichen Einflüssen beeinträchtigt wird 7 Kleine knackende Geräusche können währe...

Страница 12: ...entoinha não está disponível para as séries M07 10 13 16SKV 2 Carregue em Regule a temperatura desejada Arrefecimento Mín 17 C Aquecimento Máx 30 C Só ventoinha Sem indicação de temperatura 3 Carregue em Seleccione AUTO LOW LOW MED MED ou HIGH FUNCIONAMENTOASECO APENASARREFECIMENTO 8 Para o processo de desumidificação o arrefecimento moderado é controlado automaticamente 1 Carregue em MODE Selecci...

Страница 13: ...ecomendado em conjunto com o aparelho de ar condicionado 6 Possibilidade de acumulação de neve Seleccione uma localização para a unidade exterior de modo que esta não fique exposta à acumulação de neve folhas ou outros detritos sazonais 7 Pode ocorrer algum som menor quando a unidade está a operar Isto é normal visto que o som pode ser provocado pela expansão contracção do plástico Nota Item 2 a 6...

Страница 14: ...ratury 3 Naciśnij przycisk Wybierz AUTO LOW LOW MED MED lub HIGH OPERACJA OSUSZANIA TYLKO CHŁODZENIE 8 W trakcie operacji Osuszania urządzenie samoczynnie kontroluje funkcję chłodzenia ustawioną na poziom średni 1 Naciśnij przycisk MODE Wybierz Osuszanie 2 Naciśnij przycisk TEMP Ustaw żądaną temperaturę 2 A C L TRYB Hi POWER 9 Urządzenie automatycznie kontroluje temperaturę cyrkulacji powietrza w ...

Страница 15: ...sować również inne urządzenia grzewcze 6 Niebezpieczeństwo związane z nagromadzeniem śniegu Urządzenie zewnętrzne powinno być umieszczone w miejscu w którym nie zagraża mu nawiewanie śniegu gromadzenie się liści lub innych odpadów sezonowych 7 Podczas działania urządzenie mogą dochodzić pewne małoznaczące dźwięki Stanowi to normalne działanie urządzenia spowodowane pracą elementów plastycznych Uwa...

Страница 16: ...vanou teplotu Chlazení Minimálně 17 C Vyhřívání Maximálně 30 C Pouze ventilátor Bez indikace 3 Stiskněte Zvolit AUTO LOW LOW MED MED nebo HIGH PROVOZNÍ REŽIM VYSOUŠENÍ POUZE CHLAZENÍ 8 Pokud chcete zvolit režim vysoušení je přiměřený výkon chlazení řízen automaticky 1 Stiskněte MODE Zvolte vysoušení 2 Stiskněte TEMP Nastavte požadovanou teplotu 2 A C L PROVOZNÍ FUNKCE S VYSOKÝM VÝKONEM 9 Pro autom...

Страница 17: ...inaci s klimatizačním zařízením jiné topné těleso 6 Pozor na nahromaděný sníh Vyberte pro venkovní jednotku takové místo kde nebude vystavena vlivu navátého sněhu nahromaděných listům nebo jiných sezónních nečistot 7 Při provozu zařízení se může ozývat slabé praskání To je normální protože praskání může být způsobováno roztahováním smršťováním plastu Poznámka Položky 2 až 6 platí pro model s vyhří...

Страница 18: ...aкcимyм 30 C Вeнтилиpовaниe Индикaция тeмпepaтypы отcyтcтвyeт 3 Haжмитe кнопкy Для выбоpa знaчeния AUTO LOW LOW MED MED или HIGH PAБOTA B PEЖИME CУШКИ TOЛЬКO OХЛAЖДEHИE 8 Пpи оcyшeнии cpeднee знaчeниe xолодопpоизводитeльноcти контpолиpyeтcя aвтомaтичecки 1 Haжмитe кнопкy MODE Для выбоpa peжимa Cyшкa 2 Haжмитe кнопкy TEMP Для ycтaновки нyжной тeмпepaтypы 2 A C L PAБOTA B PEЖИME Hi POWER 9 Для автом...

Страница 19: ... cпоcобноcть Тeпло отбиpaeтcя cнapyжи и отдaeтcя в помeщeниe Пpи cлишком низкой нapyжной тeмпepaтype иcпользyйтe вмecтe c кондиционepом дpyгоe peкомeндовaнноe нaгpeвaтeльноe обоpyдовaниe 6 Зaмeчaниe отноcитeльно нaкaпливaющeгоcя cнeгa Для нapyжного блокa cлeдyeт выбиpaть тaкоe положeниe в котоpом он нe бyдeт подвepжeн излишним cкоплeниям cнeгa лиcтьeв или дpyгого мycоpa 7 Во время работы блока воз...

Страница 20: ...anje ili Provjetravanje Samo ventilator nije dostupan za serije M07 10 13 16SKV 2 Pritisnite tipku Namjestite željenu temperaturu Hlađenje Min 17 C Grijanje Maks 30 C Provjetravanje Nema prikaza temperature 3 Pritisnite tipku Odaberite postavku AUTO LOW LOW MED MED ili HIGH SUHO HLAĐENJE SAMO HLAĐENJE 8 Za odvlaživanje umjerena snaga hlađenja automatski se kontrolira 1 Pritisnite tipku MODE Odaber...

Страница 21: ...uređajem 6 Nakupljanje snijega Odaberite položaj vanjske jedinice gdje neće biti izložena nanosima snijega nakupljanju lišća i sličnim okolnostima 7 Za vrijeme rada jedinice može se čuti zanemarivo krckanje To je uobičajeno jer takav zvuk može izazvati širenje ili skupljanje plastike Napomena Gornje točke od 2 do 6 odnose se na model s grijanjem Radni uvjeti klimatskog uređaja Uređaj ne radi Hlađe...

Страница 22: ...vagy Ventilátor üzemmód beállítást A ventilátor csak M07 10 13 16SKV ivitelben kapható 2 Nyomja meg a gombot Be lehet állítani a kívánt hőmérsékletet Hűtés Min 17 C Fűtés Max 30 C Ventilátor Nincs hőfokkijelzés 3 Nyomja meg a gombot Válassza az AUTO LOW LOW MED MED vagy beállítást SZÁRÍTÁS MÓD CSAK HŰTÉS 8 Nedvességmentesítésre a rendszer automatikusan szabályoz egy mérsékelt hűtőteljesítményt 1 N...

Страница 23: ...yiségben kibocsátja Ha a külső hőmérséklet túl alacsony javasolt a légkondicionáló mellett egy másik fűtő berendezés használata is 6 A hó lerakódásának figyelembe vétele Olyan helyet kell a kültéri egység számára választani ahová a szél nem hord a havat falevelet vagy egyéb szezonális hulladékot 7 Kisebb pattogó zörej előfordulhat a berendezés működése során amely normális mivel ezt a műanyag hőtá...

Страница 24: ...7 10 13 16SKV serisinde mevcut değildir 2 tuşuna basın İstediğiniz sıcaklığı ayarlayın Soğutma Min 17 C Isıtma Maks 30 C Sadece Fan Sıcaklık gösterilmiyor 3 tuşuna basın AUTO LOW LOW MED MED veya HIGH seçeneklerinden birini seçin KURUTMA ÇALIŞMA SADECE SOĞUTMA 8 Nem alma için yeterli soğutma performansı otomatik olarak kontrol edilir 1 MODE tuşuna basın Kuru seçeneğini seçin 2 TEMP tuşuna basın İs...

Страница 25: ...aşka bir ısınma cihazı kullanılması önerilir 6 Kar birikmesi ile ilgili görüşler Dış üniteyi karın birikmeyeceği yaprakların ve mevsimlere bağlı maddelerin birikemeyecekleri bir yere kurun 7 Ünite çalışırken bazı küçük çatırdama sesleri çıkabilir Plastik maddenin genleşmesi büzülmesi söz konusu olduğundan bu ses gayet normaldir Not Isıtma modeli için madde 2 6 Klima çalışma koşulları Ünite çalışmı...

Страница 26: ...Verwarming Max 30 C Ventilatie Geen temperatuurindicatie 3 Druk op Kies AUTO LOW LOW MED MED of HIGH DROGE WERKING ALLEEN KOELEN 8 Bij ontvochtigen wordt automatisch een lichte koeling doorgevoerd 1 Druk op MODE Kies Droge lucht 2 Druk op TEMP Stel de gewenste temperatuur in 2 HOOGVERMOGENSWERKING 9 Om de kamertemperatuur en de luchtstroom automatisch te controleren voor een snellere koeling of ve...

Страница 27: ... Stel de buitenmodule zo op dat ze niet is blootgesteld aan ophoping van sneeuw bladeren of dergelijke 7 Tijdens het bedrijf van het apparaat is soms een kraakgeluid te horen Dit is normaal daar een kraakgeluid veroorzaakt kan worden door de uitzetting krimping van kunststof Opmerking Punt 2 tot 6 voor verwarmingsmodel Werkingsvoorwaarden Toestel werkt niet Gebrekkige koeling of verwarming De hoof...

Страница 28: ...γία της αφύγρανσης ελέγχεται αυτ ματα και μια λειτoυργία περιo ρισμένης ψύξης 1 Πιέστε MODE Επιλέξτε Αφύγρανση 2 Πιέστε TEMP Ρυθμίστε στην θερμoκρασία πoυ επιθυμείτε 2 A C L ΛΕΙΤOΥΡΓΙΑ Hi POWER 9 Για τον αυτ ματο έλεγχο της θερμοκρασίας του δωματίου και της ροής αέρα για ταχύτερη ψύξη ή θέρμανση εκτ ς απ τις λειτουργίες DRY και FAN ONLY Πιέστε Hi POWER Εκκίνηση και τερματισμ ς της λειτoυργίας ΛΕΙΤ...

Страница 29: ... σε συνδυασμ με τo κλιματιστικ 6 Πρ βλεψη συσσωρευμένoυ χιoνιoύ Eπιλέξτε τη θέση της εξωτερικής μoνάδας σε σημείo πoυ να μην είναι εκτεθειμένη συσσώρευση χιoνιoύ φύλλων ή άλλων υπoλειμμάτων ανάλoγα με την επoχή 7 Ενδέχεται να ακούγεται κάποιος ελαφρύς ήχος τριξίματος ταν λειτουργεί η μονάδα Αυτ είναι φυσιολογικ καθώς το τρίξιμο μπορεί να προκαλείται απ τη διαστολή συστολή του πλαστικού Σημείωση Τα...

Страница 30: ...endast fläkt Enbart fläkt är inte tillänglig för M07 10 13 16SKV serier 2 Tryck på Ställ in önskad temperatur Kyla Min 17 C värme Max 30 C Endast fläkt Ingen temperaturangivelse 3 Tryck på Välj mellan AUTO LOW LOW MED MED eller HIGH AVFUKTNING ENDAST KYLA 8 För avfuktningens skull styrs en lagom kyla automatiskt 1 Tryck på MODE Välj Torr 2 Tryck på TEMP Ställ in önskad temperatur 2 A C L MAXDRIFT ...

Страница 31: ... där den inte utsätts för snö löv eller annat årstidsbetonat skräp 7 Vissa mindre knakande ljud kan uppstå då enheten är igång Detta är normalt eftersom det knakande ljudet kan vara orsakat av utvidgning hopdragning av plast Obs Punkt 2 t o m 6 gäller värmeaggregatsmodeller Driftsmiljö för luftkonditioneringen Aggregatet arbetar inte Kyl eller värmeeffekten är onormalt svag Huvudströmbrytaren är a...

Страница 32: ...en poistoa varten keskitasoinen jäähdytystoiminto säädetään automaattisesti 1 Paina MODE Valitse Kuivatus 2 Paina TEMP Aseta haluamasi lämpötila 2 A C L SUURTEHOKÄYTTÖ 9 Voidaksesi automaattisesti säättää huonelämpötilaa ja ilmanpuhallusta nopeuttaaksesi viilentymistä tai lämpenemistä Ei toimi KUIVATUS ja PELKKÄ PUHALLIN tiloissa Paina Hi POWER Käynnistä ja pysäytä toiminta VIRRANSÄÄSTÖTOIMINTO 10...

Страница 33: ...a suositeltua lämmityslaitetta yhdessä ilmastointilaitteen kanssa 6 Estä lumen kerääntyminen ulkoyksikön päälle Valitse ulkoyksikölle sellainen paikka jossa sen päälle ei pääse kerääntymään lunta puista pudonneita lehtiä tai vastaavaa 7 Laitteesta saattaa kuulua vähäistä natinaa sen toiminnan aikana Tämä on normaalia sillä ääni aiheutuu muovin laajentumisesta tai supistumisesta Huomaa kohdat 2 6 k...

Страница 34: ...07 10 13 og 16SKV 2 Trykk Velg ønsket temperatur Kjøling Min 17 C Oppvarming Maks 30 C Kun vifte Ingen temperaturindikering 3 Trykk Velg AUTO LOW LOW MED MED eller HIGH TØRRDRIFT KUN KJØLING 8 For avfukting styres en moderat kjøleytelse automatisk 1 Trykk MODE Velg Tørr 2 Trykk TEMP Velg ønsket temperatur 2 A C L HØYEFFEKT DRIFT 9 For å kontrollere automatisk temperaturen og luftstrømmen for hurti...

Страница 35: ... utendørsenheten hvor det ikke samler seg opp snø løv eller annet rusk og rask 7 Noen lave smellelyder kan oppstå når enheten er i drift Dette er normalt fordi smellelydene kan oppstå ved ekspansjon kontraksjon av plastikk Merk Punkt 2 til 6 gjelder oppvarmingsmodellen Enhetens driftsbetingelser Enheten virker ikke Kjøling eller oppvarming fungerer unormalt dårlig Hovedstrømsbryteren er slått av S...

Страница 36: ...de temperatur Cooling Min 17o C Heating Max 30o C Fan Only Ingen temperaturindikation 3 Tryk på Vælg AUTO LOW LOW MED MED eller HIGH TØR DRIFT KUN AFKØLING 8 For affugtning Moderat afkøling kontrolleres automatisk 1 Tryk på MODE Vælg Dry 2 Tryk på TEMP Indstil den ønskede temperatur 2 A C L HI POWER FUNKTION 9 Til automatisk kontrol af rummets temperatur og lufttrykket for hurtigere afkøling og op...

Страница 37: ...drørende sneansamlinger Vælg en placering til den udendørs enhed hvor den ikke udsættes for snefygning nedfaldne blade eller andet årstidsbetonet nedfald 7 Der kan forekomme en lav knaselyd når enheden anvendes Dette er normalt idet knaselyden kan være forårsaget af udvidelse sammentrækning af plastik Bemærk Punkt 2 til 6 for opvarmningsmodellen Klimaanlæggets anvendelsesvilkår Enheden virker ikke...

Страница 38: ...ARE şi DOAR VENTILATOR Se apasă pe ECO se iniţiază şi se opreşte modul de funcţionare respectiv Observaţie Modul de răcire temperatura stabilită va creşte automat cu un grad oră timp de 2 ore creştere de maximum 2 grade În modul de încălzire temperatura stabilită va scădea Pregătirea filtrelor 1 Se deschide grila de admisie a aerului şi se scot filtrele de aer 2 Se fixează filtrele vezi detaliile ...

Страница 39: ...i aparatului se pot auzi pocnete slabe Aceste sunete nu indică o defecţiune deoarece pot fi cauzate de dilatarea contractarea plasticului Observaţie Punctele 2 6 sunt valabile pentru modelele cu încălzire Condiţiile de funcţionare a aparatului de aer condiţionat Aparatul nu funcţionează Răcireasauîncălzireaseefectueazăanormaldelent Întrerupătorul principal este decuplat Disjunctorul este activat p...

Страница 40: ... ОТОПЛЕНИЕ РЕЖИМ ВЕНТИЛИРАНЕ 7 1 Натиснете изберете Cool Heat или Fan only Функция само вентилатор не е на разположение в серията M07 10 13 16SKV 2 Натиснете настройте желаната температура Cooling мин 17o C Heating макс 30o C Fan Only няма индикация за температурата 3 Натиснете Изберете AUTO LOW LOW MED MED sau HIGH РЕЖИМ НА МЕКО ИЗСУШАВАНЕ САМО ОХЛАЖДАНЕ 8 За изсушаване режимът на умерено охлажда...

Страница 41: ...прозорци или врати Входният изходният отвор за въздух на външната част е блокирал Скоростта на вентилатора е твърде ниска Режимът на работа е ВЕНТИЛАТОР или МЕКО ИЗСУШАВАНЕ ОТСТРАНЯВАНЕ НА ПРОБЛЕМИ ТОЧКА НА ПРОВЕРКА 21 ДИСТАНЦИОННО УПРАВЛЕНИЕ A B ИЗБОР 22 За да използвате дистанционното управление за всяка вътрешна част в случай че има монтирани 2 климатика близо един до друг Дистанционно управлен...

Страница 42: ...suurendatud võimsus SÄÄSTUREŽIIM 10 Säästurežiim on suunatud energia säästmisele välja arvatud kuivatamise ja ainult ventilaatori režiimis Süsteemi käivitamiseks ja seiskamiseks vajuta nuppu ECO Märkus Jahutusrežiimis langeb seatud temperatuur kiirusel 1 kraad tunnis 2 tunni jooksul maksimaalselt 2 C langus soojendusrežiimis temperatuur suureneb Filtrite ettevalmistamine 1 Avage õhu sissevooluvõre...

Страница 43: ...s kogunenud lume kohta valige välisseadmele koht kus see ei jää lume alla ei kogune peale lehti ega muud aastaajale iseloomulikku prahti 7 Võib kostuda mõningast praksumist kui seade töötab See on normaalne sest praksuvat heli võib põhjustada plastiku paisumine kokkutõmbumine Märkus Punktid 2 6 on küttemudeli jaoks Õhukonditsioneeri töötingimused Seade ei tööta Jahutus või soojendus on ebatavalise...

Страница 44: ... darba režīmu Piezīme Dzesēšanas režīmā iestatītā temperatūra 2 stundu laikā automātiski tiek paaugstināta par 1 grādu stundā maksimālais temperatūras paaugstinājums 2 grādi Sildīšanas režīmā iestatītā temperatūra tiek samazināta 1 Hi POWER zaļš 2 Indikators FILTER oranžs 3 FAN ONLY oranžs RAS M07 M16SKCV Series 3 Indikators PRE DEF DE FROST oranžs RAS M07 M16SKV Series 4 Indikators TIMER dzeltens...

Страница 45: ...aisa kondicionētāju ON 2 Pavērsiet tālvadības pulti pret iekštelpas agregātu 3 Izmantojot zīmuļa galu turiet nospiestu tālvadības pults pogu CHK Displejā ir redzams rādījums 00 4 Turot nospiestu pogu MODE nospiediet pogu CHK Displejā redzams rādījums B rādījums 00 nodziest un gaisa kondicionētājs izslēdzas OFF Tālvadības pults B iestatījums ir saglabāts atmiņā BPiezīme 1 Atkārtojiet iepriekš aprak...

Страница 46: ...ustenie a zastavenie chodu EKONOMICKÝ CHOD 10 Na automatické udržiavanie izbovej teploty pri šetrení energie s výnimkou režimu VYSUŠOVANIE DRY alebo LEN VENTILÁTOR FAN ONLY Stlacte ECO Spustenie a zastavenie chodu Poznámka Ochladzovanie nastavená teplota sa automaticky zvýši o 1 stupen hod pocas 2 hodín maximálne zvýšenie o 2 stupne V prípade ohrievanie sa nastavená teplota zníži Príprava filtrov ...

Страница 47: ...sa pri ňom nehromadil sneh lístie alebo iné predmety počas jednotlivých ročných období 7 Pri chode zariadenia môže byť počuť mierne praskanie Je to normálne lebo praskanie môže byť spôsobené rozťahovaním sťahovaním plastu Poznámka Položka 2 až 6 pri modeli s kúrením Prevádzkové podmienky klimatizácie Zariadenie nefunguje Ochladzovanie alebo ohrievanie je mimoriadne slabé Hlavný vypínač je vypnutý ...

Страница 48: ... sam ni na razpolago 2 Pritisnite na Nastavite želeno temperaturo Cooling Min 17o C Heating Max 30o C Fan Only Brez temperaturne oznake 3 Pritisnite na Izberite AUTO LOW LOW MED MED ali HIGH SUŠENJE SAMO HLAJENJE 8 Za odpravo vlage se zmerno hlajenje uravnava samodejno 1 Pritisnite na MODE Izberite Dry Sušenje 2 Pritisnite na TEMP Nastavite želeno temperaturo 2 A C L DELOVANJE Z VISOKO MOČJO 10 TZ...

Страница 49: ...mba Točke 2 do 6 za model z ogrevanjem Pogoji delovanja klimatske naprave Enota ne deluje Hlajenje ali segrevanje je nenavadno šibko Glavni vklopni gumb je izključen Omrežno stikalo je nastavljeno za prekinitev električnega napajanja Prekinitev električnega toka Timer je vklopljen Filtri so prašni Temperatura ni bila pravilno nastavljena Okna ali vrata so odprta Zračni vhodi ali izhodi zunanje eno...

Страница 50: ...MEMO 1110250160 indb 50 1110250160 indb 50 4 22 09 3 47 04 PM 4 22 09 3 47 04 PM ...

Страница 51: ...MEMO 1110250160 indb 51 1110250160 indb 51 4 22 09 3 47 09 PM 4 22 09 3 47 09 PM ...

Страница 52: ...1110250160 indb 52 1110250160 indb 52 4 22 09 3 47 15 PM 4 22 09 3 47 15 PM ...

Отзывы: