2.3 Power Supply Troubleshooting
2 Troubleshooting Procedures
Procedure 3
Connection Check
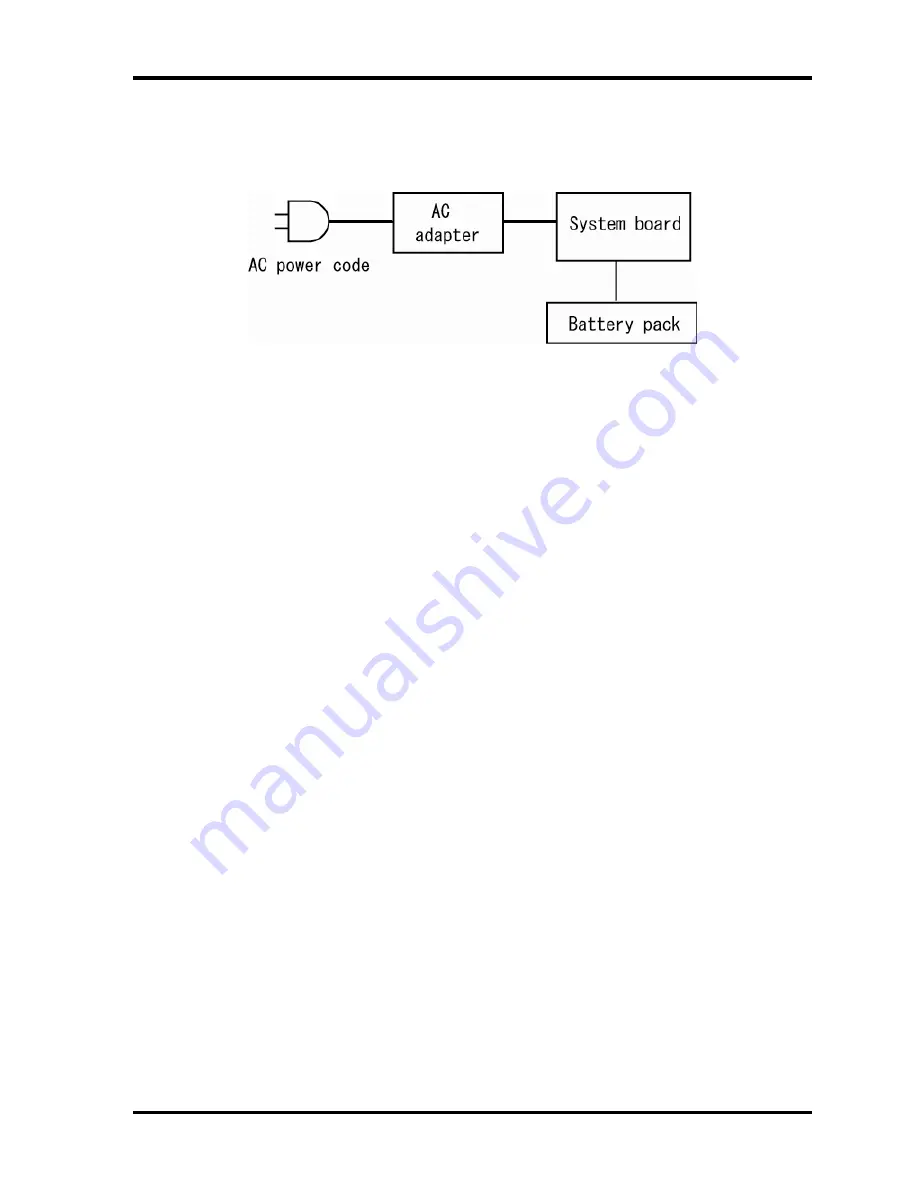
The power supply wiring diagram is shown below:
Any of the connectors may be disconnected. Perform Check 1.
Check 1 Disconnect the AC power cord from the wall outlet. Check the power cable for
breaks. If the power cord is damaged, connect a new AC power cord. If there is
no damage, go to Check 2.
Check 2 Connect a new AC adaptor or AC power cord.
•
If the DC IN icon does not light, go to Procedure 5.
•
If the battery icon does not light, go to Check 3.
Check 3 Make sure the battery pack is installed in the computer correctly. If the battery is
properly installed and the battery icon still does not light, go to Procedure 4.
Procedure 4
Charge Check
The power supply may not charge the battery pack. Perform the following procedures:
Check 1 Make sure the AC adaptor and AC power cord are firmly plugged into the DC IN
socket and the wall outlet.
Check 2 Make sure the battery is properly installed. If the battery is properly installed, go
to Check 3.
Check 3 The battery pack may be completely discharged. Wait a few minutes to charge the
battery pack. If the battery pack is still not charged, go to Check 4.
Check 4 The battery’s temperature is too hot or cold. Return the temperature to a normal
operating condition. If the battery pack still is not charged, go to Check 5.
Check 5 Replace the battery pack with a new one. If the battery pack still is not charged,
go to Procedure 5.
PORTEGE S100 Maintenance Manual (960-508)
2-13
Содержание Portege S100 Series
Страница 1: ...Toshiba Personal Computer PORTEGE S100 Maintenance Manual TOSHIBA CORPORATION File Number 960 508 ...
Страница 10: ...x PORTEGE S100 Maintenance Manual 960 508 ...
Страница 11: ...Chapter 1 Hardware Overview ...
Страница 12: ...1 Hardware Overview 1 ii PORTEGE S100 Maintenance Manual 960 508 ...
Страница 25: ...1 2 2 5 inch Hard Disk Drive 1 Hardware Overview PORTEGE S100 Maintenance Manual 960 508 1 11 ...
Страница 36: ...Chapter 2 Troubleshooting Procedures ...
Страница 37: ...2 Troubleshooting Procedures 2 ii PORTEGE S100 Maintenance Manual 960 508 ...
Страница 41: ...2 Troubleshooting Procedures 2 vi PORTEGE S100 Maintenance Manual 960 508 ...
Страница 92: ...Chapter 3 Tests and Diagnostics ...
Страница 93: ...3 Tests and Diagnostics 3 3 ii PORTEGE S100 Maintenance Manual 960 508 ...
Страница 116: ...3 4 Setting of the hardware configuration 3 Tests and Diagnostics PORTEGE S100 Maintenance Manual 960 508 3 19 ...
Страница 199: ...3 31 SETUP 3 Tests and Diagnostics PORTEGE S100 Maintenance Manual 960 508 3 101 ...
Страница 212: ...3 Tests and Diagnostics 3 31 SETUP 3 114 PORTEGE S100 Maintenance Manual 960 508 ...
Страница 213: ...Chapter 4 Replacement Procedures ...
Страница 214: ...4 Replacement Procedures 4 ii PORTEGE S100 Maintenance Manual 960 508 ...
Страница 218: ...4 Replacement Procedures 4 vi PORTEGE S100 Maintenance Manual 960 508 ...
Страница 310: ...4 Replacement Procedure 4 29 Fluorescent Lamp 4 92 PORTEGE S100 Maintenance Manual 960 508 ...
Страница 311: ...Appendices ...
Страница 312: ...Appendices App ii PORTEGE S100 Maintenance Manual 960 508 ...
Страница 318: ...Appendices App viii PORTEGE S100 Maintenance Manual 960 508 ...
Страница 324: ...Appendices Appendix A Handling the LCD Module A 6 PORTEGE S100 Maintenance Manual 960 508 ...
Страница 330: ...Appendices Appendix B Board Layout B 6 PORTEGE S100 Maintenance Manual 960 508 ...
Страница 356: ...Appendices Appendix C Pin Assignments C 26 PORTEGE S100 Maintenance Manual 960 508 ...
Страница 366: ...Appendices Appendix E Key Layout E 2 PORTEGE S100 Maintenance Manual 960 508 ...
Страница 368: ...Appendices Appendix F Wiring diagrams F 2 PORTEGE S100 Maintenance Manual 960 508 ...
Страница 370: ...Appendices Appendix G BIOS rewrite procedures G 2 PORTEGE S100 Maintenance Manual 960 508 ...
Страница 372: ...Appendices Appendix H EC KBC rewrite procedures H 2 PORTEGE S100 Maintenance Manual 960 508 ...
Страница 374: ...Appendices Appendix I Reliability I 2 PORTEGE S100 Maintenance Manual 960 508 ...


