background image

Diagnostic Aids

3-31

e-STUDIO 16P

PPDS Active/Inactive 

If PPDS is active, the following user default printer settings are 

S is active, the following user default printer settings are 

changed: 

PCL and PS SmartSwitch settings for each port are turned off. 

Printer Language is changed to PPDS emulation. 

If PPDS is inactive, the following user default printer settings are 
changed: 

PCL and PS SmartSwitch settings for each port are turned on. 

Printer Language is changed to PCL 5 emulation. 

Note:  PPDS can be activated using the PJL LPPDS command. 

be activated using the PJL LPPDS command. 

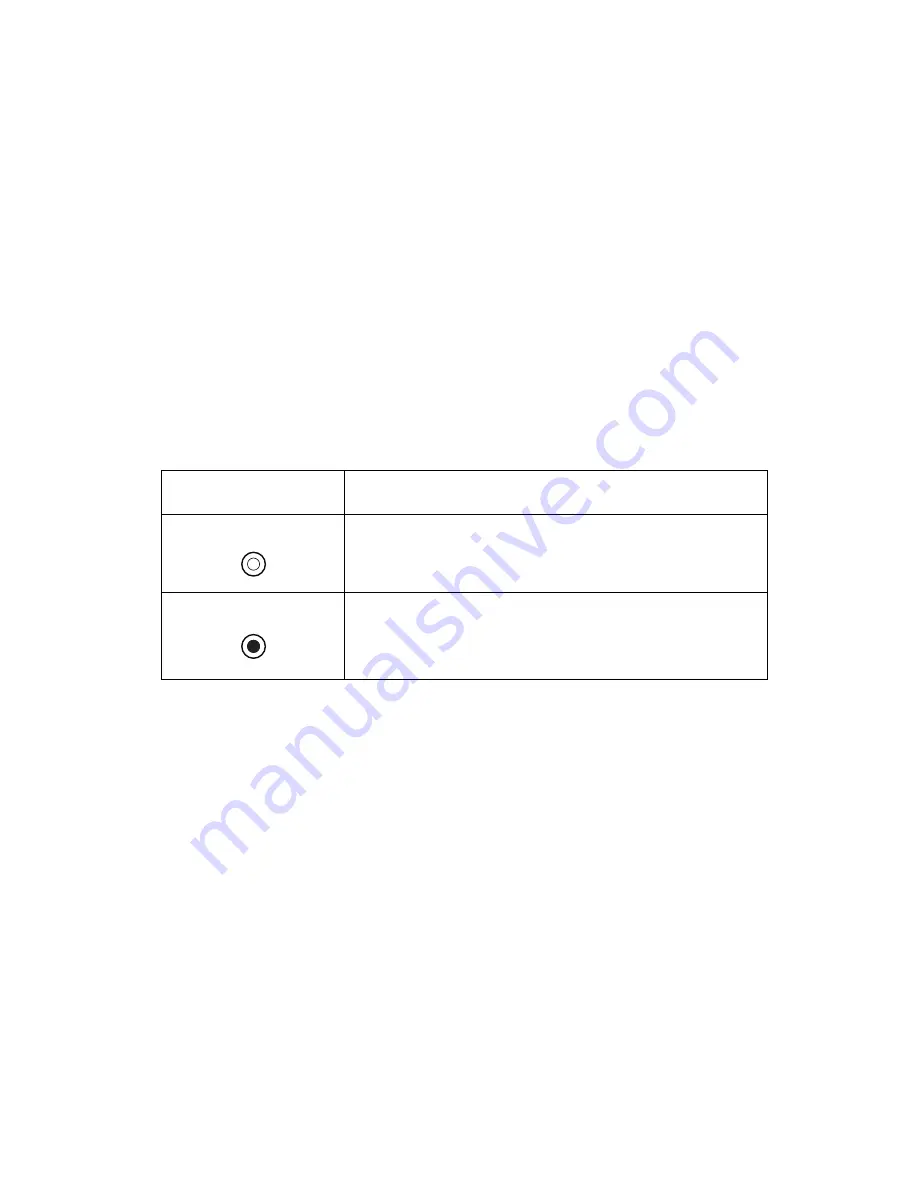
Off/On/Auto Setting 

Value

PPDS is inactive. 

PPDS is active. 

Содержание e-STUDIO 16P

Страница 1: ...TOSHIBA TOSHIBA SERVICE MANUAL SERVICE MANUAL PAGE PRINTER e e STUDIO 16P STUDIO 16P ...

Страница 2: ...lutions Inc National Service Training 2 Musick Irvine Ca 92618 U S A Toshiba America Business Solutions may use or distribute any of the information you supply in any way it believes appropriate without incurring any obligation to you You can download additional copies of publications related to this product by accessing the Toshiba FYI website and then select the Tech To Go menus Toshiba and e ST...

Страница 3: ...ST 2 36 Symptom Tables mptom Tables 2 36 Service Checks 2 39 Cooling Fan Service Check 2 40 40 Cover Interlock Switch Service Check 2 40 Engine Board Service Check 2 41 Dead Machine Service Check 2 43 3 Low Voltage Power Supply LVPS Service Check 2 44 Fuser Service Check 2 45 Cold Fuser Service Check 2 47 Hot Fuser Service Check 2 48 Main Motor Service Check 2 48 Operator Panel Service Check 2 49 ...

Страница 4: ...4 1 Removal Procedures 4 2 Cover Removals 4 2 Auto Sheet Feed ASF Assembly Removal y Removal 4 3 Printhead Assembly Removal 4 4 Controller Board Removal 4 4 Controller Board Cage Removal 4 4 High Voltage Power Supply HVPS Removal Voltage Power Supply HVPS Removal 4 5 Cooling Fan Removal Fan Removal 4 5 Low Voltage Power Supply LVPS Removal 4 5 Engine Board Removal 4 6 Charge Roll Assembly Removal ...

Страница 5: ...overs 7 2 Assembly 2 Frame 7 4 Assembly 3 Fuser 7 6 Assembly 4 Main Drive 7 8 Assembly 5 Paper Feed per Feed 7 10 Assembly 6 Printhead 7 12 Assembly 7 Electronics 7 14 Assembly 8 Options 7 16 Assembly 9 Cables no illustration 7 18 Assembly 10 Miscellaneous no illustration 7 20 Index I 1 ...

Страница 6: ...vi Service Manual e STUDIO 16P ...

Страница 7: ...Laser Notices ces The following laser notice label may be affixed to this printer Laser Advisory Label ory Label Class 1 Laser Statement Label tatement Label The laser statement label is located on the rear of the rear cover assembly ...

Страница 8: ...Anforderungen der Bestimmung DHHS Department of Health and Human Services 21 CFR Teil J für Laserprodukte der Klasse I 1 CFR Teil J für Laserprodukte der Klasse I 1 In anderen Ländern gilt der Drucker als Laserprodukt der Klasse I Drucker als Laserprodukt der Klasse I der die Anforderungen der IEC International Electrotechnical Commission 60825 gemäß amtlicher Bestätigung erfüllt 60825 gemäß amtli...

Страница 9: ...ix Service Manual e STUDIO 16P Japanese Laser Notice apanese Laser Notice otice Chinese Laser Notice Laser Notice ...

Страница 10: ...x Service Manual e STUDIO 16P ...

Страница 11: ...ng of this product Professional service personnel should understand this and take necessary precautions Consignes de Sécurité gnes de Sécurité urité Ce produit a été conçu testé et approuvé pour respecter les normes strictes de sécurité globale lors de l utilisation de composants Toshiba spécifiques Les caractéristiques de sécurité de certains éléments ne sont pas toujours évidentes Toshiba ne peu...

Страница 12: ...Safety Information xii e STUDIO 16P ...

Страница 13: ... contains an error indicator table symptom tables and service checks used to isolate failing field replaceable units FRUs FRUs 3 Diagnostic Aids contains tests and checks used to locate or repeat symptoms of printer problems 4 Repair Information provides instructions for making printer adjustments and removing and installing FRUs justments and removing and installing FRUs 5 Connector Locations use...

Страница 14: ...nnection The e STUDIO 16P printer comes with 8MB of standard memory Model Information Printer Operation Paper is held in a 150 page tray where it is picked by a center fed D D shape pick roller The paper follows an L shape path as it moves through the printer Images are created with toner on an OPC drum within the toner cartridge A transfer roller then draws the toner off A transfer roller then dr...

Страница 15: ...nsions for the printer model This does not include packaging but does include the print cartridge that ships with the printer Physical Dimensions e STUDIO16P Height 221 mm 8 7 inches Width 380 mm 15 0 inches Depth 368 mm 14 5 inches Operating Clearance Left and right sides 304 8 mm 12 inches Front 304 8 mm 12 inches Rear 508 mm 20 inches ...

Страница 16: ... Note Some options are not available in every country Contact your point of purchase for options available in your country Note Standard RAM is soldered on the engine board AM is soldered on the engine board Option e STUDIO16P Tray 2 Available Memory 4MB 8MB 16MB Total Possible 32MB 64MB 72MB Flash 1MB 2MB 4MB ...

Страница 17: ... Stimulated Emission of Radiation LCD Liquid Crystal Display LED Light Emitting Diode LFCR Line Feed Carriage Return LVPS Low Voltage Power Supply MROM OM Masked Read Only Memory NVRAM Nonvolatile Random Access Memory OEM Original Equipment Manufacturer OPC Optical Photoconductor PC Photoconductor PJL L Printer Job Language POR Power On Reset POST Power On Self Test PPDS Personal Printer Data Stre...

Страница 18: ...e action necessary to repair a malfunctioning printer The LEDs on the operator panel can indicate either a user error EDs on the operator panel can indicate either a user error message or service error message When a service error occurs the printer stops printing and all operator panel LEDs blink in a continuous pattern indicating a service error until the printer is powered off If all operator p...

Страница 19: ...hree groups Status Attendance Service Depending on the LED sequence briefly approximately 1 second approximately 1 second push the operator panel button to restart the printer display an error code or activate other printer functions The operator panel LED table see page 2 3 can be used to determine the type of message displayed based on which ge displayed based on which combination of LEDs are on...

Страница 20: ...DIO 16P Status Information Ready The printer is in a Ready state Ready indicates the printer is ready to receive and process data from the host system Brief button press executes a print test Long button press executes a printer reset ...

Страница 21: ...he paper path The user indicates that the jam is cleared by closing the cover or by performing a brief button press Paper Jam A paper jam is detected Brief button press assumes the jam has been cleared A warm up is performed and the print job resumes Long button press is ignored Open close cover assumes the jam has been cleared A warm up is performed and the job prints ...

Страница 22: ...rinter setting is modified to note that the connection exists Then each time the power is cycled on the printer if the setting states a connection exists the printer attempts to communicate with the adapter If the adapter does not respond this message is posted This error is only detected during the power on cycle This means if the external network adapter connection is lost after the power on cyc...

Страница 23: ...s error is 1 If this error occurs at power on and an ENA is attached to the A is attached to the printer verify the ENA is properly connected 2 When the printer is in the Ready state press the operator panel button to print a menus settings page 3 Under the parallel menu look for the parallel buffer line If this line says disabled and the host computer is trying to print using the parallel port re...

Страница 24: ... errors are not recoverable However it may be possible to turn the printer off and back on to temporarily recover from the error condition if it is intermittent When a service error occurs the printer stops printing immediately The only recovery is to turn off the printer The following operator panel is an example indicating a primary service error code condition Brief button press displays a serv...

Страница 25: ... When a service error occurs the printer stops printing and all operator panel LEDs blink in a continuous pattern indicating a service error until the printer is turned off Press and release the operator panel button to display the secondary service error code ...

Страница 26: ...r failure Once the error code is displayed if the operator panel button is pushed again the operator panel displays the service error indication all 6 indicator LEDs blinking Continual pressing of the Continual pressing of the button causes the LEDs to repeat in the following order 1 Service error indication 2 Fuser service error code indication 3 Service error indication ...

Страница 27: ...ator panel button is pushed again all 6 indicator LEDs blink Continual pressing of the 6 indicator LEDs blink Continual pressing of the operator panel button causes the LEDs to repeat in the following order 1 Service error indication vice error indication 2 Fuser failure service error code indication 3 Fuser failure under temperature service error subcode indication 4 Service error indication ...

Страница 28: ...again the operator panel will display the service error indication all 6 indicator LEDs blinking Continual pressing of the operator panel button causes the LEDs to repeat in the following order 1 Service error indication 2 Software service error code indication 3 Service error indication Place the printer into the special function menu and run a print test See Using the Special Function Menu on pa...

Страница 29: ...ervice Manual e STUDIO 16P Fuser Failure Over Temperature Error Code de The operator panel is indicating a fuser failure over temperature subcode See Hot Fuser Service Check on page 2 48 for more information ...

Страница 30: ...rmation 2 13 e STUDIO 16P Fuser Failure Under Temperature Error Code The operator panel is indicating a fuser failure under temperature subcode See Cold Fuser Service Check vice Check on page 2 47 for more information ...

Страница 31: ...P Fuser Failure Under Temperature Error Code Standby Under Temperature Error Code Standby The operator panel is indicating a fuser failure under temperature subcode See Cold Fuser Service Check heck on page 2 47 for more information ...

Страница 32: ...Fuser Failure Under Temperature Error Code While Printing Temperature Error Code While Printing The operator panel is indicating a fuser failure under temperature subcode See Cold Fuser Service Check ce Check on page 2 47 for more information ...

Страница 33: ...2 16 Service Manual e STUDIO 16P Fuser Failure Thermister Open Error Code Thermister Open Error Code The operator panel is indicating a fuser failure thermister open subcode Replace the fuser assembly ...

Страница 34: ...utton is pushed again the operator panel displays the service error indication all 6 indicator LEDs blinking Continual pressing of the operator panel button causes the LEDs to repeat in the following wing order 1 Service error indication 2 Mirror motor failure service error code indication 3 Service error indication Inspect the printhead cable and replace the assembly as necessary If this does not...

Страница 35: ...the operator panel displays the service error indication all 6 indicator LEDs blinking Continual pressing of the operator panel button causes the LEDs to repeat in the following wing order 1 Service error indication 2 Optional memory service error code indication 3 Service error indication Replace the optional memory DIMM If this does not correct the MM If this does not correct the problem replace...

Страница 36: ...operator panel button is yed if the operator panel button is pushed again the operator panel displays the service error indication all 6 indicator LEDs blinking Continual pressing of the operator panel button causes the LEDs to repeat in the following order 1 Service error indication 2 ROM checksum failure service error code indication 3 Service error indication Replace the ROM SIMM If this does n...

Страница 37: ...played if the operator panel button is pushed again the operator panel will display the service error indication all 6 indicator LEDs blinking Continual pressing of the Ds blinking Continual pressing of the operator panel button causes the LEDs to repeat in the following order 1 Service error indication 2 Base memory service error code indication 3 Service error indication Replace the controller b...

Страница 38: ...e the error code is displayed if the operator panel button is pushed again the operator panel displays the service error gain the operator panel displays the service error indication all 6 indicator LEDs blinking Continual pressing of the operator panel button causes the LEDs to repeat in the following order 1 Service error indication 2 NVRAM failure service error code indication 3 Service error i...

Страница 39: ...s displayed if the operator panel button is pushed again the operator panel displays the service error indication all 6 indicator LEDs blinking Continual pressing of the 6 indicator LEDs blinking Continual pressing of the operator panel button causes the LEDs to repeat in the following order 1 Service error indication 2 ASIC register failure service error code indication 3 Service error indication...

Страница 40: ...is displayed if the operator panel button is pushed again the operator panel displays the service error gain the operator panel displays the service error indication all 6 indicator LEDs blinking Continual pressing of the operator panel button causes the LEDs to repeat in the following order 1 Service error indication 2 ASIC SRAM failure service error code indication 3 Service error indication Rep...

Страница 41: ... the operator panel button is pushed again the operator panel displays the service error indication all 6 indicator LEDs blinking Continual pressing of the Continual pressing of the operator panel button causes the LEDs to repeat in the following order 1 Service error indication 2 Flash memory failure service error code indication 3 Service error indication Replace the Flash memory If this does no...

Страница 42: ... panel button is pushed again the operator panel displays the service error indication all 6 indicator LEDs blinking Continual pressing of the Continual pressing of the operator panel button causes the LEDs to repeat in the following order 1 Service error indication 2 Font checksum failure service error code indication 3 Service error indication Replace the ROM SIMM If this does not correct the pr...

Страница 43: ...panel button is pushed again the operator panel displays the service error indication all 6 indicator LEDs blinking Continual pressing of the Continual pressing of the operator panel button causes the LEDs to repeat in the following order 1 Service error indication 2 Engine communication failure service error code indication mmunication failure service error code indication 3 Service error indicat...

Страница 44: ...r Codes Conditions Not Detected or Reported s Conditions Not Detected or Reported The printer does not detect or report the following conditions errors Incorrect manual feed Output bin full Print cartridge missing reported as top cover open error ...

Страница 45: ...rror Code Table Operator Panel LED Description Operator panel LED is on Operator panel LED is off Operator panel LED is blinking blinking Operator panel LED is blinking slowly Ready Data Toner Low Load Paper Paper Jam Error Press Button Condition Ready Demo Ready Offline Remote Busy ...

Страница 46: ...lts Saving Settings Resetting Printer Flushing Buffer Hex Trace Paper Jam Load Manual Paper Envelope Load Paper Envelope Tray 1or Tray 2 Load Paper Tray 1 for Side 2 of Manual Duplex Top Cover Cover Open Ready Data Toner Low Load Paper Paper Jam Error Press Button Condition ...

Страница 47: ...ror Flash Memory Full Diagnostic Test Mode Operator Panel LEDs When Toner Is Low Ready and Toner Low Demo Ready and Toner Low Offline remote and Toner Low Busy and Toner Low Waiting and Toner Low Ready Data Toner Low Load Paper Paper Jam Error Press Button Condition ...

Страница 48: ...oner Low Hex Trace and Toner Low Paper Jam and Toner Low Load Manual Manual Paper Envelope and Toner Low Load Paper Envelope Tray 1 and Toner Low Load Paper Tray 1 for Side 2 of Manual Duplex and Toner Low Load Paper Tray 2 and Toner Low Top Cover Open and Toner Low Ready Data Toner Low Load Paper Paper Jam Error Press Button Condition ...

Страница 49: ...Low Flash Memory Full mory Full and Toner Low Diagnostic Test Mode and Toner Low Printer Error Secondary Codes Memory Full Complex Page Short Paper Toner Low Intervention Resolution Reduction Warning Font Error Ready Data Toner Low Load Paper Paper Jam Error Press Button Condition ...

Страница 50: ... code is used a second service error code is used to further describe the error When a service error occurs pressing the operator panel button after viewing the primary service error code displays the secondary service error code The following table contains the secondary service error codes Primary Service Error Codes Service Error vice Error See page 2 8 Secondary Service Error Codes Software Er...

Страница 51: ...e 2 17 Optional Memory See page 2 18 ROM Checksum See page 2 19 Base Memory See page 2 20 NVRAM Failure See page 2 21 ASIC Register Failure See page 2 22 ASIC SRAM Failure See page 2 23 Flash Memory Failure See page 2 24 Ready Data Toner Low Load Paper Paper Jam Error Press Button Condition ...

Страница 52: ...ne Communica tion Failure See page 2 26 Fuser Service Error Subcodes Fuser Failure Over Temperature See page 2 12 Fuser Failure Under Temperature See page 2 13 Fuser Failure Thermister Open See page 2 16 Ready Data Toner Low Load Paper Paper Jam Error Press Button Condition ...

Страница 53: ...witch Service Check on page 2 40 POST completes except one or more LEDs do not come on See the Operator Panel Service Check on page 2 49 None of the LEDs come on See the Operator Panel Service Check on page 2 49 Main motor does not come on See the Main Motor Service Check on page 2 48 Fan does not come on See the Cooling Fan Service Check on page 2 40 Fuser lamp does not come on See the Cold Fuser...

Страница 54: ...n page 2 47 Blank page See the Blank Page on page 2 55 Black page See the Black Page on page 2 56 Heavy background See the Heavy Background on page 2 57 Light print See the Light Print on page 2 59 White or black lines or bands See the White or Black Lines or Bands on page 2 60 Toner on back of page See the Toner on Back of Page on page 2 60 Incorrect characters print See the Incorrect Characters ...

Страница 55: ... the Parallel Port Service Check on page 2 54 Paper wrinkled or bent See the Paper Trees Wrinkles Stacks Poorly Or Curls on page 2 53 3 Top cover will not close See the Cover Interlock Switch Service Check on page 2 40 Operator panel button does not respond See the Operator Panel Button Service Check on page 2 50 Operator panel LEDs do not light or very dim See the Operator Panel Service Check on ...

Страница 56: ...easuring voltages of the LVPS engine boards must be performed with the printer positioned on its ds must be performed with the printer positioned on its back side This provides the servicer access to the circuit boards underneath the printer while supplying necessary power to the rest of the printer ...

Страница 57: ...thin Within approximately 3 seconds the engine board should apply 24V dc to the fan See Connector Locations on page 5 1 for more information If voltage is present replace the cooling fan If voltage is not present see the Engine Board Service Check d Service Check on page 2 41 FRU Action Cover Interlock Switch Disconnect the cover interlock cable plug from the engine board Push the cover interlock ...

Страница 58: ...Disconnect the LVPS engine board jumper cable from the engine board See Connector Locations on page 5 1 for more information If voltage is correct ensure J12 PSU is properly seated in the J12 PSU connector on the engine board Check for 24V dc on the cable If voltages are not present or incorrect see the Low Voltage Power Supply LVPS Service Service Check on page 2 44 Note With all cables connected...

Страница 59: ...s the Ready LED turns on solid 4 The cooling fan comes on 5 The fuser lamp comes on 6 The drive motor runs 7 The printhead motor runs 8 The printer cycles down into standby mode ready If the operator panel LEDs come on solid and never turn off replace the controller board and or controller cable If some LEDs are on or flashing see the Status Information on page 2 3 to determine a course of action ...

Страница 60: ...ck the fuse on the LVPS board for continuity If open replace with appropriate fuse If fuse opens again see Low Voltage Power Supply LVPS Service Check on page 2 44 If not open see power switch below Power Switch Turn on the printer power switch Check for ac line voltage in the switch cable CN1 LVPS board between pin 1 and ground and between pin3 and ground If line voltage is present see the Cover ...

Страница 61: ...ter for ac line voltage Check for ac line voltage on CN1 between pin 1 and pin 3 If line voltage is present disconnect the CN3 cable plug from the LVPS board If the voltage is not present see the Dead Machine Service Check on page 2 43 3 Use the LVPS connector table page 5 1 and check for correct voltages If voltage is not present or correct replace the LVPS fuses and or the LVPS board ...

Страница 62: ...he glass housing with bare hands as skin contains acids that can weaken the glass The line voltage to the printer must be within the following limits 100 V ac 127 V ac for the low voltage model printer 27 V ac for the low voltage model printer 200 V ac 240 V ac for the high voltage model printer Turn the printer off and wait a few minutes for the fuser lamp to cool Turn the machine on and observe ...

Страница 63: ... connector CN2 on the LVPS It should match the line voltage If line voltage is not present see Low Voltage Power Supply LVPS Service Check on page 2 44 Make sure the fuser thermistor is correctly connected to the engine board If the problem persists disconnect the thermistor cable from the engine board and check for approximately 5V dc See 5V dc See Connector Locations on page 5 1 for more informa...

Страница 64: ... be sure the thermistor is contacting the hot roll and the thermistor cable is firmly seated in connector CN1 on the LVPS board Check for excessive toner buildup on the surface of the thermistor Clean or replace as necessary See Connector Locations on page 5 1 for more information Turn the printer off and disconnect the thermistor cable from the engine board Measure the resistance of the thermisto...

Страница 65: ...fuser assembly if the resistance is lower than 1k ohm or shorted FRU Action Engine Board Main Motor Main Motor Cable Check the engine board for the correct voltages See Connector Locations on page 5 1 for more information If these voltages are correct check the main motor cable for continuity If these voltages are not correct see the Low Voltage Power Supply LVPS Service Check Service Check on pag...

Страница 66: ...ator panel Operator Panel Operator Panel Cable Controller Board Board If all LEDs are dim and operate erratically during POST or all LEDs come on and stay on solid during POST replace the following FRUs one at a time in the order shown Controller Board Operator Panel Operator Panel Cable If none of the LEDs come on make sure the cable is properly connected to the operator panel and the controller ...

Страница 67: ... Cable Disconnect the operator panel from the operator panel cable Check the continuity between J2 1 and J2 2 on the operator panel as you press the operator panel button As the button is pressed continuity is present If continuity is present replace the operator panel cable If continuity is not present replace the operator panel ...

Страница 68: ...d Sensor Make sure the input paperfeed sensor is working properly A stuck or incorrectly installed sensor causes this error FRU Action Pick Roller Clutch Solenoid Check the pick roller clutch for wear The solenoid interacts with the clutch controlling motion of the pick roller If the cam surface of the pick roller clutch assembly is worn the bly is worn the solenoid may not stop the pick roller fr...

Страница 69: ...the input paper feed sensor If these voltages are not correct replace the engine board FRU Action Paper Tray Tray Make sure the paper tray is correctly installed The black mylar guide sheet in the front of the tray must be positioned in the paper path just behind the pick roller assembly This guide sheet can easily block the paper path if installed incorrectly Pick Roller Solenoid Make sure soleno...

Страница 70: ...k the friction pad on the paper separator for signs of wear Replace as necessary Pick Roller Pad Assembly Check the friction pad on the pick roller pad assembly for signs of wear Replace as necessary FRU Action Fuser Assembly This problem is most likely due to a worn transfer roller A worn transfer roller causes the printer to run hotter than required for the media being printed Excessive heat can...

Страница 71: ...set up correctly 4 Try enabling the parallel port pull up resistors See Parallel Mode 1 on page 3 27 Try printing a test page after enabling resistors If the printer still does not print disable the resistors 5 If the internal print test page prints correctly the user application printer driver is set up correctly and the correct bidirectional parallel cable is installed yet the printer still fail...

Страница 72: ...ective printhead assembly high fective printhead assembly high voltage power supply or engine LVPS board See HVPS High Voltage Power Supply Board on page 5 7 y Board on page 5 7 and check the voltage measurements If the voltages are correct check the printhead cable for continuity If the cable measures continuity replace the printhead If the cable does not measure continuity replace the cable If t...

Страница 73: ... HVPS Cable HVPS Make sure the HVPS to engine LVPS cable is correctly installed See HVPS High Voltage Power Supply Board on page 5 7 and check the voltage measurements If the voltages are correct check the HVPS to engine LVPS cable for continuity If the cable does not measure continuity replace the cable If the cable measures continuity replace the HVPS If the voltages are not correct see Low Volt...

Страница 74: ...oner Cartridge Make sure the toner cartridge is correctly installed and the high voltage contacts are clean If the cartridge is installed correctly try a new cartridge HVPS Contacts HVPS Board Engine Board Check the contacts for correct installation and contamination where contact is made with the toner cartridge and HVPS Board Clean as necessary If this does not correct the problem replace the fo...

Страница 75: ...n pressure is applied to the fuser hot roll Paper Make sure recommended paper is being used FRU Action Toner Cartridge The charge roll in the toner cartridge may have an unbalanced pressure against the PC drum Try a new toner cartridge Transfer Roller Bearing Assembly Transfer Roller Check the springs in the left and right transfer roller bearings The bearing assemblies should support the transfer...

Страница 76: ...tridge is installed correctly and is not low on toner If the problem continues install a new toner cartridge Transfer Roller HVPS Contact Transfer Roller HVPS Board Check the transfer roller for signs of toner buildup and contamination Inspect the HVPS contact transfer roller for contamination Inspect the HVPS board for contamination where it meets the HVPS contacts If all components appear free o...

Страница 77: ...rive gears for signs of wear debris binds or damage FRU Action Print Cartridge Inspect the overall paper path for signs of spilled toner Gently clean the contaminated areas with a soft cloth or compressed air Fuser Hot Roll Backup Roller The fuser hot roll can cause toner on the back of the paper if toner is building up on the hot roll This buildup may transfer to the backup roller later transferr...

Страница 78: ...tion 2 61 e STUDIO 16P Incorrect Characters Print Characters Print Make sure the correct printer driver software is installed Incorrect software can cause incorrect characters to print and the image may not fit the page ...

Страница 79: ...cute Engine Clean Cycle on page 3 13 for more information Make sure you are using recommended print media see media types and sizes in the User s Guide Use MarkVision to define the custom type setting for media type media texture or media weight The print cartridge may be defective Replace it Toner smudges appear on the front or back of the page Run engine clean cycle to remove any toner that may ...

Страница 80: ...emove any toner that may have accumulated See Execute Engine Clean Cycle on page 3 13 for more information Try a different kind of paper Paper Paper designed for copiers gives the best quality If you are printing on special media such as card stock or labels be sure you select the correct paper type in the printer driver Change the media texture setting If the setting is not in your driver you can...

Страница 81: ...ridge The Toner Low LED is on Remove the print cartridge and gently shake it from side to side to redistribute the toner Replace the print cartridge Solid black areas on transparencies or paper contains white streaks Choose a different fill pattern in your software application Try a different type of paper Paper designed for copiers gives the best quality quality Remove the print cartridge and gen...

Страница 82: ...of toner or defective Replace the cartridge You may have a software error Try turning the printer off and back on The printer has missing or damaged parts Contact the place where you bought your printer The operator panel LEDs do not EDs do not come on when the printer is turned on The LEDs may take a few seconds to come on Make sure the power cord is firmly plugged in at the back of the printer a...

Страница 83: ... using a 3K or 6K print 3K or 6K print cartridge and the Toner Low alarm is set to on the printer stops printing until you replace the print cartridge Download the Toshiba e STUDIO16 Setup Utility from the Toshiba Web b site fyi toshiba com to change the Toner Low alarm The media skews or buckles Don t overfill Tray 1 or the optional Tray 2 see media capacities in the media types and sizes table i...

Страница 84: ... is selected from the printer driver Make sure the tray is pushed all the way in Make sure the metal plate is pressed down before inserting it into the printer Note Once the tray is inserted the metal plate springs up so the paper can feed into the printer Make sure the paper does not exceed the stack height indicator Make sure the paper is under both corner bucklers see loading paper in the User ...

Страница 85: ...nter driver Select hex trace mode to determine what the problem is Restore factory defaults Make sure the parallel cable or USB cable is firmly plugged in at B cable is firmly plugged in at the back of the printer Jobs are not printing and the Error LED is on solid Make sure the print cartridge is installed properly Make sure the printer top cover is closed While in PostScript Level 2 emulation th...

Страница 86: ...the Web site fyi toshiba com to download the latest printer driver While using manual duplex the printer gets a paper jam A paper jam interrupts the duplex process As a result the information on the page that jammed is lost Cancel your print job and press the operator panel with a long button press approximately 3 seconds to reset the printer Resend your print job Problem Action ...

Страница 87: ... Resetting User Defaults User Defaults When formatting problems occur or unexpected characters print try resetting the printer default settings to your user defaults Press and hold the operator panel button until all the LEDs come on ...

Страница 88: ...nt quality test pages and advanced troubleshooting mode To enter the special function menu 1 Turn off the printer 2 Open the top cover 3 Turn the printer back on 4 When the Error LED comes on indicating the top cover is open dicating the top cover is open press and release the operator panel button twice quickly double button press 5 When the Error LED and D and Press Button LED blink close the co...

Страница 89: ...cial Function Menu on page 2 71 for more information 2 Press and release the operator panel button twice quickly kly double button press until the Toner Low LED comes on and the two bottom LEDs blink 3 Press the operator panel with a long button press hold until all g button press hold until all the LEDs come on to reset the printer to the original factory defaults Once the settings are returned t...

Страница 90: ...ormation 2 Press and release the operator panel button twice quickly double button press three times until the Paper Jam LED D comes on and the two bottom LEDs blink 3 Press the operator panel button with a long button press hold until all the LEDs come on to select the Hex Trace setting Hex Trace setting 4 Press the operator panel button with another long button press to initiate Hex Trace Data s...

Страница 91: ...s the operator panel button with a long button press hold until all the LEDs come on to initiate Print Quality Test Pages y Test Pages Three pages print to help you evaluate print quality The first page has registration marks the second page is gray and the third page is black Once the paper exits into the output bin the printer returns to the Ready state 4 Use the test pages to isolate problems s...

Страница 92: ...tion 2 75 e STUDIO 16P Advanced Troubleshooting Mode roubleshooting Mode Refer to Advanced Troubleshooting in the Advanced Troubleshooting in the User s Guide for information about advanced troubleshooting mode settings ...

Страница 93: ...2 76 Service Manual e STUDIO 16P ...

Страница 94: ...d ending with Ready Each LED remains on for approximately one second but no more than approximately two seconds This cycling repeats as needed during the execution of the self test The printer performs the cycle at least once Additional cycles can be interrupted at any point in the cycle Additional cycles can be interrupted at any point in the cycle indicating the self test is complete Information...

Страница 95: ...h of the following operations may only be performed if the printer is in the correct operation mode The six modes are Normal printing Demo printing Diagnostics test Special function menu Configuration mode Hex trace The mode entry table lists steps to enter and exit each mode See Printer Modes Summary Table mmary Table on page 3 3 for details ...

Страница 96: ...ng NVRAM power on default flag set to normal AND Turn on printer with cover closed OR Print engine cleaning cycle page from special function menu OR Operator panel reset from hex trace OR Print quality test page from special function menu OR Reset defaults from special function menu Turn off printer and follow instructions for method of entry ...

Страница 97: ...x trace OR Print quality test page from special function menu OR Reset defaults from special function menu Turn off printer and follow instructions for method of entry Diagnostics Menu Turn on printer while pressing the button with the top cover open Once the printer posts the top cover open indication close the top cover Turn off printer and follow instructions for method of entry Mode Method of ...

Страница 98: ...engine clean cycle hex trace print quality test pages reset defaults or toggle demo mode function Configuration Enter the special function menu mode and then select the enter configuration mode option Turn printer off and follow instructions for method of entry to enter desired mode Hex Trace Enter the special function menu mode and then select the enter hex trace mode option Turn printer off Mode...

Страница 99: ...3 6 Service Manual e STUDIO 16P Normal Printing Mode de 1 Turn the printer on 2 Verify the operator panel Ready LED is on LED is on The printer is ready for normal operation ...

Страница 100: ...s turned on The printer posts the Busy sy indication on the operator panel Busy is posted until the demo print job completes or until some asynchronous event occurs for example reset or intervention When the demo job completes the printer posts demo ready and remains in demo mode waiting for the initiation of another demo job This is demo mode with the Press Button LED flashing ED flashing ...

Страница 101: ...page contains the following information Listing of all printer settings contained in the operator panel menus and their default values Printer information such as serial number page count installed RAM engine code level RIP code level and font information M engine code level RIP code level and font information Note The menus page is printed in the language specified by the display language printer...

Страница 102: ...est When the printer enters Normal or Demo modes the total amount of installed memory detected during the POST sequence is compared T sequence is compared with an NVRAM value representing the printer total installed g the printer total installed memory If the amount of detected memory matches the value stored in NVRAM the printer doesn t perform a Memory Test during Test during POST sequence into ...

Страница 103: ... printer on 5 When the cover open error is indicated on the operator panel Error LED on release the button 6 Close the cover The printer automatically runs the diagnostics test matically runs the diagnostics test If the tests pass the Toner Low Low LED blinks If a test fails a service indication is displayed Once the diagnostics test is complete a one page Quick Test can be Quick Test can be print...

Страница 104: ... hex trace Print diagnostics print quality test page Set demo mode active inactive Entering Special Function Menu 1 Turn the printer off 2 Open the printer cover 3 Turn the printer on 4 When the cover open error is indicated on the operator panel Error LED on double press the button ble press the button 5 When the Error and Press Button LEDs start flashing close the cover The special function menu...

Страница 105: ...nel LEDs change the state to Ds change the state to indicate the function is executed Double button press moves to next selection in the menu for example from engine clean cycle to reset defaults to enter config mode Ready Data Toner Low Load Paper Paper Jam Error Press Button Condition Execute engine clean cycle Reset defaults Enter config mode Enter hex trace Three print quality test pages Toggl...

Страница 106: ... feeds one sheet of paper Once the engine cleaning cycle pages are printed the printer enters either normal printing or demo printing modes based on the NVRAM power on default flag fault flag Reset Defaults The operator panel reset operation is available when the printer is operating in its normal mode demo mode or hex trace mode and when the operator panel indicates a printer state which permits ...

Страница 107: ...mode Parallel Port Settings Enable port NPA mode Protocol Mode 1 Mode 2 Strobe adjust USB Settings Enable port NPA mode PPDS Activated Auto LFCR CRLF R CRLF Auto line feed after a carrier return auto carrier return after a line feed and PPDS activated settings may be modified y be modified using PJL However modifications of these settings are typically required by non PC users so the C users so th...

Страница 108: ...Ds are off Press Button indicates the Par Enabled setting To exit configuration mode turn off the printer Once the printer enters configuration mode replace the words on the panel overlay with one of the following overlays Action Definition Double click button press Moves through the configuration mode menu items Brief button press Moves through the displayed menu item value list Long button press...

Страница 109: ...means the panel is presently showing the value for the menu item Parallel Port Enabled The off on auto Press Button LED displays the value of the current setting off on or auto For this example For this example Parallel Port Enabled is off The value list for the menu item Parallel Enabled is off on and auto ...

Страница 110: ...ED a long button press saves the displayed value The printer indicates a setting is being saved by displaying all LEDs on solid The following table shows which printer mode must be active for each operation Operation Mode Print Buffer Normal Operator Panel Reset Normal demo and hex trace Print Test Page Normal Print Font Samples Normal Print Directory Normal Format Flash Normal Set Demo Mode Activ...

Страница 111: ...tor panel Two PJL commands exist which allow the user to JL commands exist which allow the user to obtain samples of the stored fonts Parallel NPA Mode Configuration Parallel NPA Mode on page 3 24 Parallel Protocol Configuration Parallel Protocol on page 3 26 Parallel Mode 1 Configuration Parallel Mode 1 1 on page 3 27 Parallel Mode 2 Configuration Parallel Mode 2 on page 3 28 Parallel Strobe Adju...

Страница 112: ...ect Toggle Demo mode by double pressing the operator y double pressing the operator panel button until the Ready and Load Paper LEDs are on 2 Perform a long button press until all LEDs are on solid Print Registration Adjustment Adjust the left margin until the registration box illustrated on the diagnostics test page is centered on the page Adjust the top margin until the registration lines locate...

Страница 113: ... can be altered from their factory set values Factory set values are never erased and may be restored at a later time Restoring Factory Defaults Restoring factory defaults returns the printer settings to the original factory settings Go to the Special Function Menu see see page 3 11 and perform the following 1 Select Reset Defaults mode by double pressing the operator panel button until the Toner ...

Страница 114: ...Select Enter Hex Trace mode by double pressing the operator panel button until the Paper Jam Jam LED is on 2 Perform a long button press until all LEDs are on solid The printer is reset to factory defaults Hex trace mode can be exited by turning off the printer or by pressing and holding the operator panel button to reset the printer Print Quality Test Pages Go to the Special Function Menu see pag...

Страница 115: ...value of some user default settings Note The diagnostics test page is printed in English only English only The second page is gray The third page is black Notes Both pages are used by service and manufacturing to evaluate print quality Both diagnostic test pages can be printed from the print quality test pages function Once the print quality test pages are printed the printer enters either the pri...

Страница 116: ...is enabled 2 Perform a brief button press to select the Parallel Port setting 3 Perform a long button press All LEDs blink once indicating the setting is saved 4 Exit the configuration mode by turning the printer power off Off On Auto Setting Value Parallel port is disabled The printer doesn t receive port is disabled The printer doesn t receive data from the parallel port Parallel port is enabled...

Страница 117: ... The current Parallel NPA setting is indicated by the Off On Auto Off On Auto Press Button Button LED When the LED is on solid all data received by the printer must be in NPA packets Any non packet data is rejected as bad packets When the LED is off the printer is not performing any NPA D is off the printer is not performing any NPA processing When the LED is blinking the printer examines incoming...

Страница 118: ...uto Setting Value The parallel port does not search for NPA data A data within the received data The parallel port requires that data sent to the printer be in NPA format The parallel port searches for optional NPA data within the received data ...

Страница 119: ... for more information 2 Perform a double click button press two times This moves to the Parallel Protocol item on the configuration menu The Parallel Protocol Load Paper LED comes on solid LED comes on solid 3 The current Parallel Protocol setting is indicated by the Off On Auto On Auto Press Button LED When the LED is off the Parallel Protocol is set to Standard When the LED is on the Parallel Pr...

Страница 120: ...r more information 2 Perform a double click button press five times This moves to the Parallel Mode 1 item on the configuration menu The Parallel Mode 1 Ready LED is blinking 3 The current Parallel Mode 1 setting is indicated by the Off On Auto Press Button LED When the LED is off the Parallel Mode 1 is set to off When the LED is on the Parallel Mode 1 is set to on Perform a brief button press to ...

Страница 121: ...x times This moves to the Parallel Mode 2 item on the configuration menu The Parallel Mode 2 item on the configuration menu The Parallel Mode 2 Data LED is blinking 3 The current Parallel Mode 2 setting is indicated by the Off On Auto Press Button LED When the LED is off the Parallel Mode 2 is set to sample on trailing edge When the LED is on the Parallel Mode 2 is set to sample on leading edge Pe...

Страница 122: ...es to the Parallel Strobe item on the configuration menu The Parallel Strobe Load Paper LED is blinking 3 The current Parallel Strobe setting is indicated by the Off On Auto Press Button LED When the LED is off the LED When the LED is off the Parallel Strobe is set to normal When the LED is on the Parallel Strobe is set to 1 When the LED is blinking the Parallel Strobe is set to 2 Perform a brief ...

Страница 123: ...rmation 2 Perform a double click button press three times This moves to This moves to the PPDS item on the configuration menu The PPDS Paper Jam LED comes on solid 3 The current PPDS setting is indicated by the Off On Auto y the Off On Auto Press Button LED When the LED is off the PPDS is set to inactive When the LED is on the PPDS is set to active Perform rform a brief button press to select the ...

Страница 124: ...tings for each port are turned off Printer Language is changed to PPDS emulation If PPDS is inactive the following user default printer settings are changed PCL and PS SmartSwitch settings for each port are turned on Printer Language is changed to PCL 5 emulation Note PPDS can be activated using the PJL LPPDS command be activated using the PJL LPPDS command Off On Auto Setting Value PPDS is inacti...

Страница 125: ...re information 2 Perform a double click button press four times This moves to the CRLF LFCR item on the configuration menu The RLF LFCR item on the configuration menu The CRLF LFCR Error LED comes on solid 3 The current CRLF LFCR setting is indicated by the Off On Auto o Press Button LED When the LED is off Auto CR after LF is off and Auto LF after CR is off When the LED is on Auto CR after LF is ...

Страница 126: ...nters configuration mode only allows the ws the user to set one or the other to on or both to off If configuration mode is entered and both settings are set to on the initial value displayed shows both values off Off On Auto Setting Value Auto CR after LF off and Auto LF after CR off Auto CR after LF is on and Auto LF after CR is off Auto CR after LF is off and Auto LF after CR is on ...

Страница 127: ...ight times This moves to the USB Port item on the configuration menu The USB Port Paper Jam LED is blinking LED is blinking 3 The current USB Port setting is indicated by the Off On Auto y the Off On Auto Press Button LED When the LED is off the USB Port is rt is disabled When the LED is blinking the USB Port is enabled Perform a brief button press to select a different USB Port utton press to sel...

Страница 128: ...such as MarkVision Note This LED state is only displayed if the current value for the USB Port Enabled setting is a fixed Port Enabled setting is a fixed value The user can t set the value by pressing the button to cycle from the off value to the on value that is the button press cycles from off to auto USB port is enabled with an automatic buffer size The printer determines the buffer size based ...

Страница 129: ...is blinking 3 The current USB NPA setting is indicated by the Off On Auto Off On Auto Press Button LED When the LED is off the USB port does not search for NPA ch for NPA data within the received data When the LED is blinking the USB port searches for USB port searches for optional NPA data within the received data When the LED is on solid the USB port requires that data ED is on solid the USB por...

Страница 130: ...STUDIO 16P Off On Auto Setting Value USB port does not search for NPA data within the received data USB port requires that data sent to the printer be in NPA format USB port searches for optional NPA data within the received data ...

Страница 131: ...to the system ground point This discharges any static electricity in your body to the printer Hold the ESD sensitive part by its edge connector shroud ve part by its edge connector shroud cover do not touch its pins If you are removing a pluggable module use the correct tool Do not place the ESD sensitive part on the printer cover or on a metal table if you need to put down the ESD sensitive part ...

Страница 132: ...ver 2 Remove the two plastic clips from the front cover support arm hinges Note Support and ease the charge roll assembly into a resting bly into a resting position when disengaging the front cover support arm hinges 3 Disengage the front cover support arm hinges from the charge roll assembly 4 Release the front cover from its pivot points Note Lay the front cover to one side as the operator panel...

Страница 133: ... Sheet Feed ASF Assembly Removal Removal 1 Open the front cover See Front Cover on page 4 2 for more information 2 Remove the top cover See Top Cover on page 4 2 for more information 3 Remove the left side cover See Left Side Cover on page 4 3 for more information 4 Remove the right side cover See Right Side Cover on page 4 3 for more information 5 Remove the two lower ASF screws 6 Tilt or swing t...

Страница 134: ...he printhead Controller Board Removal 1 Open the front cover See Front Cover on page 4 2 for more information 2 Remove the right side cover See Right Side Cover de Cover on page 4 3 for more information 3 Remove the controller board cover screw 4 Disconnect cables from the controller board 5 Remove the two parallel cable screws 6 Remove the four controller board screws 7 Remove the controller boar...

Страница 135: ...l 1 Open the front cover See Front Cover on page 4 2 for more information 2 Remove the top cover See Top Cover on page 4 2 for more information 3 Remove the left side cover See Left Side Cover on page 4 3 for more information 4 Remove two cooling fan screws 5 Remove the toner cartridge 6 Tilt the printer carefully to the rear so it is resting on the ASF 7 Remove the four bottom cover screws bottom...

Страница 136: ...e controller board cage See Controller Board Cage Removal on page 4 4 for more information 7 Remove the two fuser top cover screws 8 Remove fuser top cover 9 Remove left and right charge roll assembly brackets Note When reinstalling charge roll assembly brackets ensure brass spring is on the left and silver spring is on the right 10 Remove charge roll assembly Fuser Assembly Removal 1 Tilt the pri...

Страница 137: ...tion 4 Remove right side cover See Right Side Cover de Cover on page 4 3 for more information 5 Remove controller board cage See Controller Board Cage Removal on page 4 4 for more information 6 Disconnect the printer motor cable 7 Remove optional Tray 2 connector from bracket y 2 connector from bracket 8 Remove the four main drive gear assembly screws 9 Remove the main drive gear assembly with dri...

Страница 138: ...cage See Controller Board Cage Removal on page 4 4 for more information 6 Disconnect the printer motor cable 7 Remove optional Tray 2 connector from bracket 8 Remove the four main drive gear assembly screws gear assembly screws 9 Remove the main drive gear assembly with drive motor from printer 10 Depress paper feed solenoid locking tab and slide paper feed solenoid off D roll assembly shaft 11 Re...

Страница 139: ...ons ations LVPS Low Voltage Power Supply Board PS Low Voltage Power Supply Board d Connector Pin No Signal CN1 N1 1 AC H 2 AC N CN2 1 Heater On 2 AC N CN3 1 Ground 2 5 V dc 3 5 V dc 4 Ground 5 24 V dc 6 24 V dc 7 Ground 8 Ground 9 Heater On 10 Heater On Sub ...

Страница 140: ...4 V dc 5 Transfer PWM 6 Transfer Enable 7 Not Used 8 Transfer Servo J2 Input Exit Sensor 1 Ground 2 Input Sensor 3 LED Drive 4 Ground 5 Exit Sensor 6 LED Drive J3 Cartridge Chip 1 Cartridge Data 2 Ground J4 Fan Control 1 24 V dc 2 Fan Control J5 Main Motor 1 24 V dc 2 Ground 3 Motor Enable ble 4 Ground 5 Motor Signal ...

Страница 141: ...P J6 Toner Sensor 1 Ground 2 Toner Signal 3 LED Drive J7 Thermistor 1 Thermistor Data 2 Ground J8 Not Used 1 2 J9 Cover Open Switch 1 24 V dc 2 Interlock Switch J10 Paper Pick Solenoid 1 24 V dc 2 Solenoid Control Connector Pin No Signal ...

Страница 142: ... RIP reset 3 Ready 4 Ground 5 Start 6 Engine notify 7 Ground 8 RIP Present 9 24 V dc 10 SCL CL 11 Sample and Hold 12 Ground 13 Printhead Enable 14 SDA 15 Ground 16 5 V dc 17 7 LSU power 18 Ground 19 Ground 20 LSYNC 21 HSYNC 22 Ground 23 Not Used 24 Sample and Hold Connector Pin No Signal ...

Страница 143: ...STUDIO 16P J12 PSU 1 5 V dc 2 Ground 3 Interlock Switch 4 Interlock Switch 5 Ground 6 Ground 7 Fuser Control 8 Hot Roll Power J13 Option Tray 1 Transmit 2 Receive 3 Tray Detect 4 5 V dc 5 Ground 6 24 V dc Connector Pin No Signal ...

Страница 144: ...al J2 LED Op Panel Panel 1 Ground 2 FPIRQ 3 LED CLK 4 LED Data 5 5 V dc 6 Ground J3 Video 1 Video 2 Ground J7 RIP to Engine gine 1 Engine POR 2 Ground 3 Notify 4 RIP Present 5 SCL 6 Ground 7 DSA 8 HSYNC 9 Ground 10 VSYNC 11 Ground 12 Laser On J8 Power 1 5 V dc 2 Ground ...

Страница 145: ... 16P HVPS High Voltage Power Supply Board VPS High Voltage Power Supply Board y Board Connector Pin No Signal CN1 HVPS 1 Developer PWM loper PWM 2 Ground 3 Charge 4 24 V dc 5 Transfer PWM 6 Transfer Enable 7 Not Used 8 Transfer Servo ...

Страница 146: ...ector Pin No Signal CN4 to Engine Card 1 RX 2 TX 3 COM1 4 5 V dc 5 COM1 6 24 V dc CN5 to Motor 1 STP_A 2 STP_Na 3 STP_B 4 STP_nB CN6 to Solenoid 1 SOl 2 FB_SOL CN7 to PIC_JIG IC_JIG Flash Down Load 1 PGM_RESET 2 5 V dc 3 COM1 OM1 4 PGM_DATA 5 PGM_CLK ...

Страница 147: ...Preventive Maintenance 6 1 e STUDIO 16P 6 Preventive Maintenance ventive Maintenance The e STUDIO 16P does not require preventive maintenance ...

Страница 148: ...6 2 Service Manual e STUDIO 16P ...

Страница 149: ...hown by one index number Parts peculiar to one or the other of the assemblies are listed separately and identified by description AR As Required in the Units column indicates that the Units column indicates that the quantity is not the same for all machines NS Not Shown in the Asm Index column indicates that the part is procurable but is not pictured in the illustration ble but is not pictured in ...

Страница 150: ...7 2 Service Manual e STUDIO 16P Assembly 1 Covers embly 1 Covers vers ...

Страница 151: ... Right Side 5 12G4457 1 Assembly Operator Panel Panel 6 12G4466 1 Hinge Right Rear 7 12G4468 1 Hinge Right Front 8 12G4535 1 Spring Front Cover Right 9 12G4543 1 Cover Front Model E320 0 9 12G4542 1 Cover Front Model E322 10 12G4450 1 Cover Access 11 12G4536 1 Spring Front Cover Left 12 12G4469 1 Hinge Left Front 13 12G4467 7 1 Hinge Left Rear 14 12G4459 1 Duct Cooling 15 12G4451 1 Cover Left Side...

Страница 152: ...7 4 Service Manual e STUDIO 16P Assembly 2 Frame y 2 Frame ...

Страница 153: ... 12G4473 1 B M Rail 4 12G4534 1 Bracket Right 5 12G4465 1 Assembly Charge Roll 6 12G4464 1 Spring Charge Roll Right 7 12G4462 1 Roll Charge 8 12G4463 1 Spring Charge Roll Left 9 12G4510 1 Spring HVPS Contact 10 12G4533 1 Bracket Left 11 12G4460 1 Fan Cooling 12 12G4461 1 Switch Assembly Power 13 12G4511 1 Strap Contact 14 12G4512 1 Strap Contact ...

Страница 154: ...7 6 Service Manual e STUDIO 16P Assembly 3 Fuser Fuser ...

Страница 155: ...user Assembly 110 V 0 V 2 12G4486 1 Fuser Assembly 220 V 3 12G4495 3 Pawl Detack 4 12G4492 2 Roller Exit Idler xit Idler 5 12G4493 1 Roller Exit Redrive 6 12G4496 4 Roll Assembly Idler 7 12G4485 1 Lamp Fuser 110 V V 7 12G4487 1 Lamp Fuser 220 V 8 12G4491 1 Roll Fuser Hot 9 12G4494 1 Roll Fuser Backup 10 12G4489 2 Bearing Backup Roll ...

Страница 156: ...7 8 Service Manual e STUDIO 16P Assembly 4 Main Drive ly 4 Main Drive ve ...

Страница 157: ...Parts Catalog 7 9 e STUDIO 16P Assembly 4 Main Drive Asm Index Part Number Units Description 4 1 12G4500 1 Gear Assembly Drive y Drive 2 12G4499 1 Motor Drive ...

Страница 158: ...7 10 Service Manual e STUDIO 16P Assembly 5 Paper Feed 5 Paper Feed ...

Страница 159: ...h Assembly Paper Feed aper Feed 4 12G4482 1 Bracket Tray 2 Connector 5 12G4490 1 Roll Paper Feed 6 12G4476 1 Sensor Exit xit 7 12G4475 1 Sensor Registration 8 12G4474 1 Roll Assembly Registration 9 12G4480 1 Strip D Roll 10 12G4477 1 Sensor Cartridge 11 12G4538 1 Roller Lower Registration Lower Registration 12 12G4539 2 Bushing Registration Roller 13 12G4540 1 Gear Registration Roller ...

Страница 160: ...7 12 Service Manual e STUDIO 16P Assembly 6 Printhead Printhead ...

Страница 161: ...Parts Catalog 7 13 e STUDIO 16P Assembly 6 Printhead nthead Asm Index Part Number Units Description 6 1 12G4498 1 Plate Printhead 2 12G4472 1 Interlock Cover 3 12G4497 1 Assembly Printhead ...

Страница 162: ...7 14 Service Manual e STUDIO 16P Assembly 7 Electronics Electronics ...

Страница 163: ...ay Austria Belgium France Netherlands Crech Slovak Countries Greece Hungary Finland Norway Sweden Germany Lebanon Syria Egypt Jordan Iran Bosnia Bulgaria Croatia Slovenia Macedonia Yugoslavia Romania South Africa Poland Russia Turkey Spain Catalan Portugal 2 1339530 0 1 Power Cord Israel 2 1339531 1 Power Cord Switzerland 2 1339532 1 Power Cord South Africa 2 1339533 1 Power Cord Chile Uruguay Ita...

Страница 164: ...7 16 Service Manual e STUDIO 16P Assembly 8 Options Options ...

Страница 165: ... 5 12G4532 1 D Roll Feed Tray 2 NS 99A1752 1 4MB SDRAM DIMM B SDRAM DIMM NS 99A1753 1 8MB SDRAM DIMM NS 99A1754 1 16MB SDRAM DIMM NS 99A1755 1 32MB SDRAM DIMM NS 99A1756 1 64MB SDRAM DIMM NS 99A0521 1 1MB Flash SIMM 4500 003 only NS 99A0522 1 2MB Flash SIMM 4500 003 only NS 99A0523 1 4MB Flash SIMM 4500 003 only NS 44H0067 1 Imagequick Card equick Card NS 11K3800 1 Bar Code Card NS 5K00205 1 IPDS ...

Страница 166: ...7 18 Service Manual e STUDIO 16P Assembly 9 Cables no illustration embly 9 Cables no illustration ables no illustration ration ...

Страница 167: ...Sensor J2 NS 12G4519 1 Cable Smart J3 NS 12G4520 0 1 Cable Motor J5 NS 12G4521 1 Cable Toner Sensor J6 NS 12G4522 1 Cable RIP J11 NS 12G4523 1 Cable Option J13 NS 12G4524 1 Cable Fuser Lamp mp NS 12G4525 1 Cable Ground Wire NS 12G4526 1 Cable Option NS 12G4527 1 Cable Cover Open Switch J9 NS 12G4528 1 Cable AC Receptacle AC Receptacle NS 12G4545 1 Cable PSU J12 ...

Страница 168: ...7 20 Service Manual e STUDIO 16P Assembly 10 Miscellaneous no illustration mbly 10 Miscellaneous no illustration scellaneous no illustration ration ...

Страница 169: ...Parts Catalog 7 21 e STUDIO 16P Assembly 10 Miscellaneous ous Asm Index Part Number Units Description NS 12G4529 1 Ring CS NS 12G4530 1 Clamp Mini NS 12G4531 1 Parts Pack Screws NS 12G4544 1 Kit Repack ...

Страница 170: ...7 22 Service Manual e STUDIO 16P ...

Страница 171: ...ecute 3 13 Engine LVPS Board Connectors LVPS Board Connectors 5 1 ESD Sensitive Parts 4 1 F Factory Defaults 3 20 Restoring 3 20 Font Samples 3 18 8 H Handling ESD Sensitive Parts 4 1 Hex Trace Mode 3 21 How to Use this Parts Catalog 7 1 HVPS Connectors VPS Connectors 5 7 M Mode Entry Configuration 3 5 Demo Printing 3 4 Diagnostics Menu 3 4 Hex Trace 3 5 Normal Printing 3 3 Special Functions Menu ...

Страница 172: ...ostic Tests 3 9 Hex Trace 3 21 Normal 3 6 Parallel NPA 3 24 Printer Mode Summary Table 3 3 Printer Operation Modes 3 2 Printer Settings Configuration Mode 3 14 Printer Symptom Table 2 37 7 R Removals 4 2 Auto Sheet Feed Asm 4 3 Controller Board 4 4 Controller Board Cage 4 4 Cooling Fan 4 5 D Roll 4 8 Engine Board 4 6 Fuser Assembly 4 6 High Voltage Power Supply 4 5 HPVS 4 5 HVPS 4 5 Low Voltage Po...

Страница 173: ...ture 2 13 2 14 2 15 Mirror Motor Failure 2 17 NVRAM Failure RAM Failure 2 21 Optional Memory 2 18 ROM Checksum Failure 2 19 Secondary 2 9 Software 2 11 Subcode 2 10 Special Function Menu 3 11 Entering 3 11 LED Summary Table 3 12 Symptom Tables 2 36 POST 2 36 Printer 2 37 Part Numbers 12G4450 7 3 12G4451 7 3 12G4452 7 3 12G4453 7 3 12G4455 7 3 12G4456 7 3 12G4457 7 3 12G4458 8 7 3 12G4459 7 3 12G44...

Страница 174: ... 12G4513 7 17 12G4514 7 17 12G4515 7 17 12G4516 7 17 12G4523 7 19 12G4528 7 19 12G4529 7 21 12G4530 7 21 12G4531 7 21 12G4532 7 17 12G4533 7 5 12G4534 7 5 12G4535 7 3 12G4536 7 3 12G4538 7 11 12G4539 7 11 12G4540 7 11 12G4541 7 11 12G4542 7 3 12G4543 7 3 12G4544 7 21 12G4545 7 19 1339526 7 15 99A0521 7 17 99A0522 7 17 99A0523 7 17 99A1752 7 17 99A1753 7 17 99A1754 7 17 99A1755 7 17 99A1756 7 17 ...

Отзывы: