background image

38

Other Digital TV features and settings

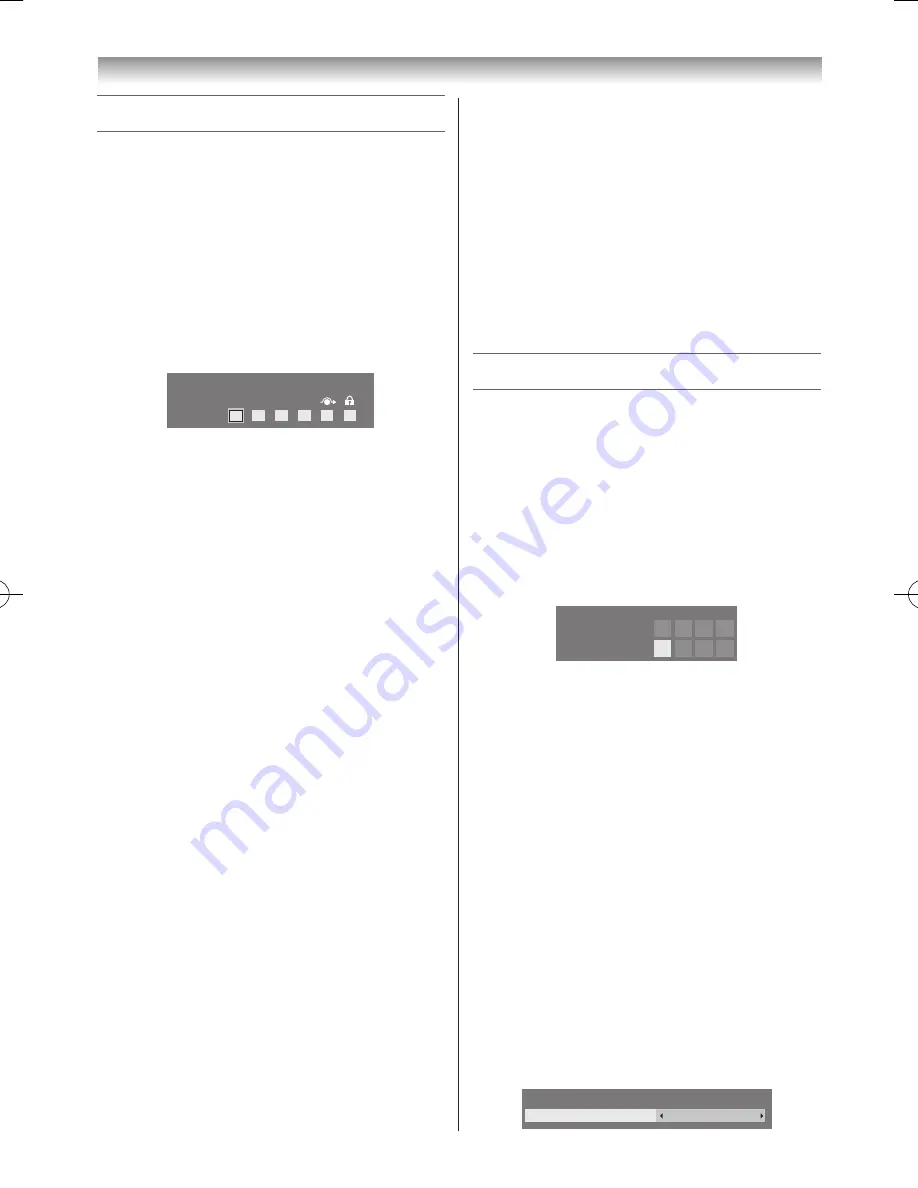
Digital settings - Channel Options

Selecting favourite channels

Favourite Channels creates a list of the digital channels 

that are watched most� Four lists can be created; these can 

be a mixture of TV, radio and text channels�

1

  Select a channel you want to add to your favourite list�

2

  Press 

QUICK

 to open the 

Quick Menu

3

  Press 

s

 to select 

Channel Options

 and press 

OK

4

  Press 

w

 repeatedly to select the favourite list (Fav�1-4)

Fav.

Channel Options

1

2

3

4

5

  Press 

OK

 to select the ones required� A check mark 

will appear in the box as they are selected�

6

  Repeat steps 1 through 5 for other channels�

7

  When all favourites have been selected, press 

EXIT

Skipping Channels

This feature allows you to set channels that will be skipped 

when 

P

u

 or 

P

U

 are used to tune� 

1

  Select a channel you want to skip in your channel list�

2

  From the 

Quick Menu

, press 

s

 or 

r

 to select 

Channel Options

 and press 

OK

3

  Press 

w

 repeatedly to select the skip box�

4

  Press 

OK

 to select� A check mark will appear in the 

box�

5

  Repeat steps 1 through 4 for other channels�

6

  Press 

EXIT

Note: 

Skipped channels cannot be selected by 

P

u


or

 P

U


but can still be accessed by direct number entry 
(when tuned a 

8

 icon will be displayed in the 

banner to indicate as a skipped channel).

Locking Channels

Locking Channels

 stops the viewing of 

digital


channels� Locked channels can only be accessed by 

entering the PIN�

1

  Select a channel you want to lock in your channel list�

2

  From the 

Quick Menu

, press 

s

 or 

r

 to select 

Channel Options

 and press 

OK

3

  Press 

w

 repeatedly to select the lock box�

4

  Press 

OK

 to select� A check mark will appear in the 

box�
If a PIN has already been set, PIN entry will be 

required to set locked channels�

5

  Repeat steps 1 through 4 for other channels�

6

  Press 

EXIT

7

  From this point on, when any of the channels in the 

Locked Channel

 list are selected the PIN must be 

entered before they can be viewed�

Digital settings - PIN Setting

In order to prevent unwanted access to certain menus and 

settings, a security PIN code can be set�

Setting the PIN

1

  From the 

DTV Settings

 menu, press 

s

 or 

r

 to 

select 

Parental PIN Setup

 and press 

OK

2

  Using the number buttons, enter a four - digit number�


Once entered you will be prompted to confirm by 

entering again�

*   *   *   *

New  PIN:

Confirm PIN:

Parental PIN Setup

Changing or Deleting your PIN code

1

 From the 

Parental PIN Setup

 menu, press 

OK

2

 Press the 

Number

 buttons to enter a 4-digit number� 

Confirm the code.

3

 Select 

Change PIN

 or 

Delete PIN

 and press 

OK

Note:

If you delete the PIN code, the settings of 
Parental Control are reset.

Note:

PIN code cannot be set to “0000”.

Parental Setup

The Parental Control feature allows you to block 

programmes according to their rating levels� If a PIN has 

been set, you will need to enter it before adjusting the 

level�

1

  From the 

DTV Settings

 menu, press 

s

 or 

r

 to 

select 

Parental Control

Parental Setup

None

Parental Control

110809c1_324246SL800A_En.indb   38

11.8.9   9:04:58

Содержание 32SL800A

Страница 1: ...Owner s Record Y TV o ow v TOSHIB g VX1A00211100 Integrated Digital LCDTV OWNER S MANUAL TOSHIBA CORPORATION 2011 All Rights Reserved TD CA2 32SL800A 42SL800A 46SL800A ...

Страница 2: ...cting your TV 41 Back connections 41 Side connections 42 Connecting HDMI and DVI devices 42 Selecting the PC HDMI 3 audio mode 44 Setting the HDMI 3 audio mode 44 Connecting a computer PC 45 Using the PC Settings 46 REGZA LINK connection 47 Using Personal TV Mode 48 Connecting a home network 48 Using your home network 49 Setting up the Network 50 Network Connection Test 54 Setting the Network Lock...

Страница 3: ...n Only use cabinets or stands recommended by the TV manufacturer Only use furniture that can safely support the TV Ensure that the TV is not hanging over the edge of the supporting furniture Never place the TV on tall furniture for example cupboards or bookcases without anchoring both the furniture and the TV to a suitable support Never stand the TV on cloth or other material placed between the TV...

Страница 4: ...ill be exposed to oil smoke or steam or in a location where there is a large quantity of dust This may cause a fire or an electric shock Introduction 10 Precautions for moving the TV When moving the TV be sure to remove the plug from the wall outlet and disconnect the aerial cable and audio video cables any steady ties and mounting screw A fire or an electric shock may result if the power cord is ...

Страница 5: ...onnect device therefore the disconnect device shall remain readily operable 5 Never pull on the power cord when removing the plug from the wall outlet Always hold the plug firmly when removing it If the power cord is yanked the cord may become damaged and a fire or an electric shock may occur 6 Never cut break modify twist bunch up or bent the cord or apply excessive force or tension to it Never p...

Страница 6: ...tors clean off the dust with a dry cloth This dust may cause a fire due to reduced insulation on the plug Clean here Important information 1 LCD screen If you have the LCD screen facing to the sun the LCD screen will be damaged Be aware of locating the TV close to a window or outdoors Never press the LCD screen strongly or scratch it and never put anything on it These actions will damage the LCD s...

Страница 7: ...ORT logo are trademarks of Silicon Image Inc in the United States and other countries DLNA the DLNA Certification Logo and DLNA CERTIFIED are trademarks service marks or certification marks of the Digital Living Network Alliance YouTube and the YouTube Logo are trademarks of Google Inc This product contains NetFront Browser of ACCESS CO LTD ACCESS the ACCESS logo and NetFront are trademarks or reg...

Страница 8: ...order Back of TV Exploring your new TV Installing the remote control batteries Remove the battery cover Insert two R6 AA batteries matching the polarities of the battery to the marks inside the battery compartment Cautions Dispose of batteries in a designated disposal area Batteries must not be exposed to excessive heat such as sunshine fire or the like Attention should be drawn to the environment...

Страница 9: ...lect the programme position pages 17 20 U u menu up down When a TV menu is on screen these keys function as up down menu navigation keys page 16 2 33 volume When no menu is on screen these keys adjust the volume level I i menu left right When a TV menu is on screen these keys are used for left right menu navigation and to adjust settings page 16 MENU 44 Press to access the TV menu page 16 BACK Whe...

Страница 10: ...audio input terminal is shared with the HDMI 3 analogue audio input terminal and its use can be configured in the Preferences menu pages 43 45 o 111 RGB PC input terminal For use when connecting a personal computer PC page 45 o 111 2 video 2 input terminals High definition component video and standard stereo audio inputs page 41 111 1 video 1 input terminal Standard composite video and standard an...

Страница 11: ...f controls for REGZA LINK mode page 12 Stereo Bilingual selection To select TV mode Subtitle on off To return to the previous programme To display on screen information Initial index function for Teletext This button turns the sound off on Position up down Teletext on Superimpose Teletext off To display the channel list To display digital on screen Programme Guide To menu up down left or right To ...

Страница 12: ...vious menu accessed Press to STOP Press to PLAY Press to PAUSE Press to SKIP BACK Press to REVERSE Press to FORWARD Press to SKIP FORWARD Getting started Note These functions are dependent on the connected device Not all of the remote control buttons may be available Please refer to the owner s manuals of the connected devices Location of controls for REGZA LINK ...

Страница 13: ... Press v or w to select the menu language English or Français 3 Press OK to display the Primary Secondary Language and Primary Secondary Audio Language item Press s r v or w to set the selectings as desired 4 Press OK to display the Time Zone menu and press v or w to select the item you want to set New South Wales Northern Territory Queensland South Australia Tasmania Victoria Western Australia or...

Страница 14: ...the external input Picture Mode page 23 Picture Size page 22 Personal Mode page 48 More Information page 20 Channel Options page 38 Sleep Timer page 30 REGZA LINK Device Control page 34 Speakers page 33 Headphone Level page 29 Wireless Information page 52 When using EPG Genre Colour page 37 EPG Update Cancel EPG Update page 37 When using Media Player Photo Multi View Sort page 61 Interval Time pag...

Страница 15: ...tion page 52 When using Media Player Music Fullscreen Play Sound page 27 Personal Mode page 48 Repeat page 63 Shuffle page 64 Sleep Timer page 30 Speakers page 33 Headphone Level page 29 Wireless Information page 52 When using Media Player Music Play DMR Sound page 27 Personal Mode page 48 Sleep Timer page 30 Speakers page 33 Headphone Level page 29 Wireless Information page 52 When using Photo Fr...

Страница 16: ... Search Jump to Programme Timers Media Player Photo Movie Music Media Player Setup Jump to Photo menu Jump to Movie menu Jump to Music menu Media Player Setup Menu Toshiba Places Jump to Toshiba Places Function Photo Frame On Timer Sleep Timer Jump to Photo Frame On Timer Menu Sleep Timer Menu Setup Picture Sound Preferences System Setup Picture Menu Sound Menu Preference Menu System Setup Menu TV...

Страница 17: ... Use s or r to move through the list to select a channel and press OK to view ATV Manual Tuning analogue Use the Manual Tuning operation if desired channels cannot be preset by Auto Tuning or if you would like to preset channels to specific position numbers one by one 1 From the System Setup menu press s or r to select ATV Manual Tuning 2 Press OK to display the ATV Manual Tuning menu Press r or s...

Страница 18: ... store your move Repeat as necessary and press EXIT DTV Manual Tuning digital This feature is available for service engineers or can be used for direct channel entry if the multiplex channel is known 1 From the System Setup menu press or to select DTV Manual Tuning and press OK DTV Manual Tuning WEAK Signal Strength Quality Channel GOOD Start Scan STRONG AVERAGE 22 Frequency XXX X MHz Bandwidth 7M...

Страница 19: ...o select Sort and press OK Setting the Standby Channel Update digital If the Standby Channel Update is set to On when the TV is in standby mode Digital Tuning is automatically executed and any new channels are saved 1 From the System Setup menu select DTV Settings and press OK 2 Press s or r to select Standby Channel Update and press v or w to select On Selecting Dynamic Scan digital If the broadc...

Страница 20: ...e On Screen Display 1 From the System Setup menu press or to select Menu Language 2 Press v or w to select the desired language Location Quick Setup Auto Software Upgrade System Setup Menu Language Auto Tuning ATV Manual Tuning DTV Manual Tuning DTV Settings Antenna English Displaying the on screen information analogue 1 Press to display the following on screen information ABCD 4 Mono The informat...

Страница 21: ...gramme Timer LED indicator page 9 will appear orange when a timer is set Displaying the Clock Display You will always see a time display on screen when using this feature 1 From the Preferences menu press or until Clock Display is selected 2 Press v or w to select On or Off Note This feature will not be available until a digital channel has been tuned HDMI Information Display When the HDMI Informa...

Страница 22: ... true 4 3 broadcast Super Live This setting will enlarge a 4 3 image to fit the screen by stretching the image horizontally and vertically holding better proportions at the centre of the image Some distortion may occur Cinema When watching all sides panel format films video tapes this setting will eliminate or reduce the black bars on all sides of the screen by zooming in and selecting the image w...

Страница 23: ...position of the picture may be made to suit your viewing preferences 1 From the Display Settings in the Preferences menu press or to select Picture Position Auto Format On 4 3 Stretch Off Picture Position Display Settings 2 Press OK and press or to select the item you want to adjust 0 0 Picture Position Horizontal Position Reset Vertical Position 3 Press v or w to adjust the settings as desired Ho...

Страница 24: ...agement Advanced Picture Settings Off Middle 3 Press v or w to adjust the settings as required Using ClearFrame 100Hz This function eliminates motion blur without adding flicker or reducing image brightness and improves the viewing quality of a motion picture 1 From the Advanced Picture Settings menu press s or r until ClearFrame 100Hz is selected 2 Press v or w to select Smooth Standard or Off Ad...

Страница 25: ...ur Adjustment menu press s or r to select Reset 2 Press OK Activating MPEG NR Noise Reduction If the incoming MPEG signal exhibits noise is grainy depending on the compression and conversion the noise may be reduced when using this function 1 From the Advanced Picture Settings menu press s or r to select Noise Reduction and press OK Noise Reduction DNR MPEG NR Low Auto 2 Press v or w to select Off...

Страница 26: ...ct Red Green or Blue and press v or w to select On 3 Press s or r to select Colour or Tint and press v or w to adjust the settings as desired Note It is not possible to turn off all of these colours simultaneously Colour Decoding If you watch DVDs with this TV the Colour Decoding option may be set for ensuring the colourimetry reproduction 1 From the Expert Picture Settings menu press or to select...

Страница 27: ...al 1 or Dual 2 mode You can hear only Dual 1 or Dual 2 sound when bilingual programmes are received 1 From the Sound menu press sor r to select Dual 0 Sound Dual Dual 1 Low Off Balance Advanced Sound Settings Dolby Volume Dynamic Range Control Headphone Settings Audio Level Offset 2 Press v or w to select Dual 1 or Dual 2 Note The Dual menu setting status is stored even when the TV is turned off S...

Страница 28: ...o 1 From the Advanced Sound Settings press s or r to select Surround 2 Press or to select Off Spatial or Cinema Voice Enhancement To turn the vocal emphasis effect On or Off Using Dolby Volume This feature provides a consistent sound volume regardless of programmes channels or input sources 1 From the Sound menu press s or r to select Dolby Volume 2 Press v or w to select Low High or Off Notes Thi...

Страница 29: ...elect On or Off Note When Panel Lock is On a reminder will appear when the buttons on the TV are pressed If the standby button is pressed the TV will switch off and can only be brought out of standby by using the remote control Setting Automatic Power Down The TV will automatically turn itself off standby after approximately 4 hours if you do not operate the control buttons on the remote control o...

Страница 30: ...OK 2 Press or to select Enable On Timer and press or to select On On Timer Enable On Timer Power On Time Enable DTV Clock Repeat Input Volume Time until Power On Channel 30 00 00 Once 00 00 DTV On On Done 3 Press to select Enable DTV Clock and press or to select On or Off 4 Press or to go through the list adding the details of the on timer by using the number buttons and or to make selections Powe...

Страница 31: ...es available depends on how many favourite lists have been created Selecting the video input source 1 At any time by pressing o on the remote control or TV a list will appear on screen showing all inputs and external equipment Inputs TV 1 2 3 HDMI 2 HDMI 1 PC HDMI 3 HDMI 4 Inputs DTV TV DTV RADIO DTV TEXT 1 2 3 HDMI 3 HDMI 2 ATV HDMI 4 PC HDMI 1 Pressing o on the remote control Pressing o on the T...

Страница 32: ...ng 3 Press s or r to select the input you want to skip and press the RED button to turn on the skip Input Label Input Labeling EXT 1 EXT 2 EXT 3 HDMI 1 HDMI 2 HDMI 3 HDMI 4 PC 4 To turn off the skip press the RED button again The input set to Skip is greyed out in the Input Selection window and is skipped over when you press o on the remote control Labeling video input sources These input labels a...

Страница 33: ... or adjust the sound volume the sound will be output from the amplifier s speakers even if TV Speakers has been selected Turn the TV to standby and on again to output the sound from the TV speakers The above functions are dependent on the connected device and TV setting Position Key Pass Through When Position Key Pass Through for the selected HDMI input mode is set to On the PU Pu and number 0 9 k...

Страница 34: ...d press OK Note The available functions depend on the equipment connected Please refer to the operation manual for each piece of equipment connected The TV features that can be controlled by the connected device remote control are Volume Sound mute Input selection Previous menu page 12 Note These functions are dependent on the connected device Not all the remote control buttons may be available Pl...

Страница 35: ...ttom of the TV screen To access any given subject simply press the appropriate coloured button on the remote control If FASTEXT is not available you can access any page simply by entering a 3 digit page number or pressing the corresponding coloured button For further information on your particular text system s see the broadcast teletext index page or consult your local Toshiba dealer Using LIST m...

Страница 36: ...n digital mode this feature will show subtitles on the screen in the selected language provided they are being broadcast 1 From the DTV Settings menu press or to select Subtitle and Audio and press OK 2 Press or to select Subtitle Display and use v or w to select On or Off Subtitle and Audio Subtitle Type Secondary Subtitle Language Primary Subtitle Language Audio Type Primary Audio Language Secon...

Страница 37: ...ess for recording please refer to the owner s manual of the recording equipment 6 Press Pu to advance to the next page or press PU to go back to the previous page Using the Genre Colour Search From the guide screen you can use the genre selection and search features 1 Press the QUICK button from the guide screen 2 Press or to select Genre Colour in the Quick Menu and press OK Australia screen exam...

Страница 38: ...annels Locked channels can only be accessed by entering the PIN 1 Select a channel you want to lock in your channel list 2 From the Quick Menu press or to select Channel Options and press OK 3 Press w repeatedly to select the lock box 4 Press OK to select A check mark will appear in the box If a PIN has already been set PIN entry will be required to set locked channels 5 Repeat steps 1 through 4 f...

Страница 39: ... zone It is recommended that you delete all entries under Programme Timers before proceeding with the steps described below 1 From the DTV Settings menu press or to select Local Time Setting 2 Press OK and press or to select Time Zone 3 Press v or w to select the item you want to set New South Wales Northern Territory Queensland South Australia Tasmania Victoria Western Australia Australian Capita...

Страница 40: ...und depending on the connected equipment amplifier etc In that case select Manual Manual You can manually adjust the audio signal timing to match the video signal timing Delay Adjustment Press or to adjust the audio signal timing 0 250 ms to match the video signal timing Notes This feature is greyed out when Audio Delay is in Auto A time lag will occur when the video signal or audio signal is chan...

Страница 41: ...r or processor Refer to the owner s manual of the connected equipment as well When you connect the TV to other equipment be sure to turn off the power and unplug all of the equipment from the wall outlet before making any connections The output sound of the TV has a wide dynamic range Be sure to adjust the audio amplifier s volume to a moderate listening level before turning on the power Otherwise...

Страница 42: ...V first and the HDMI or DVI device When turning off your electronic components turn off the HDMI or DVI device first and the TV This TV may not be compatible with features and or specifications that may be added in the future This TV is only operable with L PCM and Dolby Digital on 32 44 1 48 kHz If there is no sound when using HDMI use the analogue audio cables to connect the TV and the HDMI devi...

Страница 43: ...er via the HDMI cable It will not be necessary to connect a cable from the audio output of the TV to the audio input of the AV amplifier to reproduce the audio received from the tuner of the TV through the AV amplifier Connecting an HDMI device One HDMI cable type A connector is needed VIDEO AUDIO L R IN OUT HDMI OUT USB 1 HDMI 4 2 Back of TV left side of TV HDMI device For proper operation it is ...

Страница 44: ...nu consists of the following 3 items Enable Content Type INSTAPORT and RGB Range Some early HDMI equipment may not work properly with your HDMI TV If you experience trouble unplug your HDMI cable first and try setting the first two options to Off This should allow your early HDMI source to operate properly with your TV 1 From the AV Connection menu press s or r to select HDMI Settings and press OK...

Страница 45: ...e signals This is not a malfunction If the edges of the picture are stretched re adjust the picture position adjustments in the PC Settings menu Depending on the specification of the PC you are using the DVD Video playing and the DVD s title some scenes may be skipped or you may not be able to pause during multi angle scenes The PC signal may not be detected correctly for certain PC models Signal ...

Страница 46: ... desired Horizontal Position 0 Adjusting the clock phase of the picture If the clock phase which synchronizes the PC signal and LCD display is not optimized the picture will blur This function allows you to adjust clock phase and display a clear picture 1 From the PC Settings menu press s or r to select Clock Phase 2 Press v or w to obtain a clear picture Clock Phase 0 Adjusting the sampling clock...

Страница 47: ...devices must also be set For details see the owner s manual for each device Notes If several devices are connected the REGZA LINK feature may not operate properly The REGZA LINK function uses CEC technology as regulated by the HDMI standard For proper operation it is recommended that you use HDMI cables with the HDMI Logo This function is limited to models incorporating Toshiba s REGZA LINK Howeve...

Страница 48: ...onal PIN in same manner as Parental PIN Setup page 38 Volume Type Press s or r to select Volume Type and press or to select Preset or Last Last Volume level just before you turn off the TV Preset Your personal volume level you set Preset Volume Press s or r to select Preset Volume and press s or r to adjust your desired volume level When the Volume Type is set to Last this feature will be greyed o...

Страница 49: ...read Spectrum DSSS Orthogonal Frequency Division Multiplexing OFDM radio technology and is compliant to The IEEE 802 11 Standard on Wireless LANs Revision a b g n as defined and approved by the Institute of Electrical and Electronics Engineers The TOSHIBA Dual Band WLAN Adaptor is intended for use this TV and should not be used with any other devices Use of the WLAN Adaptor in other USB products m...

Страница 50: ...hoto Frame Setup Personal TV Setup REGZA LINK Setup Teletext Auto Network Lock Off Preferences 2 Press s or r to select Network Type and press v or w to select Wired or Wireless Network Type Wired Network Connection Test Advanced Network Setup Network Setup Wireless Setup Note If the Dual Band WLAN Adaptor is not connected Wireless cannot be selected 3 If you selected Wired see Advanced Network Se...

Страница 51: ... these conditions TKIP AES 8 63 ASCII or 64 Hex characters WEP 5 or 13 ASCII or 10 or 26 Hex characters There is only one key ID to set for WEP encryption 7 Select Done and press OK Note If Network Name is not displayed see step 4 and 5 in Manual Setup below to set Network Name before pressing Done Note Settings are not saved if BACK is pressed before Done is selected Manual Setup 1 From the Prefe...

Страница 52: ... 11a 11b 11g 11n Channel Channel in use 1 165 Network Name SSID set Authentication Authentication set Encryption Encryption set Security Key Security Key set AP MAC Address The AP s MAC address is displayed when the TV is connected with the AP TV MAC Address The MAC address of the TV is displayed DHCP Enabled is displayed when using DHCP Disabled is displayed when not using DHCP IPAddress The TV s...

Страница 53: ...as IP Address Note If you manually set the IP address you must not use the same IP address for any other device The IP address you use should be a private address DNS Setup When the DHCP function of the router connected to this TV is Off set Auto Setup to Off and manually set the DNS address es Your internet service provider should have provided these to you Auto setup 1 From the Preferences menu ...

Страница 54: ... on screen software keyboard 2 Press OK 3 Repeat steps 1 and 2 until you have entered all desired text 4 Press the BLUE button to close the software keyboard and return to the previous screen Note If BACK is pressed changes are not saved and the software keyboard window is closed The text will remain as it was before starting the keyboard A B C D E F G A a 1 AAA H I J K L M N O P Q R S T U V W X Y...

Страница 55: ... From the Media Renderer Setup menu select Media Controller Setup and press OK 2 Press s or r to select Access Control and press v or w to select On 3 Press s or r to select Select Media Controller and press OK 4 Press s or r to select the item you want to accept and press OK A check will appear in the box To remove the check press OK again 5 Press w to select Done and then press OK Notes You can ...

Страница 56: ... On it will be necessary to enter your four digit PIN code in order to access network features page 38 1 From the Toshiba Places menu select YouTube and press OK 2 Press s r v or w to select the file you want to view and press OK Closing YouTube Press EXIT Notes Not all YouTube content that can be accessed by computer may be viewed with this TV Depending on network environment and the use situatio...

Страница 57: ...YouTube with a size adjusted to exactly fit the suitable width for this TV Text Size Changes the font size of the screen Select from Largest Large Medium Small or Smallest Note This font size is effective only for the page Advanced Settings See the next column Page Information Displays the information of the page you are viewing Server Certificates Displays the server certification To setup the Ad...

Страница 58: ... will appear It changes whenever BLUE button is pressed 4 Press BACK Using the Media Player This TV allows you to enjoy movie music and photo files stored on a USB device connected to USB Port Moreover you can also play photos movies or music files from your PC by connecting the TV to your home network Terminology DMP DLNA CERTIFIED Player DMS DLNA CERTIFIED Server DMR DLNA CERTIFIED Renderer DMC ...

Страница 59: ...ontent 1 Press s or r to select a file or folder 2 Press OK to move to the next layer or press BACK to return to the previous layer Closing the Media Player 1 Press EXIT Displaying the device information 1 Press QUICK to open the Quick Menu in list mode or Multi View mode 2 Press s or r to select Device Information Setting DLNA CERTIFIED Server waking up You only need to complete the Media Server ...

Страница 60: ...on file number photo title date and time taken resolution etc Note The information may not be correctly displayed depending on the content DMC or DMS Slide Show This view allows you to watch a slide show of your photos In this mode only files located in the selected directory will be played 1 To start slideshow press OK in the Single View mode 2 Press v w to view the previous next photo 3 Press s ...

Страница 61: ... if you highlight the file without pressing OK the content is played on a preview screen When OK is pressed it is played in full screen mode Depending on the file size it may take some time to start playback 4 Press v to stop playback Notes Depending on the file size it may take some time to start playback If playback finishes before v is pressed the screen will return to the list During playback ...

Страница 62: ...y device and play it on the TV Deactivating your device 1 In step 3 above select DivX VOD Deactivation and press OK 2 A confirmation screen will appear Select Yes and press OK 3 The DivX VOD window will appear and you will see the deactivation code For details on registration please visit the DivX website at http vod divx com ABOUT DIVX VIDEO DivX is a digital video format created by DivX Inc This...

Страница 63: ...ess BACK to move back to the previous layer 3 With the desired file selected press OK or c to start playback It is played in full screen mode Press the RED button the screen will return to the list playing the playback USB only 4 Press v to stop playback Notes Depending on the file size it may take some time for playback to begin During playback you can adjust the Sound menu functions from the Qui...

Страница 64: ...ring playback The information will be displayed on the bottom of the screen 2 Press again to remove the information Note The information may not be correctly displayed depending on the content DMC or DMS Closing the Music Player 1 Press EXIT File Compatibility See page 68 Using the Photo Frame feature You can use the TV screen as a digital picture frame One image pre installed or user installed ca...

Страница 65: ...K A confirmation message will appear Select Yes and press OK 4 Press BACK Settings 1 Press or to select Settings and press OK 2 Press or to select Clock Position or Auto Power Off Settings f f O k c o l C Left Off Position Auto Power Off Edit 3 Set the following items as desired Clock Press or to select Off Digital Clock Analogue Clock or Analogue Digital Position Press or to select Left or Right ...

Страница 66: ... below wait until it warms up No REGZA LINK operation The REGZA LINK feature is available for Toshiba REGZA LINK compatible devices Make sure HDMI cables with the HDMI logo are used When a connected REGZA LINK device does not work correctly after you have changed device settings turn off your TV and unplug the power cord Then plug the TV in and turn on again If several devices are connected the RE...

Страница 67: ... until PIN entered Block all Transmitted rating hex code 0 x 00 0 x 01 0 x 02 0 x 03 0 x 04 0 x 05 0 x 06 0 x 07 0 x 08 0 x 09 0 x 0A 0 x 0B 0 x 0C 0 x 0D 0 x 0E 0 x 0F Australian parental guide code Not Classified P Pre school C Children s G General PG Parental Guidance Recommended M Mature Audience 15 R Restricted 18 MA Mature Adult Audience 15 AV Adult Audience Strong violence 15 On Screen Disp...

Страница 68: ...g on the content DivX external subtitles are not support Video MPEG 2 Video H 264 MPEG 4 AVC yes yes Audio MPEG 1 Layer1 MPEG 1 Layer2 MPEG 2 Layer2 Dolby Digital AC 3 L PCM yes yes Audio Dolby Digital Plus AAC HE AAC yes no MP4 mp4 m4v Video H 264 MPEG 4 AVC yes yes Audio AAC yes yes Audio HE AAC Dolby Digital AC 3 Dolby Digital Plus yes no AVI DivX DivX Plus HD avi divx div Video DivX 3 4 5 6 ye...

Страница 69: ...ber 7 MHz Channel Frequency Limits MHz 7 MHz Digital Channel Centre Freq MHz 8 MHz Designated Channel Number 8 MHz Channel Frequency Limits MHz 8 MHz Digital Channel Centre Freq MHz 27 519 526 522 5 27 518 526 522 28 526 533 529 5 28 526 534 530 29 533 540 536 5 29 534 542 538 30 540 547 543 5 30 542 550 546 31 547 554 550 5 31 550 558 554 32 554 561 557 5 32 558 566 562 33 561 568 564 5 33 566 57...

Страница 70: ...6 51 687 694 690 5 51 710 718 714 52 694 701 697 5 52 718 726 722 53 701 708 704 5 53 726 734 730 54 708 715 711 5 54 734 742 738 55 715 722 718 5 55 742 750 746 56 722 729 725 5 56 750 758 754 57 729 736 732 5 57 758 766 762 58 736 743 739 5 58 766 774 770 59 743 750 746 5 59 774 782 778 60 750 757 753 5 60 782 790 786 61 757 764 760 5 61 790 798 794 62 764 771 767 5 62 798 806 802 63 771 778 774...

Страница 71: ...4 735 25 C55 743 25 C56 751 25 C57 759 25 C58 767 25 C59 775 25 C60 783 25 C61 791 25 C62 799 25 C63 807 25 C64 815 25 C65 823 25 C66 831 25 C67 839 25 C68 847 25 C69 855 25 S mode OSD RF Frequency MHz S1 105 25 S2 112 25 S3 119 25 S4 126 25 S5 133 25 S6 140 25 S7 147 25 S8 154 25 S9 161 25 S10 168 25 S11 231 25 S12 238 25 S13 245 25 OSD RF Frequency MHz S14 252 25 S15 259 25 S16 266 25 S17 273 25...

Страница 72: ... 48 kHz Digital TV Terrestrial Tuner Demodulator Frequency 51 858 MHz Loop Through 51 858 MHz Bandwidth 7 8 MHz Demodulator COFDM FFT Mode 2K 8K Constellation QPSK 16QAM 64 QAM Guard Interval 1 4 1 8 1 16 1 32 Inner Coding Rate 1 2 2 3 3 4 5 6 7 8 COMPONENT VIDEO INPUT terminals the signal format 480i 480p 576i 576p 720p 50 60 Hz 1080i 50 60 Hz These signal formats are converted to match the numbe...

Страница 73: ...2 11 a b g n compatible Operating condition Temperature 0 C 35 C Humidity 20 80 No moisture condensation Supplied accessories Owner s manual 1 Remote control 1 Batteries 2 Clip 1 page 3 Screw 1 page 3 Scart Phono jacks adaptor 1 page 41 Pedestal stand 1 Optional accessories TOSHIBA Dual Band WLAN Adaptor WLM 10U1 RoHS DA Design and specifications are subject to change without notice Never service ...

Страница 74: ...74 ...

Страница 75: ...75 ...

Страница 76: ......

Отзывы: