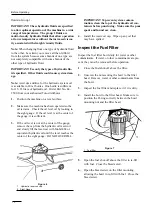
Installing A New Air Filter
1.
Inspect the new filter for shipping damage.
Check the sealing end of the filter. Do not install
a damaged filter.
2.
Insert the new filter into the air cleaner body.
Make sure the filter is sealed properly by apply-
ing pressure to the outer rim of the filter when
installing. Do not press on the flexible center of
the filter.
3.
Install the cover and secure the latches. Make
sure the cover is positioned with the TOP side up.
Changing The Engine Oil And
Filter
Change the oil and the oil filter initially after the first
20 hours of operation, thereafter change the oil every
50 hours and the oil filter every 100 hours.
1.
Locate the engine the oil drain plug on the bottom
of the oil pan.. Remove the drain plug and let the
oil flow into the drain pan. When the oil stops,
install the drain plug.
2.
Locate the engine filter on the front of the engine.
Remove the oil filter. Apply a light coat of clean
oil to the new filter seal before screwing it on.
DO NOT OVER-TIGHTEN.
3.
Add oil to the crankcase.
Changing the Hydraulic System
Fluid And Filter
The hydraulic system filter must be changed after the
first five hours of operation, and after that, every 250
hours of operation or yearly, whichever comes first.
Use a genuine Toro oil filter for replacement. The
hydraulic fluid must be changed every 500 hours of
operation or yearly, whichever comes first.
1.
Park the machine on a level surface, lower the
cutting units, set the parking brake and turn the
engine off.
2.
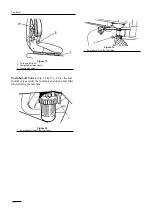
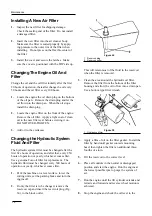
If only the filter is to be changed, remove the
reservoir cap and insert the reservoir plug (Fig.
30), to the block outlet.
Figure 29
1. Reservoir plug
2. Reservoir outlet
This will retain most of the fluid in the reservoir
when the filter is removed.
3.
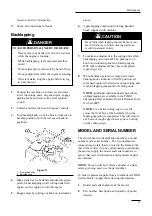
Clean the area around the hydraulic oil filter.
Remove the filter from the bottom of the filter
housing and allow the oil to flow into a drain pan.
Use a bottom type filter wrench.
Figure 30
1. Hydraulic oil filter
4.
Apply a film of oil on the filter gasket. Install the
filter by hand until gasket contacts mounting
head; then tighten the filter an additional three-
fourths of a turn.
5.
Fill the reservoir to the correct level.
6.
Place all controls in the neutral or disengaged
position and start the engine. Run the engine at
the lowest possible rpm to purge the system of
air.
7.
Run the engine until the lift cylinder extends and
retracts and forward and reverse wheel motion is
achieved.
8.
Stop the engine and check the oil level in the
26
Maintenance
Содержание REELMASTER 2300-D
Страница 24: ...Figure 21 Figure 22 Figure 23 Figure 24 Figure 25 Figure 26 24 Maintenance ...
Страница 29: ......

