background image

The Toro Total Coverage Warranty

Landscape

A Limited Warranty (see warranty periods below)

Contractor
Equipment
(LCE)

Conditions and Products Covered

The Toro Company and its affiliate, Toro Warranty Company, pursuant to an agreement
between them, jointly promise to the original purchaser to repair the Toro Products
listed below if defective in materials or workmanship.

The following time periods apply from the date of purchase by the original owner:

Products

Warranty Period

21 in. Mowers

2 years Residential Use

1

1 year Commercial Use

Engines

4

Honda – 2 years

Kawasaki – 3 years

30 in. Mowers

2 years Residential Use

1

1 year Commercial Use

Engines

4

Kawasaki – 3 years

Mid-Size Walk-Behind Mowers

2 years

Engines

4

Kawasaki – 3 years

Grand Stand

®

Mowers

5 years or 1,200 hours

2

Engines

4

3 years

Frame

Lifetime (original owner only)

3

Z Master

®

2000 Series Mowers

4 years or 500 hours

2

Engines

4

3 years

Frame

Lifetime (original owner only)

3

Z Master

®

3000 Series Mowers

5 years or 1,200 hours

2

Engines

4

3 years

Frame

Lifetime (original owner only)

3

Z Master

®

5000 Series Mowers

5 years or 1,200 hours

2

Engines

4

Kohler Command – 2 years

Kohler EFI – 3 years

Frame

Lifetime (original owner only)

3

Z Master

®

6000 Series Mowers

5 years or 1,200 hours

2

Engines

4

Kawasaki – 3 years

Frame

Lifetime (original owner only)

3

Z Master

®

7000 Series Mowers

5 years or 1,200 hours

2

Engines

4

2 years

Frame

Lifetime (original owner only)

3

Z Master

®

8000 Series Mowers

2 years or 1,200 hours

2

Engines

4

2 years

Frame

Lifetime (original owner only)

3

All Mowers

Battery

90 days Parts and Labor

1 year Parts only

Belts and Tires

90 days

Attachments

1 year

1

Residential use means use of the product on the same lot as your home. Use at more than one

location is considered commercial use and the commercial warranty would apply.

2

Whichever occurs first.

3

Lifetime Frame Warranty - If the main frame, consisting of the parts welded together to form the

tractor structure that other components such as the engine are secured to, cracks or breaks in
normal use, it will be repaired or replaced, at Toro's option, under warranty at no cost for parts and
labor. Frame failure due to misuse or abuse and failure or repair required due to rust or corrosion
are not covered.

4

Some engines used on Toro Products are warranted by the engine manufacturer.

Instructions for Obtaining Warranty Service

If you think that your Toro Product contains a defect in materials or workmanship,
follow this procedure:

1.

Contact any Authorized Toro Service Dealer to arrange service at their
dealership. To locate a dealer convenient to you, refer to the Yellow Pages of
your telephone directory (look under “Lawn Mowers”) or access our web site
at www.Toro.com. You may also call the numbers listed in item #3 to use the
24-hour Toro Dealer locator system.

2.

Bring the product and your proof of purchase (sales receipt) to the Service
Dealer. The dealer will diagnose the problem and determine if it is covered
under warranty.

3.

If for any reason you are dissatisfied with the Service Dealer’s analysis or with
the assistance provided, contact us at:

RLC Customer Care Department

Toro Warranty Company

8111 Lyndale Avenue South

Bloomington, MN 55420-1196

888-865-5676 (U.S. Customers)

888-865-5691 (Canada customers)

Owner Responsibilities

You must maintain your Toro Product by following the maintenance procedures
described in the

Operator's Manual

. Such routine maintenance, whether performed by

a dealer or by you, is at your expense.

Items and Conditions Not Covered

There is no other express warranty except for special emission system coverage
and engine warranty coverage on some products. This express warranty does not
cover the following:

Cost of regular maintenance service or parts, such as filters, fuel, lubricants, oil
changes, spark plugs, air filters blade sharpening or worn blades, cable/linkage
adjustments, or brake and clutch adjustments

Components failing due to normal wear

Any product or part which has been altered or misused or neglected and requires
replacement or repair due to accidents or lack of proper maintenance

Pickup and delivery charges

Repairs or attempted repairs by anyone other than an Authorized Toro Service
Dealer

Repairs necessary due to failure to follow recommended fuel procedure (consult

Operator's Manual

for more details)

Removing contaminants from the fuel system is not covered

Use of old fuel (more than one month old) or fuel which contains more than
10% ethanol or more that 15% MTBE

Failure to drain the fuel system prior to any period of non-use over one
month

General Conditions

All repairs covered by these warranties must be performed by an Authorized Toro
Service Dealer using Toro approved replacement parts.

Neither The Toro Company nor Toro Warranty Company is liable for indirect,
incidental or consequential damages in connection with the use of the Toro
Products covered by this warranty, including any cost or expense of providing
substitute equipment or service during reasonable periods of malfunction or
non-use pending completion of repairs under this warranty.

All implied warranties of merchantability (that the product is fit for ordinary use)
and fitness for use (that the product is fit for a particular purpose) are limited to
the duration of the express warranty.

Some states do not allow exclusions of incidental or consequential damages,
or limitations on how long an implied warranty lasts, so the above exclusions
and limitations may not apply to you.

This warranty gives you specific legal rights, and you may also have other rights
which vary from state to state.

Countries Other than the United States or Canada

Customers who have purchased Toro products outside the United States or Canada should contact their Toro Distributor (Dealer) to obtain guarantee policies for your country,
province, or state. If for any reason you are dissatisfied with your Distributor's service or have difficulty obtaining guarantee information, contact the Toro importer. If all other
remedies fail, you may contact us at Toro Warranty Company.

Australian Consumer Law:

Australian customers will find details relating to the Australian Consumer Law either inside the box or at your local Toro Dealer.

374-0252 Rev G


Содержание 78531

Страница 1: ...267 Rev A 48in or 52in E Z Vac Bagger Z400 Series Z Master Mowers Model No 78531 Serial No 315000001 and Up Model No 78532 Serial No 315000001 and Up Register at www Toro com Original Instructions EN...

Страница 2: ...No Serial No Figure 2 Bagger Serial Number 1 Bagger model and serial number location Model No Serial No This manual identifies potential hazards and has safety messages identified by the safety alert...

Страница 3: ...A heavy grass catcher could cause loss of control or overturn the machine Slow down and use extra care on hillsides Be sure to travel in the recommended direction on hillsides Turf conditions can aff...

Страница 4: ...tional Decals Safety decals and instructions are easily visible to the operator and are located near any area of potential danger Replace any decal that is damaged or lost 1 653558 98 5954 106 3339 11...

Страница 5: ...bagger belt into the blower assembly Blower assembly from Blower and Drive Kit 1 6 Spring from Blower and Drive Kit 1 Install the blower assembly 7 No parts required Adjust the flow baffle Upper tube...

Страница 6: ...the 8 bolts and nuts securing the rear of the heat shield to the engine straps and rear bumper Figure 4 Note Discard the bolts and nuts 2 Remove the 4 bolts washers and nuts securing the sides of the...

Страница 7: ...ition 6 Install the bagger bracket and heat shield to the rear of the engine straps and rear bumper with 8 new bolts 5 16 x 1 inch and 8 new flange nuts 5 16 inch as shown in Figure 9 7 Install the ba...

Страница 8: ...e 10 Note Save the bolts and flange nuts Figure 10 1 Bolt 4 Engine guard strap 2 Flange nut 5 Rear weight 3 Rear bumper Note Make sure to install the bagger bracket correctly as shown in Figure 11 Fig...

Страница 9: ...embly 2 Install the 2 clevis pins into the hood assembly and bagger mounting bracket Secure it with 2 hairpin cotters Figure 14 Figure 14 1 Hood assembly 3 Hairpin cotter 2 Bagger mounting bracket 4 C...

Страница 10: ...eded for this procedure 1 Bagger belt from Blower and Drive Kit Procedure 1 Loosen the belt guide bolt Figure 18 2 Install the belt around the blower pulley Figure 18 3 Install the belt between the fi...

Страница 11: ...you remove the grass chute 1 Remove the side discharge chute from the mower deck Figure 19 1 Bolt 5 Spring installed 2 Spacer 6 Grass deflector 3 Locknut 7 L end of spring place behind deck edge befo...

Страница 12: ...e Flow Baffle No Parts Required Procedure 1 Swing the lever up to loosen the cam lock Figure 24 2 Align the flow baffle and cam lock in the slot to the edge of the blower assembly 3 Swing the lever ba...

Страница 13: ...ening and pull it back out so that the rubber seal is protruding out Figure 25 Figure 25 1 Upper tube 3 Bagger hood 2 Bagger opening 6 With the hood in the down position and the right hand bag removed...

Страница 14: ...top and bottom of the blower housing Figure 29 1 Blower assembly 3 Latch 2 Lower tube 10 Make sure that the mower deck is in the lowest height of cut position and the mark on the upper tube is still...

Страница 15: ...r tube from the blower 13 Join the upper and lower tubes with 3 bolts 10 x 3 4 inches 3 flat washers 7 32 inch and 3 locknuts 10 as shown inFigure 31 Figure 31 1 Lower tube 4 Locknut 10 2 Upper tube 5...

Страница 16: ...2 inches 2 Locknut 3 8 inch 4 Washer 3 8 inch Procedure To comply with ANSI OPEI B71 4 2012 Standard add front weight to the machine CAUTION The bagger adds a lot of weight to the rear of the machine...

Страница 17: ...control 1 Install 2 bolts 3 8 x 3 inches and 2 washers 3 8 inch to the frame under the foot rest Figure 34 2 Install the weights with the decal facing the front to the bolts with 2 washers 3 8 inch an...

Страница 18: ...the engine off and wait for all moving parts to stop before clearing an obstruction from the bagging system Never do maintenance or repairs while the engine is running Set the parking brake WARNING Wi...

Страница 19: ...37 1 Bag 2 Bottom handle 6 Repeat for the other bag 7 Install the bag tab into the notch in the bagger support frame Do this for both bags 8 Lower the bagger hood over the bags 9 Latch the bagger hoo...

Страница 20: ...Deflector DANGER Without the grass deflector discharge cover or complete grass catcher assembly mounted in place you and others are exposed to blade contact and thrown debris Contact with rotating mo...

Страница 21: ...he bagger If this happens the tube and blower may plug To avoid plugging the bagging system mow the grass at a high height of cut then lower the mower to your normal cutting height and repeat the bagg...

Страница 22: ...ide of the machine Use a mild automotive detergent to remove dirt 2 Make sure that you remove matted grass from all parts 3 After washing all parts let them dry thoroughly Note With all parts installe...

Страница 23: ...ry 100 hours After the first 8 hours Inspect the bagger attachment after the first 8 hours of operation and 100 hours thereafter 1 Disengage the PTO move the motion control levers to the neutral locke...

Страница 24: ...ess you install a cover plate a mulch plate or a grass chute and catcher Make sure that the grass deflector is in the down position 1 Remove the locknut bolt spring and spacer holding the deflector to...

Страница 25: ...er to Inspecting the Bagger page 23 3 Make sure the bags are empty and thoroughly dry 4 Check the belt for wear or cracks 5 Store the machine in a clean dry place out of direct sunlight If you must st...

Страница 26: ...y the hopper 1 The bags are too full 1 Dump more frequently 2 The engine speed is low 2 Always operate the bagger at full throttle 3 Grass is too wet 3 Cut grass when it is dry 4 Grass is too long 4 C...

Страница 27: ...Notes 27...

Страница 28: ...Notes 28...

Страница 29: ...Notes 29...

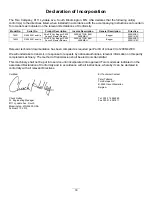
Страница 30: ...Bagger 2006 42 EC 2000 14 EC Relevant technical documentation has been compiled as required per Part B of Annex VII of 2006 42 EC We will undertake to transmit in response to requests by national aut...

Страница 31: ...3766 3636 Jean Heybroek b v Netherlands 31 30 639 4611 Victus Emak Poland 48 61 823 8369 European Privacy Notice The Information Toro Collects Toro Warranty Company Toro respects your privacy In order...

Страница 32: ...the Service Dealer s analysis or with the assistance provided contact us at RLC Customer Care Department Toro Warranty Company 8111 Lyndale Avenue South Bloomington MN 55420 1196 888 865 5676 U S Cust...

Отзывы: