


14
1
2
3
m–6092
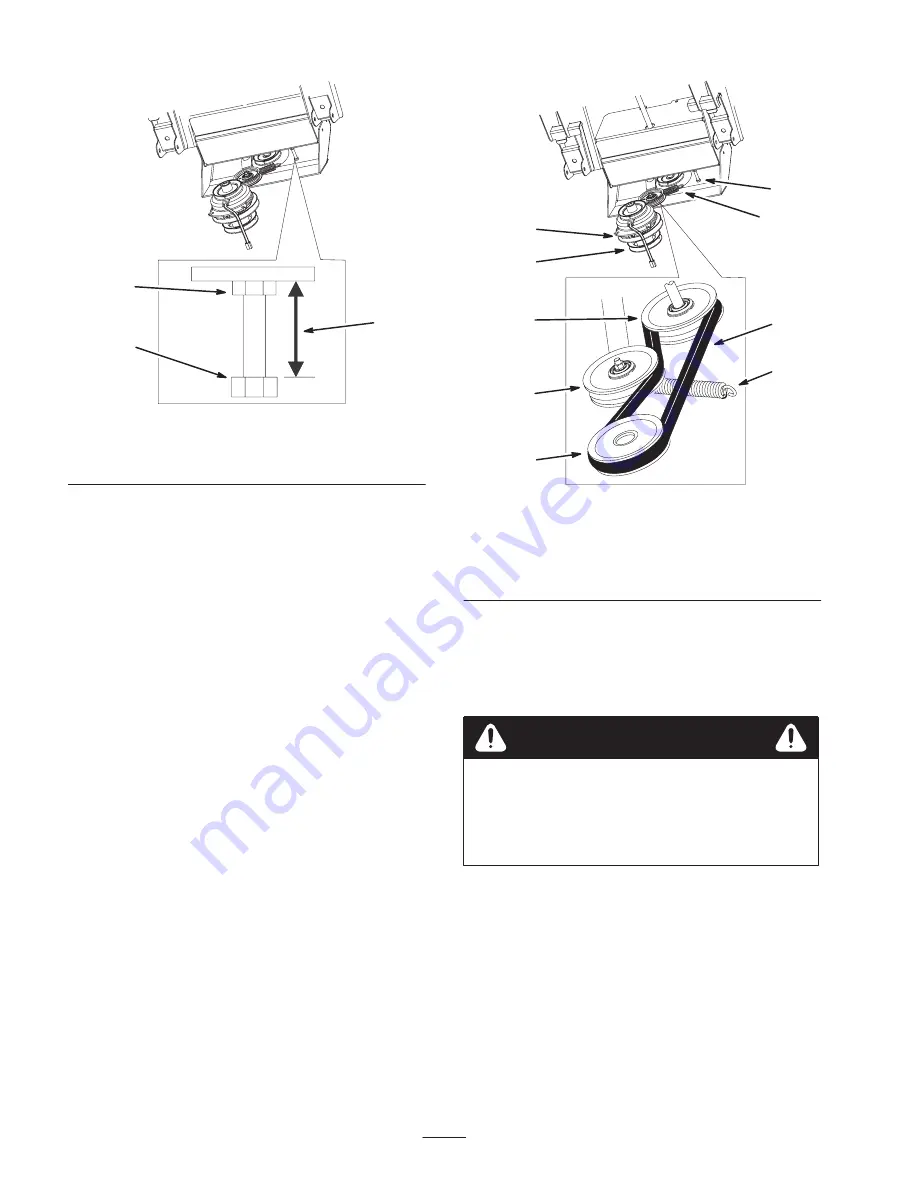
Figure 19
1.
Bolt for spring
2.
Jam nut
3.
2 in.
6. Install the spring onto the tensioner pulley arm hook
(Fig. 20).
7. Install the skid plate (Fig. 18).
m–6004
6
3
4
7
2
1
1
6
5
Figure 20
1.
Tensioner spring
2.
Bolt for spring
3.
Bagger tensioner pulley
4.
Bagger pulley
5.
Bagger belt
6.
Clutch drive pulley
7.
Clutch
Installing the Weights
Note: There are left hand and right hand weights and
weight brackets (Fig. 22).
The bagger adds a lot of weight to the rear of the
machine and may cause an unstable condition
which could result in a loss of control.
•
Install the front weights.
Caution
1. Remove the two outside bolts that connect the front
floorpan to the carrier frame (Fig. 21). Save this
hardware.
2. Remove the 4 bolts and washers that hold the front
floorpan to the front frame (Fig. 21). Save this
hardware.