Page 47
3.8 HDD Installation
To install the HDD into the EX-93821/EX-93823, please follow the steps below:
Step 1:
Remove the back cover. See
Section 3.6
above.
Step 2:
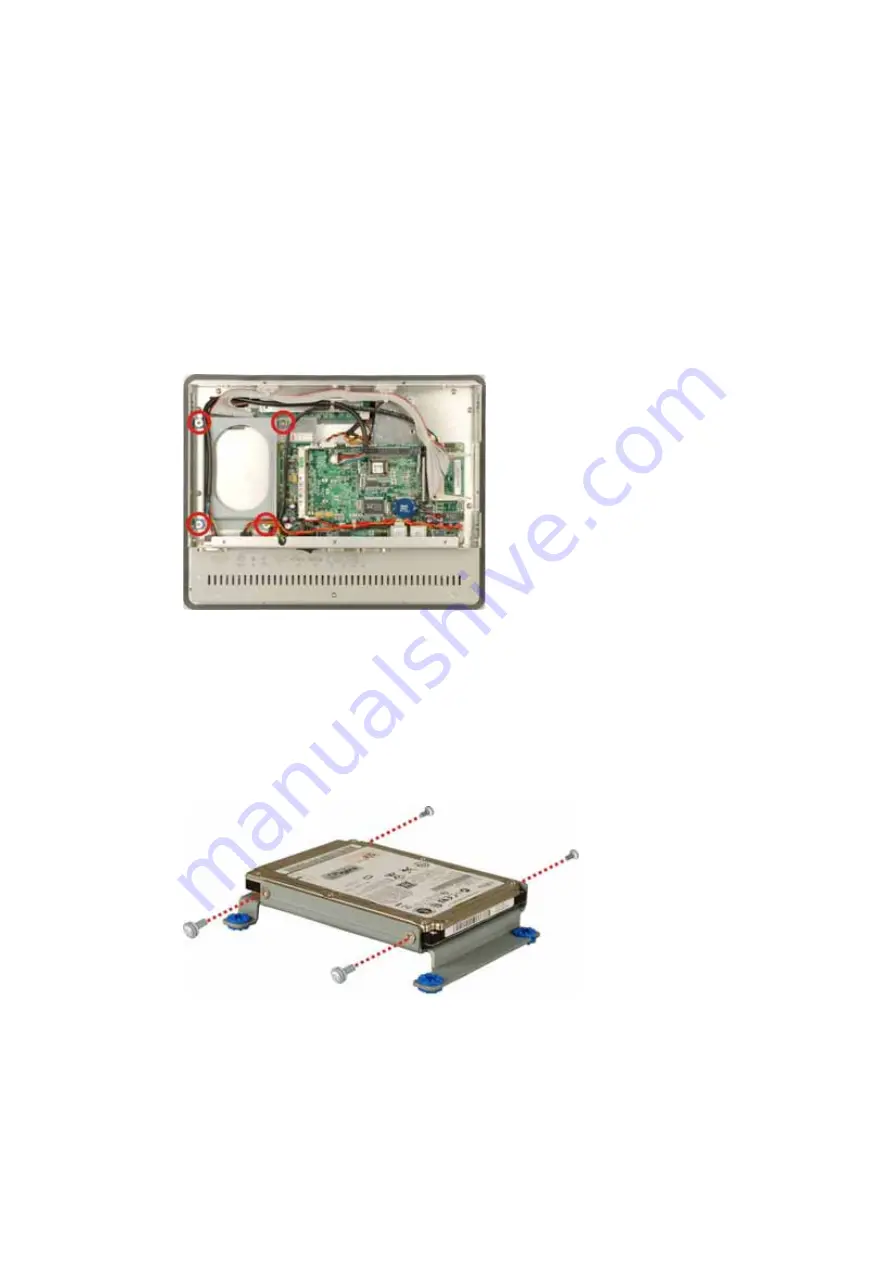
The HDD bracket is attached to the platform by four retention screws. Remove
the four retention screws from the platform (
Figure 3-7
).
Figure 3-7: HDD Bracket Retention Screws
Step 3:
Attach the HDD brackets to the HDD. To do this, align the four retention screw
holes in the two sides of the HDD bracket with the retention screw holes on the
sides of the HDD. Insert four retention screws into the HDD bracket (
Figure
3-8
).
Figure 3-8: EX-93821/EX-93823 HDD Bracket Retention Screws
Step 4:
Connect the IDE cable from the motherboard to the rear of HDD.
Содержание EX-93821
Страница 1: ...Page 1 EX 93821 EX 93823 Flat Panel PC...
Страница 13: ...Page 13 1 Introduction Chapter 1...
Страница 27: ...Page 27 2 Motherboard Chapter 2...
Страница 35: ...Page 35 3 Installation and Configuration Chapter 3...
Страница 59: ...Page 59 4 Gasket Replacement Chapter 4...
Страница 61: ...Page 61 5 AMI BIOS Setup Chapter 5...
Страница 98: ...EX 93821 EX 93823 Flat Panel PC Page 98 3 3 V 12 V VBAT V 5VSB V...
Страница 99: ...Page 99 A Safety Precautions Appendix A...
Страница 103: ...Page 103 B BIOS Configuration Options Appendix B...
Страница 107: ...Page 107 C Software Drivers Appendix C...
Страница 116: ...EX 93821 EX 93823 Flat Panel PC Page 116 THIS PAGE IS INTENTIONALLY LEFT BLANK...
Страница 117: ...Page 117 D Hazardous Materials Disclosure Appendix D...
Страница 121: ...Page 121 E Index...


