Advanced features
Advanced features
3.4
Channel edit
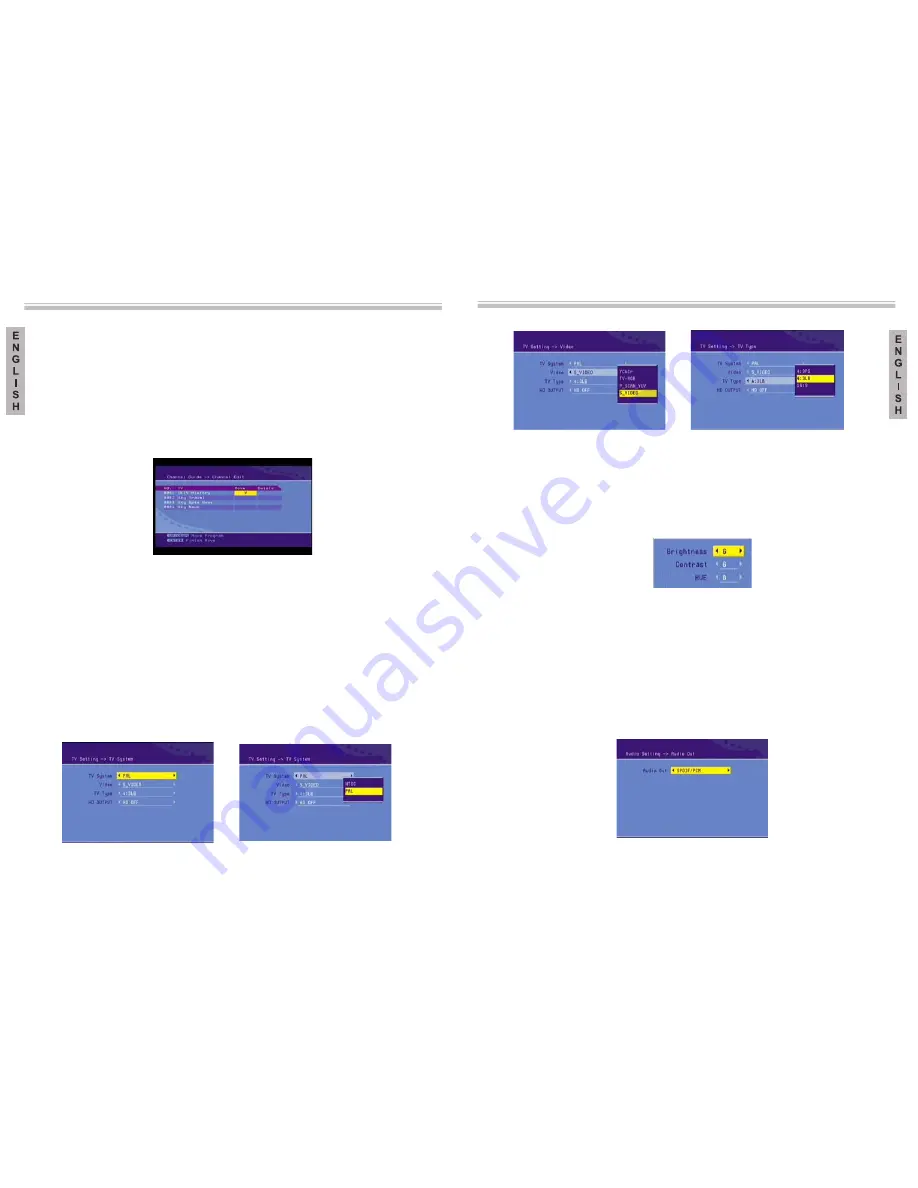
The channel edit menu is shown in Picture 13. To change the name of a channel select
the channel and press ENTER. Following this, use the left or right function keys to
select a character and “up” or “down” to change a character. Press ENTER to confirm
the name change. To change the position of a channel, select the MOVE column and
press ENTER. Next, use the “up” and “down” function keys to change the number order
of the channel and the ENTER key to confirm the change. Select the DELETE column
and press ENTER if you wish to erase a channel. Use the TV / RADIO key to alternate
between television channels and radio channels. Note: If there are no channels available,
the user the user cannot access channel edit.
Picture 13: Channel edit menu
3.5
List of notes
(EPG) menu or that you have added manually.
Will show all the notes on programs that appear in you Electronic Programmes
Guide
4. System setup
4.1
Setting the TV
From the Settings Menu, shown in Picture 14, the TV system, the video out and the
aspect proportion of the TV. Press “up” or “down” to select the points. To change the
settings, press the “left” and “right” function keys to alternate between the different
settings, or press ENTER and then the “up” and “down” function keys
options. The possible options are:
TV system: NTSC, PAL, Automatic. See Picture 15.
Video: YCbCr, TV-RGB, P-SCAN-YUV, PC-VGA, S-VIDEO. See Picture 16.
TV type: 4:3 Panoramic, 4:3 Letterbox, 16:9. See Picture 17.
to select a list
of
Picture 14: TV settings menu
Picture 15: TV system
Picture 16: Video
Picture 17: TV type
4.2
Setting the video
From the Video Settings Menu, shown in Picture 18, the brightness, contrast, hue and
can be changed. Press the “up” or “down” function keys to select one of the
points. To change the settings, press the “left” and “right” function keys to alternate
between the different settings. Alternativel
a list of possible settings.
y, you can also press ENTER to choose
from
Picture 18: Video Settings Menu
Settings:
Brightness: 0, 2, 4, 6, 8, 10, 12
Contrast: 0, 2, 4, 6, 8, 10, 12
Hue: +12, +10, +8, +6, +4, +2, 0
4.3
Setting the audio
From the Audio Settings Menu, shown in Picture 19, the audio out option can be
changed using the “left” and “right” function keys. Alternatively, press ENTER to
choose amongst a list of possible settings. The following are the audio out options:
SPDIF OFF, SPDIF RAW, SPDIF PCM.
Picture 19: Audio Settings Menu
62
63
The menu setup system – DVB-T Section
The menu setup system – DVB-T Section


