Page 10
For technical questions, please call 1-888-380-0318.
Item 64806
Sa
FE
ty
W
E
lding
t
ip
S
tig
/ Stick
c
ontrol
S
Wir
E
Maint
E
nanc
E
1.
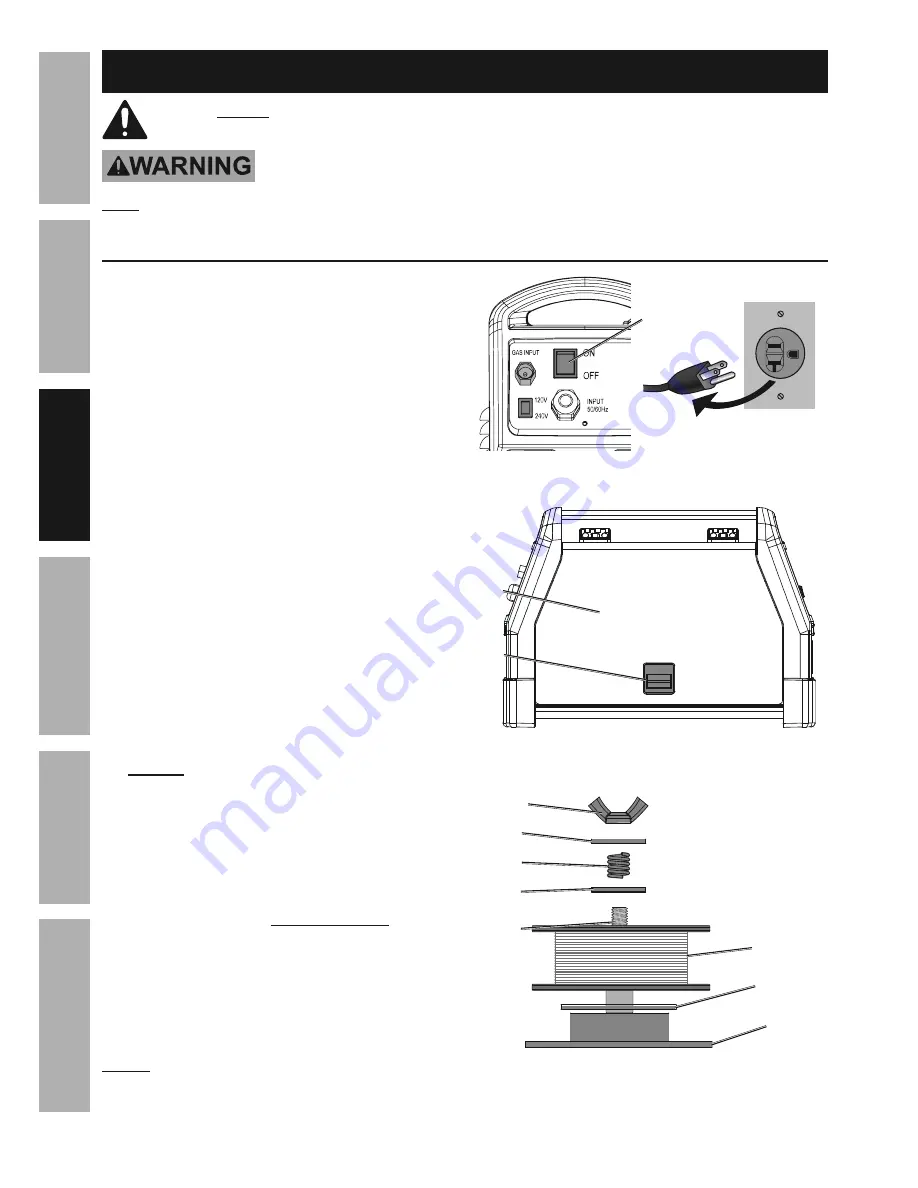
turn the power Switch oFF and unplug
the Welder before proceeding.
2. Pull up on the Door Latch,
then open the Door.
3.
2 pound Wire Spool installation:
Remove the Wingnut, Keyed Washers, and
Spring. If replacing a Spool, remove the old
Spool and all remaining wire from the liners.
4. Place the new Wire Spool over the Spool Spindle
and against the Spool Brake Pad as illustrated.
to prevent wire feed problems, set the Spool
so that it will unwind counterclockwise.
5. Line up the Keyed Washers with
the groove on the Spindle. Replace
the Keyed Washers and Spring
over the Spool Spindle and secure
Spool in place with the Wingnut.
notice:
If Wire Spool can spin freely, Wingnut is too
loose. This will cause the welding wire to unravel and
unspool which can cause tangling and feeding problems.
power
Switch
door
latch
door
Welder
Wall
Wingnut
2 lb
Wire Spool
Spool
Brake pad
keyed
Washer
keyed
Washer
Spring
Spool
Spindle
2 lb Spool loading
Wire Welding
read the EntirE iMportant SaFEty inForMation section at the beginning of this manual
including all text under subheadings therein before set up or use of this product.
to prEVEnt SErioUS inJUry FroM accidEntal opEration:
turn the power Switch off and unplug the Welder before setup.
note:
Remove the protective foam and cardboard from the Welder before setup.
Wire Spool Installation / Wire Setup


