background image

FDU-XT PLUS User Guide


I  

25

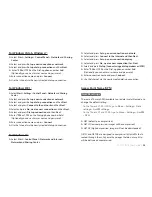
For Windows Vista & Windows 7:

   Select 

Start 

>

 Settings 

>

 Control Panel 

>

 Network

 and 

Sharing 

Center

.

   Select and press

 Set up a new connection or network

.

   Select and press 

Set up dial-up connection

 and then 

Next

.

   Enter 

*99#

 or 

1722

 on the Dial-up phone number field.  

(Optionally you can enter user name and password).

   Enter connection name and press 

Connect

.

   Use the Internet via the newly created dial-up connection.

  Select and press 

Set up a new connection or network

.

  Select and press 

Connect to the Internet and then Next

.

  Select and press 

Set up a new connection anyway

.

  Select and press 

No, create a new connection

 then 

Next

.

  Select and press 

Dial-up (Connect using a dial-up modem or ISDN)

   Enter 

*99#

 or 

1722 

on the Dial-up phone number field.  

(Optionally you can enter user name and password)

  Enter connection name and press 

Connect

  Use the Internet via the newly created dial-up connection

For Windows 10:

    Select 

Start 

>

 Control Panel 

>

 Network and Internet 

>


Network and Sharing Center

.

Access Point Name (APN)

GmPRS settings

There are 3 Thuraya APNs available to use data in satellite mode, to 
change the default setting:

-   On the Thuraya XT-PRO DUAL, go to 

Menu

 > 

Settings

 > 

Data 

settings

 > 

GmPRS settings

-   On the Thuraya XT and XT-PRO, go to 

Menu 

Settings

 > 

GmPRS


APN

  GET (default, no compression)

  GETLC (low compression, images will be compressed)

  GETHC (high compression, images will not be downloaded)

GETLC and GETHC are designed to compress all http traffic that is 
routed through them. Any emails and apps that do not use http 
will be delivered uncompressed.

For Windows 8/8.1:

  Select 

Start 

>

 Settings 

>

 Control Panel 

>

 Network

 and 

Sharing 

Center

.

  Select and press

 Set up a new connection or network

.

  Select and press

 Set up dial-up connection

 and then 

Next

.

  Select and press 

Connect to the network

 and then 

Next

.

  Select and press 

No, create a new connection

 and then 

Next

.

  Select and press 

Dial-up connection

 and then 

Next

.

    Enter 

*99#

 or 

1722

 on the Dial-up phone number field.  

(Optionally you can enter user name and password).

  Enter connection name and press 

Connect

.

  Use the Internet via the newly created dial-up connection.

Содержание FDU-XT PLUS

Страница 1: ...FDU XT PLUS USER GUIDE...

Страница 2: ......

Страница 3: ...PLUS 13 5 10 Docking the XT PRO or XT 14 5 11 Docking the XT PRO DUAL 14 5 12 Undocking the handset from the FDU XT PLUS 15 6 Receiving Making Voice Calls 16 6 1 Receiving Voice Calls 16 6 2 Making C...

Страница 4: ...nces the capabilities of your Thuraya handset to meet your communication requirements both in the home office and on a vessel When a Thuraya handset is used with FDU XT PLUS the handset becomes a comm...

Страница 5: ...m 3 2 Installing the Satellite Antenna The satellite antenna is a rectangular patch antenna and is supplied with mounting brackets 3 2 1 How to Install the Satellite Antenna 1 Mount the antenna onto a...

Страница 6: ...age area Europe Africa Middle East Align your antenna towards the Thuraya 3 satellite if your location is within the Thuraya 3 coverage area Asia Australia In the overlapping areas you can approach ei...

Страница 7: ...ace so that the drilled holes and the screw holders line up 5 Fix the antenna securely using the screws provided 6 Connect the other end of the GPS antenna cable on the reverse side of the FDU XT PLUS...

Страница 8: ...gold to gold and silver to silver Tighten the connector and wrap the connected part using magnetic coupling vinyl tape or sealant to protect from water Mount the pipe to the underside of the antenna a...

Страница 9: ...SAT port Secure the earth wire inside the hole located on the underside of the antenna and the other side of the wire to the mounting pole using bolts Seal the heads of the bolts using sealant Connec...

Страница 10: ...e of the unit to allow the FDU XT PLUS to be hooked securely to a wall Interfaces for connecting external equipments such as Group 3 fax machines and PCs are provided at the reverse side of the unit F...

Страница 11: ...DTE Port GPS Antenna Phone EXT Port for connection to external line phones Satellite Antenna Port Power Switch DC Jack USB DTE FAX EXT SAT GPS POWER 12V 36V d c AUX OUT Speakerphone Volume Up Power L...

Страница 12: ...for brackets are provided on the back of the FDU XT PLUS 1 Find an appropriate location on the wall to mount the FDU XT PLUS 2 Place the bracket on the fixing location and mark the location of the scr...

Страница 13: ...FDU XT PLUS at the RJ 11 interface using the included RJ 11 cable 1 Plug one end of the RJ 11 cable to the RJ 11 interface marked EXT on the FDU XT PLUS 2 Connect the other end of the RJ 11 cable to t...

Страница 14: ...ce of the FDU XT PLUS To use the USB interface please install the USB drivers for the FDU XT PLUS first on your PC The drivers can be found on the Support CD provided with the product Contact your Ser...

Страница 15: ...stay on 4 If not connected try again from Step 2 Press the Bluetooth Scanning button to pair with the previously paired device up to 3 last paired devices How to clear the Bluetooth connection history...

Страница 16: ...fully the display of the phone will show Fixed Adapter 4 Ensure you have full signal strength on the display otherwise try to adjust the direction of the antennas Ensure that the dust caps on the reve...

Страница 17: ...a locking function to prevent unwanted removal of the handset from the FDU XT PLUS The handset can only be removed if the lock is opened To remove the phone 1 Allow the handset to complete all ongoin...

Страница 18: ...Incoming calls are indicated by 1 Ringing tone from the speakerphone optionally from the extension phone if attached or from the Bluetooth headset if connected 2 Flashing of the speakerphone LED and o...

Страница 19: ...handset Method 2 1 Dial the destination number using Thuraya handset keypad while the auxiliary handset is on the cradle 2 Pick up the auxiliary handset Calling from the Extension Phone 1 Pick up the...

Страница 20: ...e to Auxiliary Handset 1 Pick up the auxiliary handset during the call The call will be routed to the auxiliary handset Auxiliary Handset to Speakerphone 1 Press the speakerphone button on the FDU XT...

Страница 21: ...XT PLUS during a call 6 5 Volume Control You can adjust the volume of the speakerphone auxiliary handset and ringtone using the Volume Up and Volume Down button on the FDU XT PLUS Adjusting auxiliary...

Страница 22: ...n mute the microphone while in speakerphone mode by pressing the mute button You will then be able to hear the caller at the other end but the other party will not be able to hear you If you pick up t...

Страница 23: ...US 2 Switch on the Group3 fax machine connected via the RJ 11 interface 3 Switch on the FDU XT PLUS 4 Place the fax sheet in the fax machine and dial the destination number followed by or 5 Press the...

Страница 24: ...ith a PC Laptop While sending a fax through PC connected through the USB or DTE interface the fax software should be configured in the class 2 0 mode When sending a fax through Venta Fax or Hot Fax se...

Страница 25: ...the USB or DTE serial interface of the FDU XT PLUS 3 Switch on the FDU XT PLUS 4 Start the data communication software of your PC 5 Enter the destination number 6 Select the data file to be sent 7 Use...

Страница 26: ...satellite data Select Start Settings Control Panel System Device Manager Check the USB serial port number for FDU XT PLUS e g COM40 with the newly created USB serial port when the USB cable is connec...

Страница 27: ...and Internet Network and Sharing Center Access Point Name APN GmPRS settings There are 3 Thuraya APNs available to use data in satellite mode to change the default setting On the Thuraya XT PRO DUAL...

Страница 28: ...following procedure to make a call on the extension phone enter the PIN code telephone number or e g 0000 123456789 1 Connect the extension phone to the RJ 11 interface marked EXT on the reverse side...

Страница 29: ...rmation of the PIN change 10 3 How to change the PIN code Please make sure you do not forget the new PIN code otherwise you need to bring the FDU XT PLUS to the Service Center in order to reset the un...

Страница 30: ...ot place the FDU XT PLUS in a wet area Do not expose the FDU XT PLUS to temperatures higher than 55 C Celsius or less than 0 C Celsius Do not expose the FDU XT PLUS to moisture dust etc Do not expose...

Страница 31: ...et is not working Check whether the auxiliary handset is connected properly Speakerphone not working Make sure that the speakerphone is on Select appropriate volume level Unable to send receive fax th...

Страница 32: ...flashing if Bluetooth connected Incoming call The white LED on the Speakerphone button is on Speakerphone is on The white LED on the Bluetooth On Off button is on Bluetooth call is on The white LED on...

Страница 33: ...and exclusive solution will be repair or replacement of the product APSI neither assumes nor authorizes any Authorized Service Center or any other person or entity to assume any other obligation or l...

Страница 34: ...External G3 fax connection fax call Auxiliary handset connection voice call 1 x RS 232 serial connection 1 x USB PC connection 2 x SMA connections Satellite antenna connection GPS antenna connection...

Страница 35: ......

Страница 36: ...www thuraya com Thuraya Telecommunications Company Emall customer care thuraya com...

Отзывы: