background image


Installing the telephone base 


The telephone base should be placed at least 1 meter away from other electrical appliances in order 

to avoid interference. The handset exchanges radio signals with the telephone base. The strength of 

these signals depends on the position of the base. You can obtain a stronger signal by placing the 

base higher.   


Operating range of the handset 


The  operating  range  of  your  telephone  is  300  meters  outdoors  without  obstructions  between  the 

telephone base and handset. Obstructions reduce the operating range. When the telephone base is 

located indoors, while the handset is indoors or outdoors, the operating range is reduced to 50 meters. 

Thick concrete walls reduce the operating range significantly. 


  Signal strength 

When the handset is within the operating range of the telephone base, 

  appears on the screen. 

  flashes when the handset is out of range. You should then get closer to the telephone base to 

turn off this indicator. 


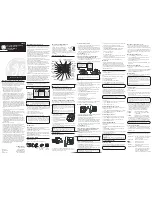
Installing and charging the batteries 


1.  Insert the plug of the supplied adapter to the back of the telephone base and the other end into 

an electrical outlet. 

2.  Plug the telephone line cord to the back of the telephone base and the other end into a telephone 

wall jack. 

3.  Insert the rechargeable Ni-MH batteries supplied into the handset by following the correct polarity 

as indicated. Close the battery compartment. 

4.  Place the handset on the telephone base and let the batteries charge for 24 hours before using it 

for the first time. 


Low battery warning 


When  the  batteries  are  very  low, 

  flashes  on  the  handset  screen  and  a  warning  beep  will 

sound every minute to prompt you to recharge the batteries. 


Battery performance 


When fully charged, the batteries offer approximately 12 hours of talk time and 120 hours of standby 

time under ideal conditions. Please note that a new battery reaches its full capacity after several days 

of normal use. 

The  battery  capacity  decreases  over  time,  reducing  the  talk  time  and  standby  time.  Replace  the 

batteries if necessary. 

The batteries and the handset will become hot during charging. This is normal. 


Telephone Jack


Adapter Jack


Содержание Multy TH-500DBE

Страница 1: ...Digital Cordless Telephone User Manual TH 500DBK TH 500DBE TH 500DRD TH 500DGN TH 500DOE Please read and retain these instructions...

Страница 2: ...settings 10 Handset settings 12 Registration 15 Operation Handset and hands free mode 16 Hands free and handset volume control 16 Mute the speakerphone 16 Caller ID type I II 17 Auto timer 17 Flash 17...

Страница 3: ...al objects staples pins etc Be careful when placing the handset near these items Your telephone does not work in case of power failure and by consequence cannot be used for emergency calls To avoid su...

Страница 4: ...lling and charging the batteries 1 Insert the plug of the supplied adapter to the back of the telephone base and the other end into an electrical outlet 2 Plug the telephone line cord to the back of t...

Страница 5: ...may irritate your eyes or skin Observe the polarity indicated Reversing the polarity of the battery may result in electrolyte leakage and explosion Remove the batteries if you do not intend to use yo...

Страница 6: ...5 Presentation of your telephone Handset...

Страница 7: ...s Decreasing the volume Review incoming number outgoing number and phone number R Flash Delete The key is used to delete memory Delete the current input by a short pressing during menu edit BIS Redial...

Страница 8: ...Repeat call indicate that the same calls received which un reviewed and the icon will be displayed NEW CID The icon will be displayed when a new call comes Sequence When you scroll and review the num...

Страница 9: ...ive sub menus under the handset menu item HANDSET MENU TREE PHONE BOOK LIST NEW ENTRY EDIT RECORD DEL RECORD DELETE ALL MEM STATUS CALL LOG MISSED RECEIVED DIALED BS SETTINGS DELETE HS DIAL MODE TONE...

Страница 10: ...ts by using the or key besides you can also make a call from phonebook Press or key to select NEW ENTRY item This function allows the user to add an entry to the phone book 1 If the phonebook is full...

Страница 11: ...ee items in this menu MISSED RECEIVED and DIALED When LCD display CALL LOG 1 Press MENU OK key to enter missed call lists received call lists or dialed call lists 2 The LCD will show the last record I...

Страница 12: ...LASH TIME The user can select to change the flash time 100ms 300ms 600ms and 1000ms 1 Press MENU OK key then using or key to select FLASH TIME item 2 Press MENU OK key to enter 3 Press or key to selec...

Страница 13: ...o the ALARM menu Selection of ALARM ON option will turn the alarm on then the user will be requested to set the alarm time 4 After select ON press MENU OK key to start the time settings of alarm 12 00...

Страница 14: ...there will be a ringing off icon display on LCD and when there is an incoming call the handset will not ring Shortcut key press and hold key to switch the handset external call ring on off TONE SETUP...

Страница 15: ...NU OK key to confirm your selection Exit from this sub menu will return the user to the AUTO ANSWER BARRING The Handset can be set to disable all external outgoing calls or special outgoing call The u...

Страница 16: ...ss or key to select from 1 8 levels SELECT BASE This function allows the user to register the handset to existing base with other handset registration 1 Press MENU OK key then using or key to choose S...

Страница 17: ...me base and the successfully registered handset will displays HS2 or HS3 on the LCD according to the registration sequence 3 Press key to page the handset when you can t find it OPERATION Handset and...

Страница 18: ...dialing The unit has pre dialing function when you may enter and edit the number before dial it out The following procedure describes how to use this function 1 In idle mode enter the number you want...

Страница 19: ...ast received record 2 Press or key to select the designated message 3 Press MENU OK key to select ADD TO PB 4 Press MENU OK key to confirm to edit the incoming message 5 The user can delete the charac...

Страница 20: ...andsets will be connected To complete the transfer of the call the initiating handset should be placed on the cradle and the external call will now be connected to the second handset Party conference...

Страница 21: ...The base can not page the handset Repeat the registration operations to register the base and handset again Most of the functions failed Check if the batteries are strong enough charge the batteries I...

Страница 22: ...uman health in the reprocessing cycle of this product Therefore at the end of service life of this appliance you should not dispose of it as normal household waste Your role as an end user is vital in...

Отзывы: