Panasonic KX-TGH260 Скачать руководство пользователя страница 1

Operating Instructions

Link-to-Cell Bluetooth Convergence Solution
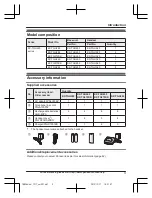
Model No.

KX-TGH260
KX-TGH262

KX-TG472SK

KX-TGH263

KX-TG473SK

KX-TGH264


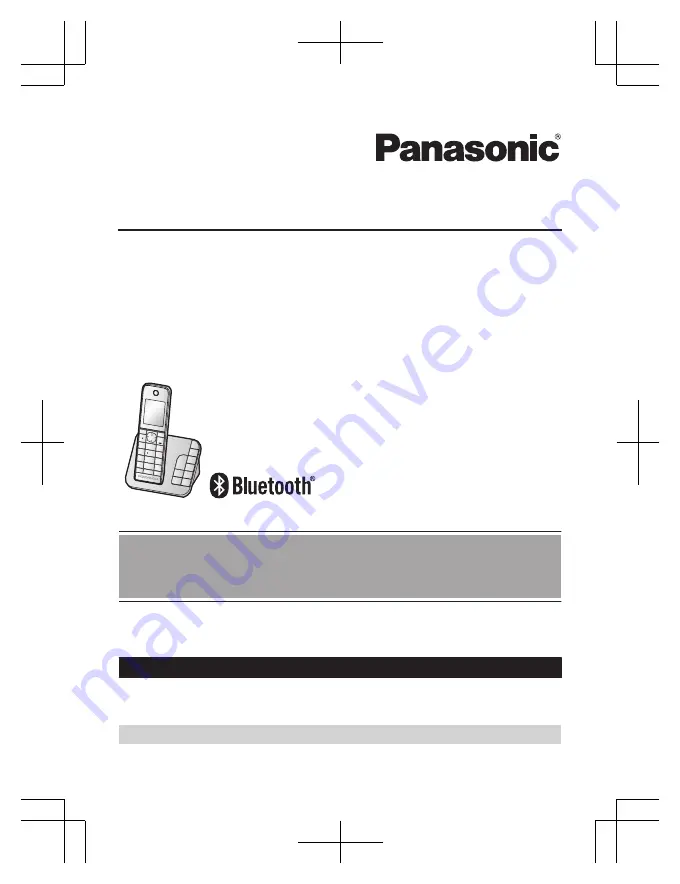
Model shown is KX-TGH260.

Before initial use, see “Getting Started”
on page 10.

Thank you for purchasing a Panasonic product.

Please read these operating instructions before using the unit and save them for
future reference.

Consulte  “Guía Rápida Española”, página 72.

For assistance, visit our Web site: 

http://www.panasonic.com/help

 for customers

in the U.S.A. or Puerto Rico.

Please register your product: http://www.panasonic.com/prodreg

TGH26x(en)_1217_ver051.pdf   1

TGH26x(en)_1217_ver051.pdf   1

2013/12/17   18:31:47

2013/12/17   18:31:47

Содержание KX-TGH260

Страница 1: ...rchasing a Panasonic product Please read these operating instructions before using the unit and save them for future reference Consulte Gu a R pida Espa ola p gina 72 For assistance visit our Web site...

Страница 2: ...er programming 42 Registering a unit 42 Caller ID Service Using Caller ID service 44 Caller list 44 Using Bluetooth Devices Copying phonebook from a cellular phone phonebook transfer 47 Text message S...

Страница 3: ...GH260 KX TGH262 KX TG472SK KX TGH263 KX TG473SK KX TGH264 A AC adaptor PNLV226Z 1 1 1 1 B Telephone line cord PQJA10075Z 1 1 1 1 C Rechargeable batteries HHR 4DPA 2 4 6 8 D Handset cover 1 PNYNTGHA20B...

Страница 4: ...tem in advance you can locate and find the mislaid item to which the key detector is attached Please visit our Web site http panasonic net pcc products telephone p tga20 Other information R Design and...

Страница 5: ...www panasonic com link2cell Trademarks R The Bluetooth word mark and logos are registered trademarks owned by Bluetooth SIG Inc and any use of such marks by Panasonic Corporation is under license R A...

Страница 6: ...or telephone line cord to be excessively pulled bent or placed under heavy objects Operating safeguards R Unplug the product from power outlets before cleaning Do not use liquid or aerosol cleaners R...

Страница 7: ...ys be followed to reduce the risk of fire electric shock and injury to persons including the following 1 Do not use this product near water for example near a bathtub washbowl kitchen sink or laundry...

Страница 8: ...underground near metal objects such as wire fences etc R Operating the product near electrical appliances may cause interference Move away from the electrical appliances Routine care R Wipe the outer...

Страница 9: ...115 mW max R Power source 120 V AC 60 Hz R Power consumption Base unit Standby Approx 1 1 W Maximum Approx 4 0 W Charger Standby Approx 0 1 W Maximum Approx 1 8 W R Operating conditions 0 C 40 C 32 F...

Страница 10: ...until you hear a click A DSL ADSL filter not supplied is required if you have a DSL ADSL service Note R Use only the supplied Panasonic AC adaptor PNLV226 1 4 5 3 4 2 n Charger Connect the AC adaptor...

Страница 11: ...ndset base unit and charger with a soft and dry cloth once a month Before cleaning the unit disconnect from power outlets and any telephone line cords Clean more often if the unit is exposed to grease...

Страница 12: ...tems Volume MDN or MCN Adjust the receiver or speaker volume while talking MFN W View the phonebook entry MEN REDIAL View the redial list MCN CID Caller ID View the caller list Base unit A D C E F H I...

Страница 13: ...level Blocked call page 40 Booster on Clarity booster is on page 22 In use Answering system is being used by another handset or the base unit Cell1 in use Someone is using the corresponding line Cell2...

Страница 14: ...You can select either English or Espa ol as the voice guidance language of the answering system The default setting is English 1 MMENUN right soft key 112 2 MbN Select the desired setting 3 MSAVEN a...

Страница 15: ...e operated to play the new messages first play the new voice mail messages next and then show the missed calls Setting the Smart function key The Smart function key for the following features must be...

Страница 16: ...s connected to your cellular phone 1 Handset For CELL 1 MMENUN right soft key 6241 For CELL 2 MMENUN right soft key 6242 R After the corresponding CELL indicator on the base unit starts flashing the r...

Страница 17: ...ng Caller ID is turned off On without Talking CID The handset and base unit use your cellular phone s ringer tone Caller information is not announced even if the Talking Caller ID is turned on Importa...

Страница 18: ...it is brought within the base unit s range during the auto connection interval it may automatically connect to the base unit page 17 R A disconnected cellular phone is not unpaired from the base unit...

Страница 19: ...llular calls to a phone number in your area Once you store your area code it is automatically added to the beginning of the 7 digit phone number when making cellular calls 1 MMENUN right soft key 633...

Страница 20: ...the redial list each 48 digits max 1 MEN REDIAL 2 MbN Select the desired entry 3 MCELLN R The unit starts dialing when only 1 cellular phone is paired a specific line is set to make cellular calls pa...

Страница 21: ...he call even if the handset is placed on the base unit or charger page 15 You can finish talking by pressing MOFFN without lifting up the handset Adjusting the ringer volume Handset Press MDN or MCN r...

Страница 22: ...turned on Booster on is displayed Handset noise reduction This feature allows you to hear the voice of the person you are talking to clearly by reducing the surrounding noise coming from the other pa...

Страница 23: ...d a cellular phone Transferring a cellular call from the handset to a cellular phone 1 Press MMENUN during a cellular call 2 MbN Transfer to cell a MSELECTN R The cellular call is transferred to the c...

Страница 24: ...if displayed to make intercom calls Answering an intercom call 1 Press M N to answer the page 2 When you finish talking press MOFFN Using the Smart function key Press M N to answer the page Power back...

Страница 25: ...ndset 2 MEN REDIAL 3 MbN Select the desired entry 4 Within 1 minute place the handset on the base unit R Wait until speakerphone is turned on automatically and the call is made n When 2 or more handse...

Страница 26: ...MOKN 7 MbN Select the desired label a MSELECTN R To store 2 or 3 phone numbers repeat steps 5 7 8 MbN Select the current setting of the group default Home a MSELECTN 9 MbN Select the desired group a M...

Страница 27: ...esents a single space Erasing the character or number Press MFN or MEN a MCLEARN R Press and hold MCLEARN to erase all characters or numbers Groups Groups can help you find entries in the phonebook qu...

Страница 28: ...are searching for page 27 MbN Scroll through the phonebook if necessary a M N To search by query You can narrow down the search to enter the first characters of a name To search for the name enter th...

Страница 29: ...d dial You can assign 1 phone number to each of the dial keys 1 to 9 on the handset Adding phone numbers to speed dial keys n By entering phone numbers 1 Press and hold the desired speed dial key 1 to...

Страница 30: ...ne is paired a specific line is set to make cellular calls page 19 3 MbN Select the desired cellular phone a MSELECTN n Using the landline 1 Press and hold the desired speed dial key 1 to 9 2 M N 30 F...

Страница 31: ...e following table indicates the default settings R In the following table indicates the reference page number R Display menu order and sub menu may vary depending on your model Display menu tree and d...

Страница 32: ...10 56 Answer on 1 327 51 Answer off 1 328 51 Main menu Voice Mail access 3 Operation Code Listening to voice mail messages 330 58 Main menu Intercom Operation Code Paging the desired unit 274 24 Main...

Страница 33: ...00 AM 237 40 Select group 241 40 Main menu Key detector 8 Sub menu 1 Sub menu 2 Settings Code Search 655 Battery check For assistance please visit http www panasonic com help 33 Programming TGH26x en...

Страница 34: ...1 Ring as cell limited 1 On with Talking CID On without Talking CID Off 6141 10 17 6142 11 Text message alert On Off 1 On no announce On with name Off 6101 10 48 6102 11 Text message alert Alert tone...

Страница 35: ...Operation Code Viewing the phonebook entry 280 27 Main menu Settings Sub menu 1 Sub menu 2 Settings Code Ring adjustments Ringer volume Handset 3 Off 6 6 160 Ringer volume Base unit 1 3 Off 6 1 G160 R...

Страница 36: ...Detector1 6561 Detector2 15 6562 16 Detector3 15 6563 16 Detector4 15 6564 16 Registration 6571 6572 16 6573 16 6574 16 Deregistration 6581 6582 16 6583 16 6584 16 Call block 1 Block a single number...

Страница 37: ...dit On Off 214 45 Auto talk 19 On Off 200 21 Set tel line 3 Set dial mode 1 Pulse Tone 120 15 Set flash time 1 20 900 ms 700 ms 600 ms 400 ms 300 ms 250 ms 200 ms 160 ms 110 ms 100 ms 90 ms 80 ms 121...

Страница 38: ...intercom call If you select On the tone sounds 2 times 8 This setting is available when you have the key detector KX TGA20 Read the installation manual for more information on the key detector 9 After...

Страница 39: ...displayed for the alarm A total of 5 separate alarm times can be programmed for each handset You can set one of 3 different alarm options once daily or weekly for each alarm time Important R Make sur...

Страница 40: ...MOFFN Changing the start and end time 1 MMENUN right soft key 237 2 Continue from step 3 Turning silent mode on off page 40 Selecting groups to bypass silent mode 1 MMENUN right soft key 241 2 Select...

Страница 41: ...MSAVEN a MOFFN n By entering phone numbers 1 MMENUN right soft key 217 2 MbN Block a single number a MSELECTN 3 MMENUN a MbN Add a MSELECTN 4 Enter the phone number 24 digits max R To erase a digit p...

Страница 42: ...name 10 characters max 3 MSAVEN a MOFFN Displaying the handset name You can select whether or not the handset name is displayed in standby mode The default setting is Off 1 MMENUN right soft key 105 2...

Страница 43: ...31 R All handsets registered to the base unit are displayed 2 MbN Select the handset you want to cancel a MSELECTN 3 MbN Yes a MSELECTN a MOFFN For assistance please visit http www panasonic com help...

Страница 44: ...onebook is displayed and logged in the caller list Talking Caller ID Handset Base unit This feature lets you know who is calling without looking at the display To use this feature you must subscribe t...

Страница 45: ...ITN repeatedly until the phone number is shown in the desired format 5 Using a cellular line To make a cellular call continue from step 2 Making cellular calls page 20 Using the landline M N Caller ID...

Страница 46: ...on 1 MCN CID 2 MERASEN a MbN Yes a MSELECTN 3 MOFFN 46 For assistance please visit http www panasonic com help Caller ID Service TGH26x en _1217_ver051 pdf 46 TGH26x en _1217_ver051 pdf 46 2013 12 17...

Страница 47: ...s displayed only when the cellular phone supports PBAP Phone Book Access Profile for Bluetooth connection R Some cellular phones may require you to perform an operation on the cellular phone even if y...

Страница 48: ...Refer to your cellular phone operating instructions for information on how to install applications Setting text message SMS alert The following settings are available The default is On no announce On...

Страница 49: ...enter your headset PIN R Typically default PIN is 0000 Refer to the headset operating instructions 4 Press MOKN then wait until a long beep sounds 5 MOFFN R When the HEADSET indicator on the base uni...

Страница 50: ...et and the handset Important R To activate this feature you should set call sharing mode to on beforehand page 37 n While the handset is on a landline call To join the conversation with your headset t...

Страница 51: ...on off the answering system Handset 1 To turn on MMENUN right soft key 327 To turn off MMENUN right soft key 328 2 MOFFN Note for base unit and handset R When the answering system is turned on the ANS...

Страница 52: ...handset When new messages have been recorded New message is displayed 1 To listen to new messages MMENUN right soft key 323 To listen to all messages MMENUN right soft key 324 2 When finished press MO...

Страница 53: ...ing a cellular line 1 Press MPAUSEN during playback 2 MbN Call back Cell a MSELECTN R The unit starts dialing when only 1 cellular phone is paired a specific line is set to make cellular calls page 19...

Страница 54: ...digits max a MOKN a MSELECTN a MOFFN Turning on off the new message alert setting 1 MMENUN right soft key 338 2 MbN On Off a MSELECTN 3 MbN Select the desired setting a MSAVEN a MOFFN Editing the set...

Страница 55: ...duct we recommend that you regularly change the remote code 1 MMENUN right soft key 306 2 Enter the desired 3 digit remote access code 3 MSAVEN a MOFFN Deactivating remote operation Press in step 2 on...

Страница 56: ...wers calls You can select 2 to 7 rings or Toll saver The default setting is 4 rings Toll saver The unit s answering system answers at the end of the 2nd ring when new messages have been recorded or at...

Страница 57: ...MbN Select the desired setting a MSAVEN a MOFFN Selecting Greeting only You can select Greeting only which sets the unit to announce a greeting message to callers but not record messages Select Greet...

Страница 58: ...r telephone company for the required pause time Example 1 222 333 4444 VM access number Pauses Password PPPP 8888 To erase the voice mail access number 1 MMENUN right soft key 331 2 Press and hold MCL...

Страница 59: ...messages Press M N in step 1 on Listening to voice mail messages page 58 R New VM must be set to On in Setting the Smart function key page 15 R If the voice mail VM access number is not stored the in...

Страница 60: ...e line cord has not been connected yet or not connected properly Check the connections page 10 R If you do not connect the telephone line cord and use only cellular lines set the cellular line only mo...

Страница 61: ...t does not turn on even after installing charged batteries R Place the handset on the base unit or charger to turn on the handset The unit does not work R Make sure the batteries are installed correct...

Страница 62: ...nding on the state of the wireless environment such as the presence of any electrical interference there may be a delay even if the auto connection feature is turned on You can connect to the base uni...

Страница 63: ...in an area with high electrical interference Re position the base unit and use the handset away from sources of interference R Move closer to the base unit R If you use a DSL ADSL service we recommen...

Страница 64: ...to talk on 2 lines at the same time for example 2 cellular lines or the landline and 1 cellular line I cannot make long distance calls R Make sure that you have long distance service Caller ID Talking...

Страница 65: ...page 37 R You need to call back the edited number to activate Caller ID number auto edit I cannot dial the phone number edited in the caller list R The phone number you dialed might have been edited i...

Страница 66: ...nection may be subject to interference from obstructions such as walls or electronic devices Move closer to the base unit I cannot connect my headset to the base unit R Confirm that your headset is tu...

Страница 67: ...ne company s voice mail service may be answering your calls before the unit s answering system can answer your calls Change the unit s number of rings setting page 56 to a lower value or contact your...

Страница 68: ...he voice instructions Depending on your service provider telephone company you may need to remove all messages from your voice mailbox to remove the notification You can also remove this notification...

Страница 69: ...notify the customer as soon as possible Also you will be advised of your right to file a complaint with the FCC if you believe it is necessary The telephone company may make changes in its facilities...

Страница 70: ...ence to radio or television reception which can be determined by turning the equipment off and on the user is encouraged to try to correct the interference by one or more of the following measures Reo...

Страница 71: ...interference when used with T Coil equipped hearing aids and cochlear implants T Compatible with Hearing Aid T Coil TIA 1083 For assistance please visit http www panasonic com help 71 Useful Informati...

Страница 72: ...ef nica de una sola l nea RJ11C hasta que escuche un clic 5 Se requiere un filtro DSL ADSL no incluido si tiene este tipo de servicio Nota L Use solo el adaptador de corriente alterna Panasonic PNLV22...

Страница 73: ...el altavoz mientras habla k Vea la entrada del directorio telef nico REDIAL Remarcaci n Vea la lista de remarcaci n V CID identificador de llamadas Vea la lista de personas que llamaron Cambio de idio...

Страница 74: ...o celular usando su sistema telef nico Para obtener m s detalles visite nuestro sitio web http www panasonic com link2cell L Coloque su tel fono celular cerca de la unidad base Si su tel fono celular...

Страница 75: ...l directorio telef nico se est n copiando desde un tel fono celular La unidad base est buscando el tel fono celular emparejado La unidad base est emparejando un tel fono celular Una llamada de celular...

Страница 76: ...unidad base Si desea usarlo de nuevo reconecte el tel fono celular a la unidad base L Aunque haya desconectado un tel fono celular emparejado de la unidad base si lo coloca dentro del alcance de la u...

Страница 77: ...star el volumen del receptor o del altavoz Oprima o V repetidamente mientras habla C mo hacer una llamada usando la lista de remarcaci n 1 REDIAL s r Seleccione la entrada deseada 2 Para hacer una lla...

Страница 78: ...ero telef nico deseado s LLAMAR o Cuando 2 tel fonos celulares est n emparejados CEL s r Seleccione el n mero telef nico deseado s LLAMAR s r Seleccione el tel fono celular deseado s SELEC Para hacer...

Страница 79: ...ando aparezca el men Selec modo r Seleccione Auto o Manual s SELEC Auto Descargue todas las entradas del tel fono celular autom ticamente Vaya al paso 5 Manual Copie las entradas que seleccion L El me...

Страница 80: ...se se ilumina usted est listo para usar el aud fono C mo operar un aud fono inal mbrico con Bluetooth usando una l nea terrestre Consulte las instrucciones de operaci n de su aud fono para ver c mo fu...

Страница 81: ...lumen del auricular L Oprima la tecla de navegaci n repetidamente mientras habla Por qu hay ruido o se corta la conversaci n L Trate de reubicar la unidad base de forma que se minimice la distancia al...

Страница 82: ...red TTY users TTY 1 866 605 1277 Purchase Parts Accessories and Owner s Manual online for all Panasonic Products by visiting our Web Site at http www pstc panasonic com or send your request by E mail...

Страница 83: ...Limited Warranty is extended only to the original purchaser and only covers products purchased as new Online Repair Request To submit a new repair request and for quick repair status visit our Web Si...

Страница 84: ...vel to and from the servicer The items listed are not exclusive but are for illustration only ALL EXPRESS AND IMPLIED WARRANTIES INCLUDING THE WARRANTY OF MERCHANTABILITY ARE LIMITED TO THE PERIOD OF...

Страница 85: ...trol type 12 Customer support 38 D Date and time 14 Dialing mode 15 Direct command code 31 Display Color 37 Display mode 37 Language 14 LCD backlight 37 Wallpaper 37 E Eco mode 11 Equalizer 22 Error m...

Страница 86: ...Y 82 V VM Voice mail 58 Voice guidance language 14 Voice mail 56 58 Volume Receiver 20 Ringer Base unit 21 34 35 Ringer Handset 21 34 35 Speaker 20 W Wall mounting Charger only 59 86 Index TGH26x en _...

Страница 87: ...87 Notes TGH26x en _1217_ver051 pdf 87 TGH26x en _1217_ver051 pdf 87 2013 12 17 18 31 52 2013 12 17 18 31 52...

Страница 88: ...d troubleshooting hints are available For your future reference We recommend keeping a record of the following information to assist with any repair under warranty Serial No Date of purchase found on...

Отзывы: