


8
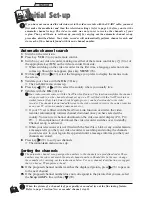
Set-up
1
Switch on your satellite / cable receiver and select channel 1.
2
Press key VCR (
1
) on your remote control.
3
With key MENU (
15
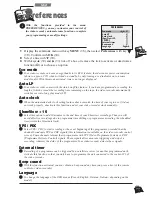
) call up the
SUMMARY
menu.
4
With key
W
W
(
12
), select the Installation line and confirm with OK (
10
).
ð
The
INSTALLATION
menu comes up.
5
With key
W
W
(
12
), select the Satellite and cable box line and confirm with OK (
10
).
ð
The S
ATELLITE AND CABLE BOX
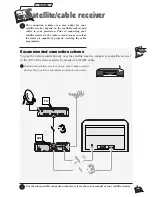
menu comes up. Depending on the connection
scheme chosen, you must tell the video recorder to which socket your satellite
receiver is connected.
6
Scroll through the different options with
C
(
13
) or
B
(
11
) and validate with OK (
10
).
- either RF or Coax (mono sound); in this case, you must start the search for the
communication channel of your satellite receiver. Press
C
(
13
) or
B
(
11
), confirm with
OK (
10
) on completion of the search,
- either AV1 or AV2; validate with OK (
10
) then select No decoder when prompted by
the video recorder (the other options available are rarely used in Europe).
7
Now you must enter your satellite code (see the code table at the end of this user
manual).
J
J
If the make or model of your satellite / cable receiver is not on the list, try out other model
numbers.
8
Validate your choice with OK (
10
).
ð
Via the infrared window, the video recorder transmits a signal to your satellite
receiver. A confirmation menu comes up while the satellite receiver positions itself on
channel 12 (check whether channel 12 is indicated by the display of the satellite
receiver, even if there is no image to be seen on the television screen).
J
J
The display of channel 12 by the decoder is not always effective. During the test (example:
TPS), you'll have to watch your decoder's display until it briefly indicates the number 12.
9a
Should the satellite receiver not use channel 12, select No with key EXIT (
14
). Your
video recorder then starts a new search (depending on the make of your satellite
receiver, several attempts are possible).
J
J
If no code works, repeat the procedure described on this page by entering the 00 into the
first screen. The video recorder then tries out all the codes stored in its memory (about
150). This procedure may require a fairly long time.
9b
If the satellite receiver uses the channel 12, select Yes with the OK (
10
) key.
10
Press key OK (
10
) again.
ð
Wait for quite a long time (up to 15 minutes), until a message tells you that storage
of your satellite channels is completed.
11
Press EXIT (
14
) to leave.
ð
Your video recorder now controls your satellite receiver.
12
Refer to page 5 to sort your satellite channels and check their names.
J
J
Some satellite receiver models cannot be controlled by your video recorder. In that case, you'll
have to programme both sets separately for timer-controlled recording.
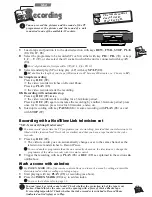
Video recorder settings
J
J
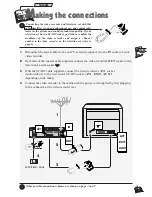
When connecting the video recorder to a television set with integrated satellite receiver, you
must select the socket AV1 during set-up.


