All installations and services must be performed by qualified service personnel.
46
B. INITIAL START UP
This furnace does not have a pilot. It is equipped with a hot surface igniter, which automatically lights the
burner. Do not attempt to light the burner by hand. Check the following items before the initial start-up.
1.
Check all wiring for loose connections and proper hook up.
2.
Leak test gas piping connections.
3.
Check all tubing to the pressure switch and drain, making sure they are connected firmly at all
connection points.
4.
Check flue pipe, combustion air inlet and all PVC connections for tightness and to ensure there is no
blockage.
5.
Make sure air filter is in place.
6.
Make sure the outside vent and air intakes are installed according to instructions and are free from
blockage.
7.
Make sure that the drain trap is properly connected to the furnace and to the buildings drain system.
8.
Make sure that the combustion door is properly installed.
9.
Prime the condensate trap by adding water through a drain hose to expedite the setup & startup
process.
: Turn off power to furnace before it is placed into service. The gas piping system must
have been leak tested by a qualified heating contractor. (See Section III, J, of these instructions on
the installation of gas piping).
: It may be necessary to purge the air out of the gas line for initial start-up of the furnace
after installation. This should be done by a qualified heating contractor. If excessive gas escapes
when purging the gas supply at the union, allow the area to ventilate for at least 15 minutes before
attempting to start the furnace. LP gas is especially dangerous because the specific gravity of LP gas
allows it to accumulate at floor level at a dangerous concentration. For remainder of operating
instructions, reference Users Information Manual.
: Heat exchanger oil will burn off on initial firing creating an unpleasant odor. To
prevent this odor from occurring more than once, it is suggested that:
1. A window(s) be opened.
2. The thermostat be set at highest setting.
3. The furnace remain running at conditions 1&2 for 30 minutes or until odor has dissipated.
C. ADJUSTMENT OF BTU INPUT RATE
The Orifice for this furnace was sized: 1) for natural gas having a heating value of 1025 BTU per cubic
foot and a specific gravity of 0.65, or 2) for liquefied propane gas with a heating value of 2,500 BTU per
cubic foot and a specific gravity of 1.55. The information plate inside the furnace vestibule will specify
which gas your furnace is setup to use. If the furnace is installed at an altitude that is more than 2,000 feet
above sea level, it is mandatory that the input to the burner be reduced 4.0% for every 1,000 feet that it is
above sea level. If the furnace is installed at an elevation of 5,000 feet, its input must be reduced 20.0%.
Example: a furnace rated at 100,000 BTU at sea level must be reduced to a firing rate of 80,000 (100,000
x 0.80 = 80,000) at an elevation of 5,000 feet. If the furnace is installed at an elevation of 2,000 feet or
Содержание CLQS1-050T36N
Страница 2: ......
Страница 4: ......
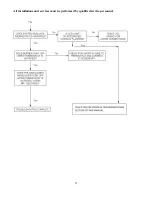
Страница 47: ...All installations and services must be performed by qualified service personnel 45...
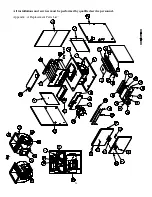
Страница 55: ...All installations and services must be performed by qualified service personnel 53...
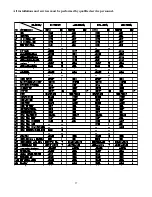
Страница 56: ...All installations and services must be performed by qualified service personnel 54...
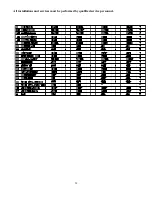
Страница 57: ...All installations and services must be performed by qualified service personnel 55...
Страница 59: ...All installations and services must be performed by qualified service personnel 57...
Страница 60: ...All installations and services must be performed by qualified service personnel 58...

