background image

Owner's Manual

D3676/D3677/D3678/D8576
What This Owner's Manual Can Do For You

  -  It explains exactly how The Rite Door

® 


operates.

  -  It explains periodic maintenance requirements necessary to assure reliable operation.
  -  It explains simple things to do and check before you call for service, so you may save the cost of an 
     unnecessary service call.
  -  It provides a complete listing of service replaceable parts.
  -  It provides your Adams Rite Limited Warranty and what steps to take for service.

Owners Record

The model number is located on the hinge stile mounting base. Refer to this number and the additional informa-
tion below when you call upon your local Rite Door

®

 dealer regarding this product.

Model No: D3676/D8576/D3677/D3678
Finish:
Door Size:
Hardware Supplier:
Date Installed:

Exit Device Operation

The Rite Door

®

 Top Rod Concealed Vertical Rod (CVR) devices provides for life safety, security & fire containment 

by use of a rotating top latch and post type header strike. When the push bar is depressed, the top rod retracts to 
release the door. Upon closing, the top actuator deadlatches around the top strike post securing the door.

Fire Door Labels, Strikes and Frame Screws

Fire Door Labels and other misc. hardware will be located in a removable channel located at the top of the door. 
This channel is secured by two Phillips head screws that can be easily removed. Please contact the factory im-
mediately if this hardware can not be located.


Содержание D3676

Страница 1: ...when you call upon your local Rite Door dealer regarding this product Model No D3676 D8576 D3677 D3678 Finish Door Size Hardware Supplier Date Installed Exit Device Operation The Rite Door Top Rod Co...

Страница 2: ...ty samples during production Atmospheric and other localized conditions may vary greatly but extremely dirty salty or abrasive situations could require service attention such as cleaning and lubricati...

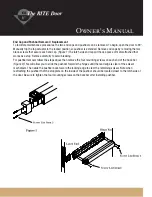
Страница 3: ...works as a stop Remove carefully to avoid breaking For pushbar removal follow the steps above then remove the four mounting screws on each end of the back bar Figure 2 This will allow you to slide th...

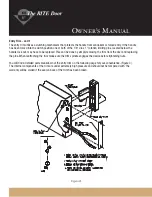
Страница 4: ...hat the square bolt is not too high as this will cause the actuator to rock in the channel The pins in the square bolt Figure B must be turned in the proper direction to fit through the slot in actuat...

Страница 5: ...Remove the two flat Phillips head screws on the bottom escutcheon plate using a Phillips head screwdriver Remove bottom escutcheon plate Step 2 On the bottom of the trim loosen the two set screws TWO...

Страница 6: ...ve to be replaced This can be done by simply removing the trim from the door and replacing the pins When reattaching the trim make sure the trim spindle engages the device before tightening nuts You w...

Страница 7: ...Owner s Manual...

Страница 8: ...Screw 2 req d S277 10R06N 603 10 32 x 1 7 16 Flat Head 4 req d S258 10R23 119 10 32 x 1 2 Flat Head 2 req d S266 10R06 603 10 32 x 1 4 Sems Screw 2 req d S277 10R04N 603 1 2 3 4 5 Screw List Latch End...

Страница 9: ...tage is present Check fuse F2 in the black fuse holder Ensure that the Primary Voltage Selection Switch SW2 is properly set Output Power LED On Power Supply Board Is Not Lit Check fuse F1 If fuse F1 i...

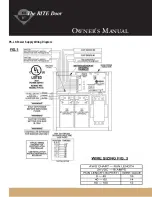
Страница 10: ...Owner s Manual PS LR Power Supply Wiring Diagram...

Отзывы: