5032UENG.DOC New 11-language guidebook Robin Hunt-Smith Revised: 07/24/98 3:51 PM Printed: 06/23/00 12:32 PM Page 1 of 6
ENG (English)
Installing the Adapter
1. Set
POWER=OFF
.
2. Connect the adapter cord to the socket on the back of
the calculator.
3. Plug the adapter into an electrical outlet.
4. Set
POWER=ON
,
PRT
, or
IC
.
Warning: Using any AC adapter other than the appropriate
TI adapter may damage the calculator and void the
warranty.
Installing or Replacing Batteries
1. Set
POWER=OFF
.
2. If the AC adapter is connected, unplug it.
3. Turn the calculator over and remove the battery
compartment cover.
4. Remove the old batteries, if necessary.
5. Position new batteries as shown in the diagram inside
the battery compartment. Pay close attention to the
polarity (+ and – symbols).
6. Replace the battery compartment cover.
7. Set
POWER=ON
,
PRT
, or
IC
.
Texas Instruments recommends you use alkaline batteries
for longer battery life.
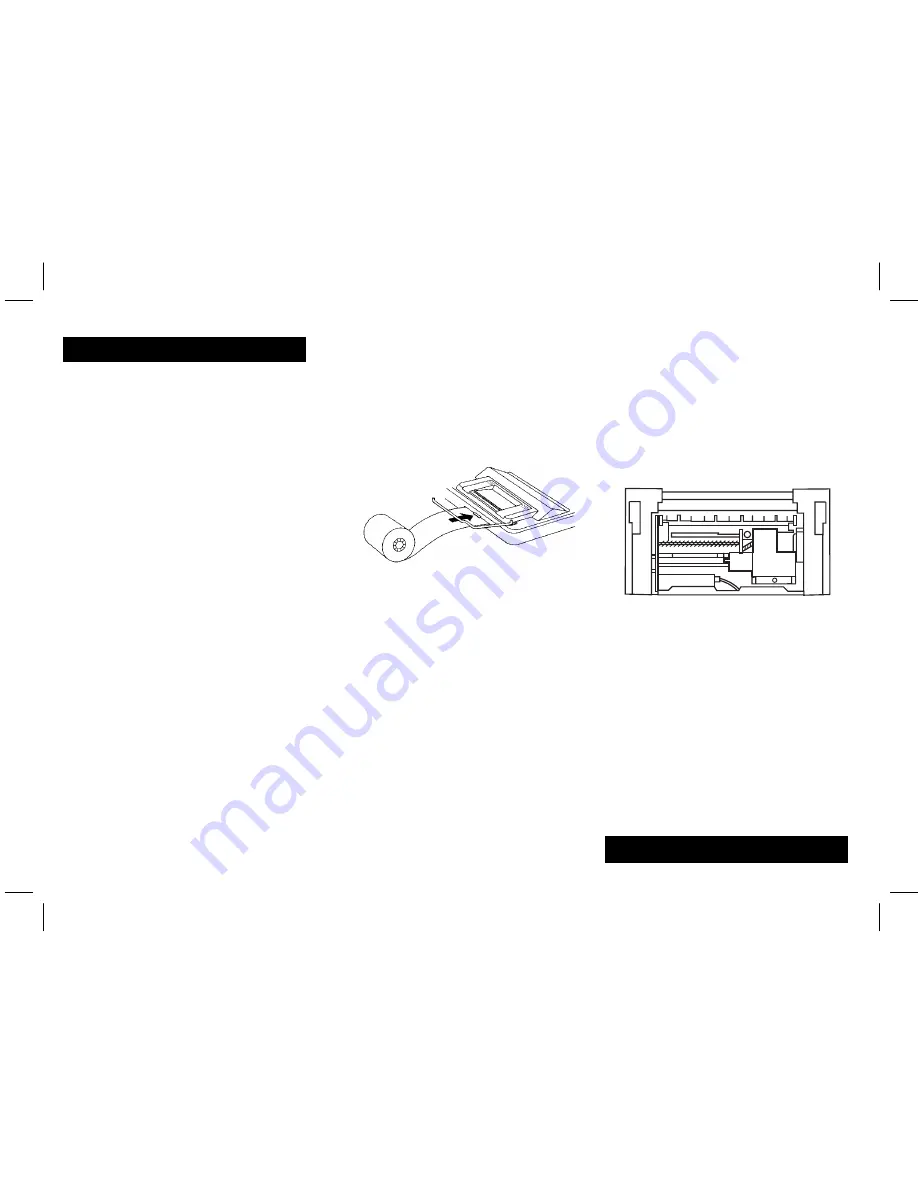
Installing the Paper Roll
To avoid paper jams, use quality bond paper. A 2¼-inch
roll of quality bond paper is included with your calculator.
1. Set
POWER=ON
.
2. Cut the end of the paper squarely.
3. Holding the paper so it unrolls from the bottom, insert
the end of the paper firmly into the slot on the back of
the calculator.
4. While feeding the paper into the slot, press
&
until
the paper is in position.
5. Lift the metal paper holder so it extends behind the
printer compartment.
6. Place the paper roll on the paper holder.
7. To print, set
POWER=PRT
or
IC
.
Note: To prevent damage to the printer (which may void
the warranty), set
POWER=ON
rather than
PRT
or
IC
when
operating the calculator without paper.
Replacing the Ink Roller
The printer uses a 2-color ink roller (IR-40T). Negative
entries and results are printed in red. All other numbers
are printed in black. If the printing becomes faint, you may
need to replace the ink roller.
1. Set
POWER=OFF
.
2. Remove the clear plastic printer-compartment cover.
(Press down and push back to slide the cover off.)
3. Remove the old ink roller by lifting the tab (labelled
PULL UP
) on the left side of the roller.
PULL
UP
4. Position the new ink roller and gently press down until
it snaps into place on both sides.
5. Replace the cover.
6. Set
POWER=PRT
or
IC
.
Warning: Never refill or moisten the ink roller. This may
damage the printing mechanism and void the warranty.
ENG (English) 1


