After Inserting its tight by screwdriver
connect the Phase and Netural wire as per given picture.
A
gain fix the front and back plate of calsys 1500L
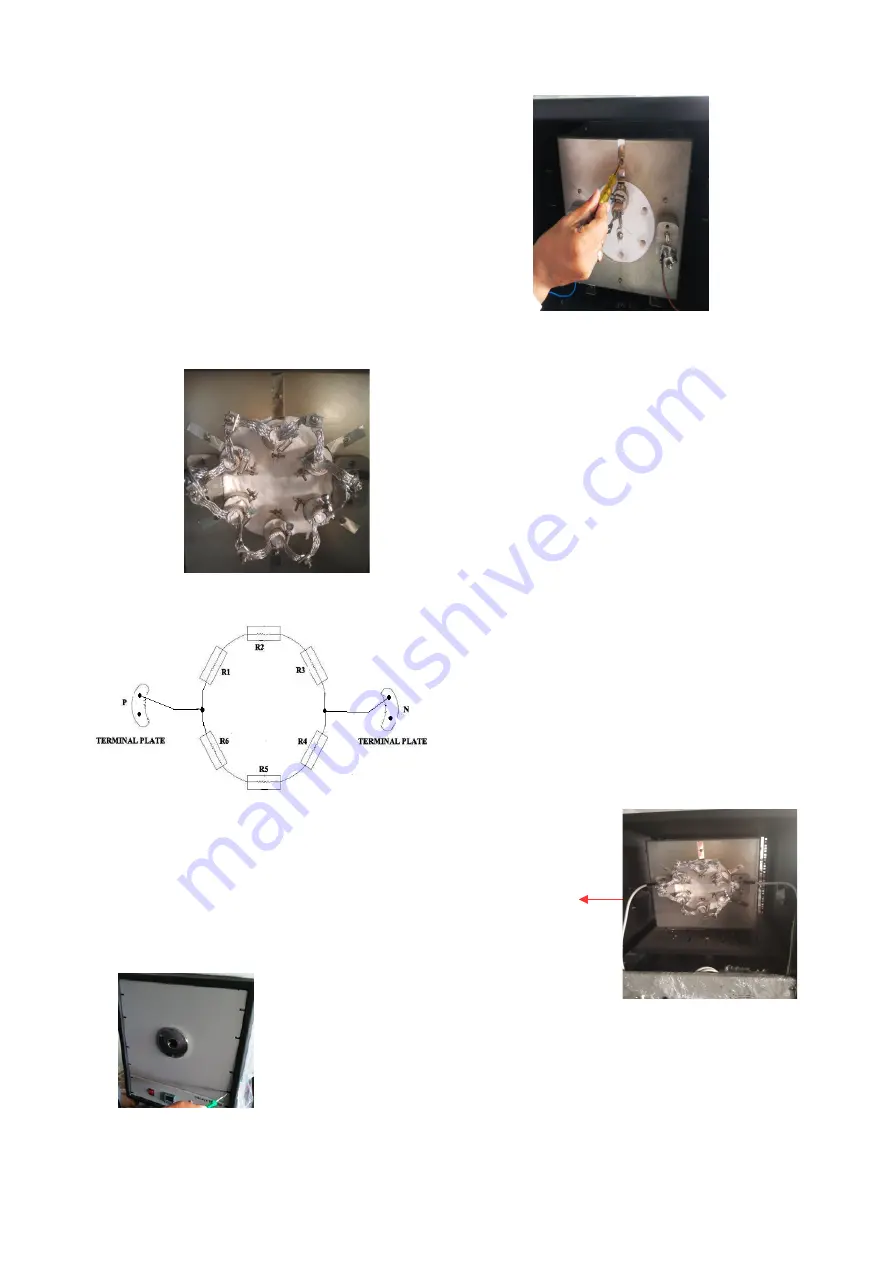
Fix the 6 heater into the chamber and
Connect all the aluminum strip in series.
Heating Element connection.


