background image

5

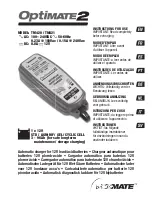
AutomAtic mAiNteNANce chArger for 12V leAd-Acid bAtteries 

from 3Ah to 96Ah, As fouNd iN: 


DO NOT USE FOR NiCd, NiMH, Li-Ion OR NON-RECHARGEABLE BATTERIES. 

charge rate: 0,8 Ah / hour, will recharge a 38Ah battery in 48 hours. 

input: 100-240V

 maximum 0,23A. the maximum output current is 0,8A. 

IMPORTANT: READ THE FOLLOWING INSTRUCTIONS BEFORE USING THE CHARGER

this appliance is not intended for use by persons (including children) with reduced physical, 

sensory or mental capabilities, or lack of experience and knowledge, unless they have been given 

supervision or instruction concerning use of the appliance by a person responsible for their 

safety. children should be supervised to ensure that they do not play with the appliance.


sAfetY WArNiNg ANd Notes:

 batteries emit eXPlosiVe gAses - prevent flame or sparks near batteries. 

Disconnect AC power supply before making or breaking DC/battery connections. Battery acid is highly corrosive. Wear 

protective clothing and eyewear and avoid contact. In case of accidental contact, wash immediately with soap and water. 

Check that the battery posts are not loose; if so, have the battery professionally assessed. If the battery posts are corroded, 

clean with a copper wire brush; if greasy or dirty clean with a rag damped in detergent. Use the charger only if the input and 

output leads and connectors are in good, undamaged condition. If the input cable is damaged, it is essential to have it 

replaced without delay by the manufacturer, his authorised service agent or a qualified workshop, to avoid danger. Protect 

your charger from acid and acid fumes and from damp and humid conditions both during use and in storage. Damage 

resulting from corrosion, oxidation or internal electrical short-circuiting is not covered by warranty. Distance the charger 

from the battery during charging to avoid contamination by or exposure to acid or acidic vapours. If using it in the horizontal 

orientation, place the charger on a hard, flat surface, but NOT on plastic, textile or leather. Use the fixing holes provided in 

the enclosure base to attach the charger to any convenient, sound vertical surface. 

eXPosure to liQuids: 

This charger is designed to withstand exposure to liquids accidentally spilled or splashed onto 

the casing from above, or to light rainfall.  Prolonged exposure to falling rain is inadvisable and longer service life will be 

obtained by minimizing such exposure. Failure of the charger due to oxidation resulting from the eventual penetration of 

liquid into the electronic components, connectors or plugs, is not covered by warranty.

bAtterY coNNectioNs:

 2 interchangeable connection sets are available, supplied with the charger is a set of battery 

clips for charging the battery off-vehicle, the other connection set comes with metal eyelet lugs for permanent connection to 

the battery posts, and re-sealable weatherproof cap on the connector that connects to the charger output cable. This 

connection set allows easy and sure connection of the charger to maintain the battery on-vehicle. The resealable 

weatherproof cap is designed to protect the connector from dirt and damp whenever the charger is not attached. Consult a 

professional service agent for assistance in attaching the metal eyelets to the battery posts. Secure the connector with 

weatherproof cap so that it cannot foul any moving part of the vehicle or the cable can be pinched or damaged by sharp 

edges. The in-line fuse in the eyelets connection set protects the battery against such accidental shorting across positive 

and negative conductors. Replace any burnt fuse only with a similar new fuse of 15A rating.

coNNectiNg the chArger to the bAtterY  

1. 

Disconnect AC power supply before making or breaking DC / battery connections. 

2.

  If charging a battery in the vehicle with the battery clips, before making connections, first check that the battery clips 

can be safely and securely positioned clear from surrounding wiring, metal tubing or the chassis. Make connections in 

the following order: First connect to the battery terminal not connected to the chassis (normally positive), then connect 

the other battery clip (normally negative) to the chassis well away from the battery and fuel line.  Always disconnect in 

reverse sequence. 

3. 

When charging a battery out of the vehicle with the battery clips, place it in a well ventilated area. Connect the charger 

to the battery: RED clamp to POSITIVE (POS, P or +) terminal and BLACK clamp to NEGATIVE (NEG, N or –) terminal. 

Make sure the connections are firm and secure. Good contact is important.

4.  if the battery is deeply discharged (and possibly sulphated), remove from the vehicle and inspect the battery 

before connecting the charger for a recovery attempt. 

 Visually check the battery for mechanical defects such as a 

bulging or cracked casing, or signs of electrolyte leakage. If the battery has filler caps and the plates within the cells 

sA

fet

Y

Содержание optimate2 TM420

Страница 1: ...IGT läs följande fullständiga instruktioner för användningen innan du använder laddaren Automatic charger for 12V lead acid batteries chargeur automatique pour batteries 12V plomb acide cargador automático para baterías 12V plomo ácido carregador automático para baterias de 12V chumbo ácido Automatische ladegerät für 12V blei säure batterien Automatische lader voor 12V loodzuur accu s caricabatter...

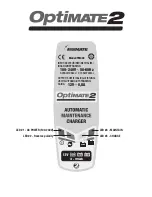
Страница 2: ...RED NETZ ALIM INGANG INSPÄNNING 100 240V 50 60Hz 0 23A 100Vac 0 15A 240Vac OUTPUT SORTIE SALIDA LEISTUNG USCITA UITGANG UTSPÄNNING SAIDA 12V 0 8A 3 96Ah LED 4 MAINTAIN LED 3 CHARGE LED 1 AC POWER 100 240V LED 2 Reverse polarity ...

Страница 3: ...electric shock unplug the charger from outlet before attempting any maintenance or cleaning Turning off controls will not reduce this risk Clean only with slightly moist not wet cloth Do not use solvents 10 WARNING RISK OF EXPLOSIVE GASES a WORKING IN VICINITY OF A LEAD ACID BATTERY IS DANGEROUS B ATTERIES GENERATE EXPLOSIVE GASES DURING NORMAL BATTERY OPERATION FOR THIS REASON IT IS OF UTMOST IMP...

Страница 4: ...ry clips then reconnect correctly according to the instructions below 15 FOLLOW THESE STEPS WHEN BATTERY IS INSTALLED IN VEHICLE A SPARK NEAR A BATTERY MAY CAUSE BATTERY EXPLOSION TO REDUCE RISK OF A SPARK NEAR BATTERY a Position AC and DC cords so as to reduce risk of damage by hood door or moving engine part b Stay clear of fan blades belts pulleys and other parts that can cause injury to person...

Страница 5: ...ervice life will be obtained by minimizing such exposure Failure of the charger due to oxidation resulting from the eventual penetration of liquid into the electronic components connectors or plugs is not covered by warranty BATTERY CONNECTIONS 2 interchangeable connection sets are available supplied with the charger is a set of battery clips for charging the battery off vehicle the other connecti...

Страница 6: ...hrough the course of the program Model TM420 INPUT SECTEUR RED NETZ ALIM INGANG INSPÄNNING 100 240V 50 60Hz 0 23A 100Vac 0 15A 240Vac OUTPUT SORTIE SALIDA LEISTUNG USCITA UITGANG UTSPÄNNING SAIDA 12V 0 8A 3 96Ah LED 4 MAINTAIN LED 3 CHARGE LED 1 AC POWER 100 240V LED 2 Reverse polarity 1 LED 1 Power on Confirms AC power supply to the charger Light intensity is low during POWER SAVING MODE 2 LED 2 ...

Страница 7: ...ay take significantly longer NOTE The total charging time of the steps 3 and 4 is are not limited LIMITED WARRANTY TecMate International SA Sint Truidensesteenweg 252 B 3300 Tienen Belgium makes this limited warranty to the original purchaser at retail of this product This limited warranty is not transferable TecMate International warrants this battery charger for three years from date of purchase...

Страница 8: ... LES BOUCHONS DES CELLULES LORS DU CHARGEMENT DE LA BATTERIE ET LES TAUX DE CHARGEMENT RECOMMANDÉS i SI LE CHARGEUR COMPORTE UN SÉLECTEUR DE TENSION DE SORTIE CONSULTER LE MANUEL DE L USAGER DE LA VOITURE POUR DÉTERMINER LA TENSION DE LA BATTERIE ET POUR S ASSURER QUE LA TENSION DE SORTIE EST APPROPRIÉE SI LE CHARGEUR N EST PAS MUNI D UN SÉLECTEUR NE PAS UTILISER LE CHARGEUR À MOINS QUE LA TENSION...

Страница 9: ...ÉE AU CHÂSSIS ET EN DERNIER LIEU CELLE RACCORDÉE À LA BATTERIE n SUIVRE LES ÉTAPES SUIVANTES LORSQUE LA BATTERIE EST À L EXTÉRIEUR DU VÉHICULE UNE ÉTINCELLE PRÈS DE LA BATTERIE POURRAIT PROVOQUER L EXPLOSION DE CETTE DERNIÈRE POUR RÉDUIRE LE RISQUE D ÉTINCELLE À PROXIMITÉ DE LA BATTERIE i VÉRIFIER LA POLARITÉ DES BORNES DE LA BATTERIE LE DIAMÈTRE DE LA BORNE POSITIVE POS P EST GÉNÉRALEMENT SUPÉRIE...

Страница 10: ...ement éloigner le chargeur de la batterie pour éviter la contamination par l acide ou les vapeurs acides ou l exposition à ceux ci En cas d utilisation horizontale placer le chargeur sur une surface dure et plane PAS en plastique tissu ou cuir Utiliser les trous de fixation de la base pour fixer le chargeur sur toute surface verticale appropriée et solide EXPOSITION AUX LIQUIDES Ce chargeur est co...

Страница 11: ...ativement petites comme celles des motos tracteurs à gazon jet ski motoneiges et similaires Les cellules d une batterie restée en décharge profonde durant une longue période peuvent être endommagées à titre permanent Ces batteries peuvent chauffer excessivement durant la charge à courant élevé Vérifier la température de batterie durant la première heure puis chaque heure suivante Vérifier la prése...

Страница 12: ...de rétention se termine l entretien de charge reprend La batterie peut nécessiter plus de 200mA pour retourner à la limite de tension minimale de 13 6 V CECI EST NORMAL Maintenance d une batterie durant des périodes prolongées L OptiMate maintiendra une batterie dont l état est bon en toute sécurité durant plusieurs mois Vérifier au moins une fois par quinzaine la sécurité des connexions entre cha...

Страница 13: ...a y plana PERO NUNCA sobre plástico tela o piel Utilice los orificios de fijación de la base de la carcasa para fijar el cargador en una superficie cómoda y totalmente horizontal EXPOSICIÓN A LÍQUIDOS Este cargador fue desarrollado para resistir a líquidos que hubieran sido derramados de forma accidental o a intemperies ligeras No obstante no se recomiendan las exposiciones prolongadas que podrían...

Страница 14: ...iente al tacto Controle la temperatura de la batería durante la primera hora a partir de entonces contrólela cada hora Permanezca atento a señales inusuales como pueden ser el burbujeo o la fuga de electrolito una mayor actividad en una pila en comparación con las otras o sonidos silbantes Si en cualquier momento la batería está demasiado caliente o nota cualquier señal que no sea normal DESCONECT...

Страница 15: ...mite de tensión mínima de 13 6 V ESTE PROCESO ES NORMAL Mantenimiento de la batería en períodos prolongados de tiempo El OptiMate mantendrá una batería cuyo estado es bueno en total seguridad durante varios meses Al menos una vez cada dos semanas compruebe que las conexiones entre el cargador y la batería está correctas y en el caso de baterías con un tapón en cada celda desconecte la batería del ...

Страница 16: ...perfície dura e plana mas NÃO em cima de plástico têxtil ou cabedal Utilize os orifícios de fixação existentes na base do invólucro para fixar o carregador a qualquer superfície vertical conveniente e em boas condições EXPOSIÇÃO A LÍQUIDOS Este carregador foi concebido para resistir à exposição a líquidos que possam cair acidentalmente sobre a caixa ou aos chuviscos Uma exposição prolongada aos lí...

Страница 17: ...entes em uma ou mais células Tais baterias podem aquecer excessivamente durante cargas de corrente elevada Pare de carregar qualquer bateria imediatamente se a bateria ficar demasiado quente ao toque Monitorize a temperatura da bateria durante a primeira hora e depois de hora a hora Verifique se existem sinais invulgares como formação de bolhas ou fuga de electrólito aumento de actividade numa cél...

Страница 18: ...este de retenção da carga termina e o carregamento da manutenção é retomado e A bateria pôde precisar mais de 200mA para regressar ao limite de tensão minima de 13 6V ISTO É NORMAL Manter uma bateria por períodos alargados O OptiMate manterá uma bateria cujo estado seja bom em qualquer segurança durante vários meses Pelo menos uma vez em cada duas semanas certifique se de que as ligações entre o c...

Страница 19: ... horizontaler Ausrichtung muss das Ladegerät auf eine feste ebene Fläche gestellt werden jedoch NICHT auf Kunststoff Textilien oder Leder Bringen Sie mittels der Befestigungsöffnungen im Gehäuseboden das Ladegerät an einer geeigneten stabilen senkrechten Fläche an AUSGESETZTSEIN ZU DEN FLÜSSIGKEITEN Dieses Ladegerät ist konstruiert um Ausgesetztsein zu den Flüssigkeiten die versehentlich auf das G...

Страница 20: ...igt sein Solche Batterien können sich beim Laden übermäßig erwärmen Batterien die so heiß werden dass eine Berührung unangenehm ist dürfen nicht weiter geladen werden Überwachen Sie die Batterietemperatur während der ersten Stunde danach stündlich Achten Sie auf ungewöhnliche Anzeichen etwa Blasenbildung oder Austreten von Elektrolyt erhöhte Aktivität in einer Zelle verglichen mit anderen oder Zis...

Страница 21: ...tigt eventuell mehr als 200 mA um wieder auf die sichere Spannung von 13 6 V zu kommen DAS IST VÖLLIG NORMAL Wartung einer Batterie über einen längeren Zeitraum Das OptiMate wartet monatelang sicher eine Batterie deren grundlegender Zustand gut ist Überprüfen Sie mindestens einmal alle zwei Wochen ob die Verbindungen zwischen Ladegerät und Batterie sicher sind klemmen Sie bei Batterien mit Verschl...

Страница 22: ... en effen oppervlak plaatsen maar NIET op plastic textiel of leer Gebruik de bevestigingsgaten in de behuizing om de lader te bevestigen op een geschikt en stevig verticaal oppervlak BLOOTSTELLING AAN VLOEISTOFFEN De lader is ontworpen om oppervlakkige blootstelling aan van bovenaf per ongeluk gemorste vloeistoffen of lichte regenval te kunnen weerstaan Het is niet aangeraden om de lader langere t...

Страница 23: ...ns het laden Stop het laden onmiddellijk indien de accu onaangenaam heet aanvoelt Controleer de temperatuur van de accu tijdens het eerste uur en daarna om het uur Kijk uit voor ongewone tekenen zoals borrelend of lekkend elektrolyt een verhoogde activiteit in één cel in vergelijking met andere of een sissend geluid Indien de accu onaangenaam warm aanvoelt of als u ongewone zaken ziet ONTKOPPEL DE...

Страница 24: ...ng van 13 6 DIT IS NORMAAL Een accu voor lange periodes onderhouden De OptiMate zal een niet defekte accu maandenlang veilig onderhouden Minstens om de twee weken moet u controleren of de verbindingen tussen de lader en de accu veilig zijn In geval van accu s met vuldoppen op elke cel moet u de accu loskoppelen van de lader het elektrolytenpeil controleren en indien nodig de cellen bijvullen met g...

Страница 25: ...e ESPOSIZIONE AI LIQUIDI Se sistemato in posizione orizzontale su una superficie piatta questo caricatore è progettato in modo da prevenire danni al circuito elettrico in caso di esposizione a liquidi versati o spruzzati accidentalmente dall alto I guasti del caricatore in seguito a ossidazione del pannello di controllo elettronico dovuta a un eventuale penetrazione di liquido nei componenti elett...

Страница 26: ... troppo calda al tatto o se si notano segnali insoliti SCOLLEGARE IMMEDIATAMENTE IL CARICATORE MODALITÀ ECOLOGICA DI RISPARMIO ENERGETICO QUANDO IL CARICABATTERIE È COLLEGATO ALL ALIMENTAZIONE CA Il convertitore di alimentazione viene spento spostandolo sulla modalità ECO quando il caricabatterie non è collegato ad alcuna batteria e consente un assorbimento di alimentazione molto limitato inferior...

Страница 27: ...imento di una batteria per periodi prolungati L OptiMate manterrà una batteria di cui lo stato di base è buono senza rischio durante parecchi mesi Verificare almeno ogni due settimane che i collegamenti fra il caricatore e la batteria siano sicuri e nel caso di batterie con tappi di riempimento per ogni cella scollegare la batteria dal caricatore controllare il livello dell elettrolite e se necess...

Страница 28: ...n yta eller väggmonteras är den konstruerad för att förhindra skador på elektroniska styrkretsar på grund av att vätska av misstag spills eller stänks på höljet uppifrån Fel på laddaren på grund av oxidation på det elektroniska styrkortet till följd av att vätska eventuellt trängt in i de elektroniska komponenterna täcks inte av garantin Exponera aldrig kontaktdon eller kontakter för regn eller sn...

Страница 29: ...ÄR ANSLUTEN TILL VÄXELSTRÖMSFÖRSÖRJNING Strömomvandlaren stängs av koppas över till ECO läge när laddaren inte är ansluten till ett batteri vilket ger en förbrukning på mindre än 0 5W vilket motsvarar en effektförbrukning på 0 012 kWh per dag När ett batteri ansluts till laddaren beror effektförbrukningen på erforderlig effekt för batteriet och det anslutna fordonet eller de elektroniska kretsarna...

Страница 30: ...ier med påfyllnadslock till varje cell koppla loss batteriet från laddaren kontrollera elektrolytnivån och fyll vid behov på cellerna med destillerat vatten INTE syra och anslut det åter Följ alltid ovanstående säkerhetsföreskrifter vid hantering av batterier och i deras närhet Laddningstid Den tid som krävs för OptiMate 2 för att slutföra en laddning av ett urladdat med ett inte väldigt urladdat ...

Страница 31: ...OTA DA MONTAGEM WANDMONTIERUNG MUURBEVESTIGING NOTA DEL MONTAGGIO VÄGGMONTERING 4x 4 5mm 1 6 L 20mm 4 5 2m 6ft max 2m 6ft SAE 75 1 8m 6ft 4 5m 14ft max SAE 75 TM421 with SAE connectors for North America EXTEND by a further 15ft with SAE 73 STD or WP 6ft max ...

Страница 32: ...mme complète d accessoires sur optimate1 com Ontdek ons volledig gamma toebehoren op optimate1 com Descubra nuestra gama completa de accesorios en optimate1 com Descubra toda a nossa gama de acessórios em optimate1 com Scoprite la nostra gamma completa di accessori su optimate1 com Se vårt kompletta sortiment av tillbehör på optimate1 com C H A RGE C O N NECTO R C O N NECTO R P O W ER P O W ER ...

Отзывы: