11
6 SETUP
AND
OPERATION
NOTE: To ensure proper voltage setting, units shipped from the
factory will not have the fuse installed. Refer to Section 6.1 to
install proper fuse and select proper voltage.
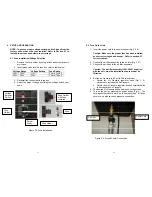
6.1 Fuse Installation/Voltage Selection
1. Remove the fuse holder by using a flat head screw driver to
pry it open.
2. Insert proper fuse into the fuse box, refer to table below
3. Re-install the fuse holder into the unit
4. Select the proper voltage by sliding the voltage switch up or
down.
Voltage Range
Voltage Setting
Fuse Rating
100V – 120V
115V
2 Amp, Type F
220V – 240V
230V
1 Amp, Type F
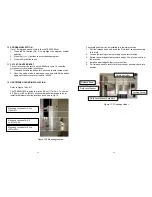
Figure 7.0 Fuse Installation
Voltage
Selector
Switch
Fuse
Holder
Screw
Driver
Fuse Holder
with Fuse
installed
Fuse
Fuse Holder
12
6.2 Turn On the Unit
1. Insert the power cord to the power socket (Fig. 3, 20).
Caution: Make sure the proper fuse has been installed
and correct voltage has been set. Refer to section 6.1
for instructions.
2. Connect the air filter assembly to the air inlet (Fig. 3, 21).
3. Connect the air hose to the air filter assembly
Caution: The air filter assembly (7091-9080), supplied
with the unit, must be installed to ensure proper air
filtration.
4. Set the air Pressure to 80 psi (5.5 bars) minimum
•
Rotate the Air Pressure regulator knob (Fig. 1, 9)
clockwise to increase the Air Pressure.
•
Rotate the Air Pressure regulator knob counterclockwise
to decrease the Air Pressure.
5. The desired Air Pressure will be displayed on the screen.
6. Turn on the unit by pressing the power button (Fig. 5). The
cartridge holder should move up to home position. If it does
not move up, please check pressure connection.
Power Cord
Air Filter
Figure 8.0 Air and Power Connection

