- EN -
- 15 -
1.
2.
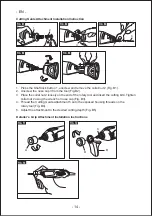
Shield Rotary Tool Attachment Installation Instructions (Not included)
1.
2.
3.
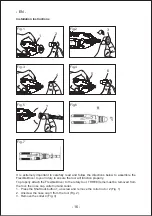
Flexible shaft installation
FIG. D1
A
B
C
C
FIG. D2
FIG. D3
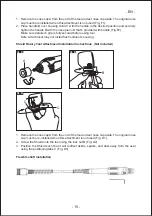
Remove the nose cap A from the end of the tool and set nose cap aside. The original nose
cap must be reinstalled when this attachment is not used (Fig. F1).
Place handle B over housing collar C with the handle in the desired position and securely
tighten the handle B with the nose piece D that’s provided with handle (Fig.F2).
Make sure detailer’s grip is fully secured before using tool.
Note: Attachment may not install flush ontotool's housing.
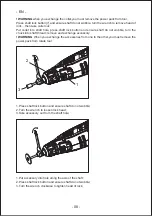
Remove the nose cap A from the end of the tool and set nose cap aside. The original nose
cap must be re-installed when this attachment is not used (Fig. D1).
Screw the Shield onto the tool using the lock nut B (Fig. D2)
Position the Shield such that it will redirect debris, sparks, and dust away from the user
using the positioning tabs C (Fig. D3).

