


PRODUCER 3
06/18/97
Lighting Control Console
page
TEATRONICS LIGHTING CONTROLS,
TEATRONICS LIGHTING CONTROLS,
INC.
INC.
12
OPERATION
(continued)
RECORD MODE
(continued)
Recording Submaster Assignments
The assignment of channels to a submaster on the Producer 3 is done either with a "load from
manual" procedure, or via the numeric keypad. The load-from-manual technique is the fastest
and most common way to load a submaster assignment. It will be discussed first.
The term "load-from-manual" comes from memory console terminology. It refers to loading a
look into memory created by a manual console. The assignment of channel levels to a submaster
on the Producer 3 is done much the same way. First, the look that is desired for a certain
submaster is created on stage using the channel sliders and any previously recorded submasters.
No matter how the look is achieved, whatever is on stage when "enter" is pressed, the submaster
will capture. Once the look is present on stage, switch the console to the record mode (if it isn't
already in record mode), and press the desired submaster key to initiate the recording process.
Next, the submaster number to be recorded is entered. The submaster assignment is compleated
by pressing the "enter" key. The look may be changed (or the whole process aborted using the
"clear" key) at any time prior to pressing "enter", without affecting previous submaster
assignments. Recording a submaster assignment deletes the previous assignments for that
submaster. The following examples may help clarify the process.
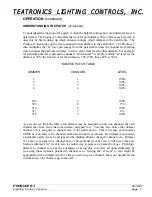
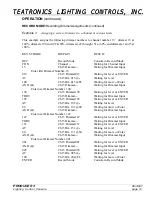
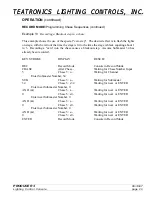
Example 6
Assigning channels to a submaster.
This example assigns channels 1 and 7 at full and channels 4 through 6 at 50% to submaster 30.
Put X scene on stage
Take the console out of BLACKOUT.
Move the GRAND MASTER slider to full.
Move the X-Y crossfader to put X scene on stage (sliders to their fully up position).
If any timers were not at zero, move the timer control to zero
(or wait for the timed fade to complete).
Make sure both scenes are in channel mode
(green light above the button labeled SUBMASTER is off).
Set the desired look on stage
Move the X scene sliders for channels 1 and 7 to full.
Move the X scene sliders for channels 4 through 6 to 50%
(half way up or to the line marked "5").
Move all other X scene sliders to zero.
Verify that the lights on stage are as desired.


